
Blooming
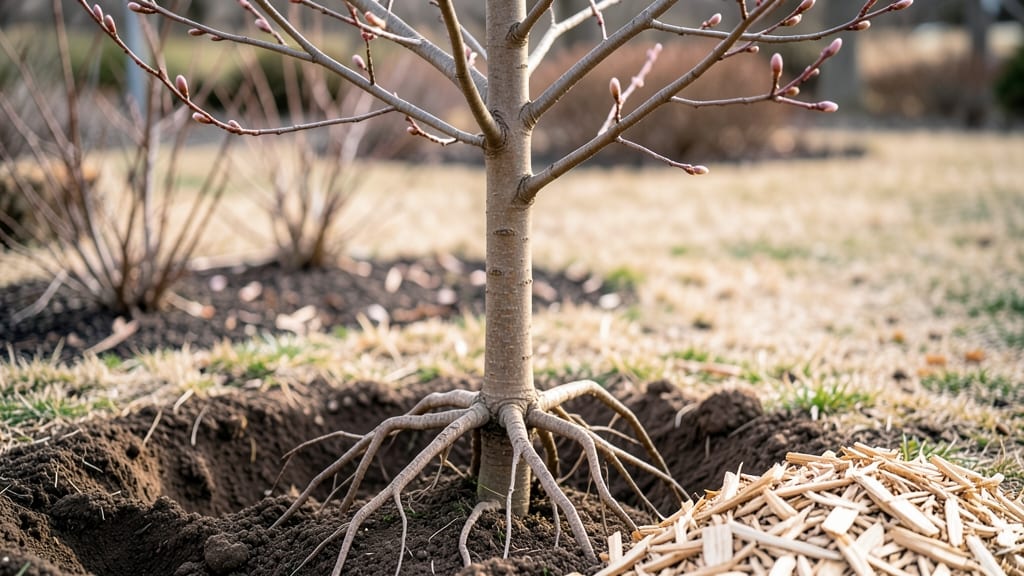
Planting a bare root cherry blossom tree in early spring gives you a head start on that iconic Pacific Northwest pastel explosion—those delicate pink clouds of blooms that turn every street into a postcard. 🌸 The key is handling those naked roots right: soak them overnight, then plant while the soil is still cool but workable, before the buds even think about swelling.
Here’s the thing—most people rush the planting, burying the roots too deep or packing the soil too tightly. Instead, spread those roots gently in a shallow trench, backfill with loose, well-draining soil, and water deeply to eliminate air pockets.
A 5-gallon watering can makes this easier than you’d think, and it’s worth the effort to keep the soil moist for the first two weeks while roots establish.
What you’ll end up with is a tree that thrives through our damp winters and blooms reliably year after year, its branches heavy with petals that even frost can’t stop.
The secret? Prune lightly in late winter to encourage strong growth, and mulch heavily to protect roots from temperature swings. No more guessing—just consistent, showstopping blooms.
This method works just as well in containers if your yard is small, and the same principles apply whether you’re planting a single specimen or a whole avenue. The only real mistake is waiting too long to get those roots in the ground—so don’t let spring slip away!
📚 In This Guide
- What you need
- Instructions
- Tips and common mistakes
- Wrapping up and next steps
What you need
- ● Bare root cherry blossom tree (1-3 plants, depending on desired size—check root spread for spacing). Pro tip: 🌡️ Choose a frost-resistant variety like Prunus × yedoensis or Prunus serrulata for PNW climates!
- ● Shovel or digging spade (wide enough for root spread, ~12-18" deep)
- ● Garden fork or trowel (for loosening soil)
- ● Compost or well-aged manure (5-10 lbs, mixed into planting hole)
- ● Native soil or potting mix (avoid heavy clay; amend with perlite if needed)
- ● Mulch (wood chips or straw) (2-3 inches, to retain moisture)
- ● Watering can or hose with gentle nozzle (for post-planting hydration)
- ● Pruning shears (sterilized, for trimming damaged roots/branches)
- ○ Staking kit (optional but helpful) (if planting in windy areas—use 2-3 stakes + soft ties)
- ● Root stimulator gel (dip roots in before planting for faster establishment)
- ● Slow-release fertilizer (10-10-10, sprinkled in planting hole)
- ● Soil pH tester (cherry blossoms prefer slightly acidic soil (6.0-7.0))
- ● Drip irrigation system (for consistent moisture during first year)
- ● Tree guard or wire mesh (to protect from critters like deer/squirrels)
Planting a bare root cherry blossom tree in the Pacific Northwest
Here's how to give your frost-resistant tree the perfect start for stunning spring blooms.
🪴 Step 1: Prepare the Planting Site
Choose a location with full sun exposure (at least 6 hours daily) and well-draining soil. Cherry blossoms hate soggy roots, so avoid low spots where water pools. I dig a hole twice as wide as the root spread but only 12 inches deep—deeper planting buries the graft union and weakens growth.
Loosen the native soil with a shovel or broad fork, breaking up any compacted layers. Mix in 2-3 inches of compost into the bottom of the hole—this improves drainage while providing nutrients. For heavy clay soil common in the PNW, add a handful of coarse sand to the mix. Tap the hole gently to settle everything before planting.
🌱 Step 2: Soak the Roots and Position the Tree
Place the bare root tree in a bucket of lukewarm water for 1-2 hours before planting. This rehydrates the roots and helps them establish faster. While soaking, check the root spread—healthy roots should fan out naturally without circling. If any roots are damaged or mushy, trim them back with clean pruners.
Position the tree in the center of the hole so the graft union (the raised bump near the base) sits 2-3 inches above soil level. This prevents it from being buried too deep as the soil settles. The roots should spread naturally outward—don't force them. A helper holds the tree upright while you work to keep it straight.
💧 Step 3: Backfill and Water Thoroughly
Fill the hole with the amended soil mixture, tamping it down gently with your hands to remove air pockets. Stop when the soil reaches the base of the graft union—this ensures proper healing. Avoid packing the soil too firmly, as this can restrict root growth. I like to create a slight mound around the base to help direct water toward the roots.
Water immediately after planting with 5 gallons of water to settle the soil and eliminate air gaps. The soil should drain freely—if water pools, your hole is too deep. After watering, add 2-3 inches of mulch around the base, keeping it 6 inches away from the trunk to prevent rot. This protects roots from winter frost while maintaining moisture.
☀️ Step 4: Stake and Protect for First Year
Install a 5-foot stake> diagonally behind the tree and loosely tie the trunk with a soft tree tie. The goal is to provide support without restricting growth—you should be able to fit two fingers between the tie and the trunk. In the PNW's windy conditions, staking prevents leaning that can stress young roots.
Cover the base with winter mulch> (straw or shredded leaves) in late fall, pulling it back in early spring. This extra layer insulates roots during our cold winters. Avoid heavy pruning the first year—just remove any dead or crossing branches. Your tree will focus energy on establishing roots rather than producing flowers.
Tips & tricks for planting bare root cherry blossom trees
Here's what I've learned after planting several cherry blossoms in the PNW's tricky climate—these tricks make all the difference for long-term success.
Soil Prep Secret: The 1-2 hours of root soaking in Step 2 is non-negotiable, but here's the real game-changer: add a handful of perlite to your soil mix if you have heavy clay. It creates tiny air pockets that prevent waterlogging, which is especially critical in our rainy winters. I've seen trees with soggy roots fail within two years—don't let that be yours!
Graft Union Placement: That 2-3 inches above soil level for the graft union in Step 2 is crucial for preventing disease. I like to mark the correct height with a small flag or stick before planting so I don't accidentally bury it. Remember, the graft union needs to stay visible—it's the tree's growth control center!
Watering Wisdom: The 5 gallons of water in Step 3 should soak down to about 12 inches—use a long screwdriver to check. If it comes out dry, you need more water. For the first month after planting, I water deeply every 3-4 days rather than light daily sprinkles. This encourages deep root growth instead of shallow roots that dry out quickly.
Mulch Matters: That 2-3 inches of mulch in Step 3 should be spread in a donut shape—keep it 6 inches away from the trunk to prevent rot. I use cedar mulch because it naturally repels pests while breaking down slowly. In our wet winters, I double the mulch thickness to 4-5 inches for extra insulation.
Pro Tips for Bare Root Cherry Blossom Tree
- Here's what I've learned after planting several cherry blossoms in the PNW's tricky climate—these tricks make all the difference for long-term success.
- Soil Prep Secret: The 1-2 hours of root soaking in Step 2 is non-negotiable, but here's the real game-changer: add a handful of perlite to your soil mix if you have heavy clay.
- Graft Union Placement: That 2-3 inches above soil level for the graft union in Step 2 is crucial for preventing disease.
Frequently asked questions
Got questions about planting and caring for your bare root cherry blossom tree? You’re not alone! Here are some of the most common queries from gardeners in the Pacific Northwest—plus expert answers to help you grow a stunning, frost-resistant bloomer.
When is the best time to plant a bare root cherry blossom tree?
Plant your tree in late fall or early spring (November–March) when the ground is workable but not frozen. This gives roots time to establish before summer heat. Avoid planting in summer or extreme cold—roots can dry out or freeze! For PNW gardeners, February–March is ideal.
How cold can my cherry blossom tree handle?
Most bare root cherry blossoms (like Prunus × yedoensis) are USDA Zones 5–8 hardy, surviving down to -15°F (-26°C). However, young trees may need winter protection (mulch, burlap wraps) their first year. Choose late-blooming varieties (e.g., ‘Kwanzan’) to avoid frost damage to flowers.
What if my bare root tree’s branches are broken or damaged?
Don’t panic! Prune out broken or crossing branches with clean, sharp shears at a 45° angle. For major damage, focus on structural integrity—remove no more than 25% of the canopy to avoid stress. Seal cuts with pruning sealant only if the tree is large (small cuts heal naturally).
Can I grow a cherry blossom tree in a pot instead of the ground?
Yes! Use a large container (at least 15-gallon) with well-draining soil and dwarf varieties (e.g., ‘Shirofugen’). Ensure the pot has drainage holes and move it to a protected spot in winter (e.g., against a wall or in a garage). Repot every 2–3 years to refresh soil and roots.
Why aren’t my cherry blossoms blooming this year?
Common reasons include young age (trees often take 3–5 years to bloom), poor sunlight (they need 6+ hours of sun daily), or over-fertilizing (too much nitrogen = leaves, not flowers). Check for pests (aphids, scale) and ensure proper pruning—avoid cutting back blooming branches!
Still stumped? Drop your question in the comments—we’re happy to help your cherry blossom thrive!
Wrapping up and next steps
Planting a bare root cherry blossom tree is a rewarding way to bring the Pacific Northwest’s iconic spring beauty to your garden—especially with frost-resistant varieties like Prunus × yedoensis or Prunus serrulata.
Whether you’re a seasoned gardener or a beginner, these trees offer stunning blooms, minimal upkeep, and a touch of nature’s magic. 🌸
Ready to transform your outdoor space? Start by choosing the right variety for your climate, gather your tools, and follow the simple steps to plant with confidence. Next, mark your calendar—soon, you’ll be enjoying the soft pink clouds of blossoms that make spring unforgettable!