Pruning
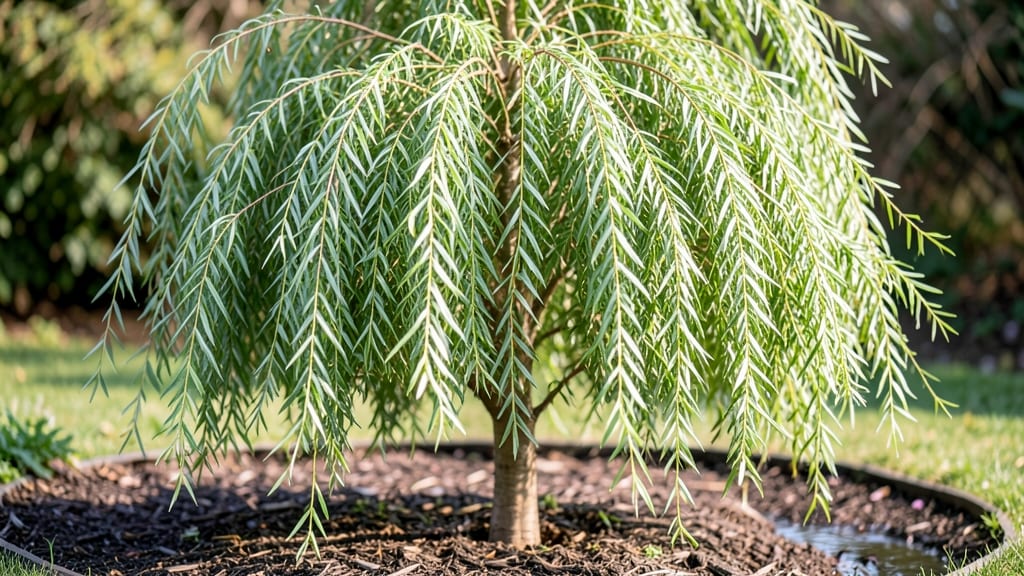
A small weeping willow tree can transform any garden into a serene retreat with its cascading branches and delicate foliage. 🌿 I fell in love with mine after seeing how it softened the edges of a narrow courtyard—its graceful arcs create a natural, dreamy focal point that no other tree can match.
The key is pruning it just right to encourage that signature drooping form while keeping it healthy and contained.
This isn’t about aggressive trimming—think of it as sculpting. You’ll focus on removing dead branches first, then shape the canopy by selectively thinning out dense areas. The goal is to maintain that elegant, waterfall-like silhouette while ensuring air and light reach all parts of the tree.
My tree now fits perfectly in its 6-foot-wide space, with branches that spill over a small pond without overwhelming it.
What you’ll end up with is a tree that looks like it belongs in a storybook—soft, lush, and full of movement. The branches will develop a more refined weeping habit, and the foliage will stay vibrant longer.
Plus, you’ll avoid the common pitfall of letting it grow too wild, which can lead to tangled, unruly growth. This method works for both young trees and mature ones needing a refresh.
Whether you’re placing it near a patio, a water feature, or along a fence, the pruning techniques here will keep it looking intentional and well-cared-for. It’s the secret to making even a small garden feel like a private sanctuary. Let’s get started with the right tools and approach.
📚 In This Guide
- What you need
- Instructions
- Tips and common mistakes
- Wrapping up and next steps
What you need
- ● Pruning shears: Bypass pruners (sharp, clean, and capable of cutting branches up to ½ inch thick).
- ● Loppers: Bypass-style (for thicker branches, ¾–1½ inches in diameter).
- ● Pruning saw: Curved-tooth (for branches over 1½ inches thick).
- ● Disinfectant: 70% isopropyl alcohol or a 10% bleach solution (1 part bleach to 9 parts water) to sterilize tools between cuts.
- ● Gloves: Heavy-duty, cut-resistant (to protect from thorns and sap).
- ● Rubbing alcohol or hydrogen peroxide: (for cleaning wounds on the tree).
- ○ Pruning sealant (optional): Tree wound paint (only use on large cuts over ½ inch in diameter).
- ● Extension pole: (for high branches, 6–10 feet long).
- ● Ladder: Sturdy, non-slip (if pruning above shoulder height).
- ● Tarp or drop cloth: (to collect debris and protect the ground).
- ● Notebook & pen: (to sketch a pruning plan or track cuts).
- ● Safety glasses: (to shield eyes from debris).
- ● Choose a dry, sunny day (avoid pruning when the tree is wet or in extreme heat).
- ● Check local pruning guidelines (some areas restrict pruning during certain seasons).
- ● Have a clear plan (identify dead, crossing, or overgrown branches before starting).
How to prune a small weeping willow tree for perfect shape
Here's the straightforward method I use to keep my weeping willow looking elegant year after year.
✂️ Step 1: Prune in Late Winter or Early Spring
Timing is everything with willows. I always prune my small weeping willow in late winter (just as buds begin to swell) or early spring before new growth starts. This prevents stressing the tree when it's dormant and gives it time to heal before summer heat. Never prune in fall—willows bleed sap heavily and heal poorly before winter.
Look for twigs that cross or rub—these are the first to remove. Use sharp pruning shears to make clean cuts at a 45-degree angle just above a leaf node or outward-facing bud. This encourages healthy regrowth in the right direction. I mark cuts with a white spray paint if doing major pruning—it helps track what I've done and spot any new issues.
✂️ Step 2: Remove Dead, Damaged, or Weak Branches
Start by inspecting the tree for dead branches (no leaves, dry wood) or weak growth (thin stems that flop). Remove these first—they drain energy from the healthy parts. Cut back to the main trunk or a strong side branch, always making your cut just outside the branch collar (that swollen area where the branch meets the trunk).
For branches thicker than ½ inch, use loppers or a pruning saw. I make the first cut about 6-12 inches from the trunk on the underside of the branch, then the final cut just outside the collar. This prevents tearing. If a branch is larger than 2 inches, I cut it into smaller sections first to avoid damaging the tree.
✂️ Step 3: Thin Out Crowded Branches for Airflow
Weeping willows naturally grow dense, so I focus on thinning rather than just cutting back. Remove about 20-30% of the branches to improve airflow and sunlight penetration. Start at the bottom and work upward—this keeps the tree's natural shape while preventing a "bushy" look at the base.
Watch for branches growing straight up or outward instead of downward. These should go first—they disrupt the graceful weeping form. I step back every few cuts to visualize the tree's silhouette. The goal is a pyramidal shape with long, flowing branches. If a branch is too long but healthy, I can shorten it by ⅓ to maintain balance.
✂️ Step 4: Shape the Canopy for Graceful Flow
Now for the fun part—refining the tree's signature weeping shape. Focus on the outer branches first, guiding them downward and outward. If a branch grows too upright, I gently bend it into place (young willow wood is flexible) and secure it with soft plant ties if needed. For stubborn branches, a small cut just below the growth point encourages new shoots to form in the desired direction.
Never remove more than 25% of the tree's foliage in one season. I spread major pruning over 2-3 years to avoid stress. After shaping, I clean up all fallen branches and sterilize my tools with rubbing alcohol to prevent disease spread. A light layer of mulch (2-3 inches) around the base helps retain moisture while the tree recovers.
💧 Step 5: Post-Pruning Care for Strong Recovery
Water deeply after pruning to help the tree recover. I give my weeping willow 10-15 gallons of water spread over the root zone—this encourages new root growth. Avoid fertilizing right after pruning; wait until new growth appears (usually in 4-6 weeks). A balanced, slow-release fertilizer in early spring does the trick.
Keep an eye out for sap bleeding—it's normal for willows to "cry" after pruning. If it's excessive, I apply a sealant to larger cuts to prevent pests. Monitor the tree for new growth direction over the next few weeks. If branches start growing back in unwanted directions, I'll do a light trim in early summer to redirect them before they harden.
Tips & tricks for perfect small weeping willow pruning
A few key insights will help you transform your weeping willow into a stunning landscape feature with minimal stress to the tree.
Timing is Everything: That late winter/early spring window is critical because willows heal fastest when they're just waking up from dormancy. I've learned the hard way—pruning in fall leads to excessive sap bleeding and poor recovery. Look for those tiny bud swellings as your cue to start. If you miss this window, wait until early spring when new growth begins.
Tool Precision Matters: Using the right tool for each branch size makes all the difference. For branches under ½ inch, sharp pruning shears work perfectly. For larger branches, I always make the first cut 6-12 inches from the trunk first—this prevents bark tearing when I make the final cut just outside the branch collar. Don't skip this two-cut method for branches over ½ inch, or you risk damaging the tree.
Visualize the Final Shape: Step back every 5-10 minutes during Step 3 and 4 to check your progress. The goal is a graceful pyramid shape with branches flowing downward. I imagine the tree as a fountain—water cascading from the top to the bottom. If you see branches growing upward or outward, those are your priorities for removal or bending. This constant visualization prevents over-pruning and maintains that elegant weeping form.
Sap Management Secret: While some sap bleeding is normal, excessive sap flow can attract pests. If you see heavy bleeding from larger cuts, apply a tree sealant immediately after pruning. I keep a small bottle of sealant in my gardening toolkit specifically for this purpose. This simple step can prevent future issues with borers and other sap-loving insects that might otherwise take advantage of your freshly pruned tree.
Pro Tips for Small Weeping Willow Tree
- A few key insights will help you transform your weeping willow into a stunning landscape feature with minimal stress to the tree.
- Timing is Everything: That late winter/early spring window is critical because willows heal fastest when they're just waking up from dormancy.
- Tool Precision Matters: Using the right tool for each branch size makes all the difference.
Frequently asked questions
Got questions about keeping your small weeping willow tree happy and healthy? Here are answers to the most common ones!
How often should I prune a small weeping willow tree?
A small weeping willow benefits from light pruning twice a year: once in late winter (before new growth starts) to shape it, and again in early summer to remove any damaged or overgrown branches. Avoid heavy pruning—willows are fast growers and can become stressed if cut back too aggressively. Focus on maintaining its natural, graceful form!
Can I prune a weeping willow in the fall?
Pruning in the fall is not recommended for weeping willows. Fall cuts can stimulate new growth that won’t harden off before winter, making the tree vulnerable to frost damage. If you must prune, do so early fall (September) for minor touch-ups, but save major pruning for late winter or early spring.
What’s the best way to prune a weeping willow to keep it small?
To control size, prune selectively by removing up to 25% of the tree’s height in one session—never more. Focus on cutting back the longest branches to encourage a bushier, more compact shape. Use clean, sharp pruners to make cuts just above a leaf node or bud. Pro tip: Avoid "topping" (cutting the main stem flat)—this can stress the tree and lead to weak regrowth.
Why is my weeping willow’s new growth dying after pruning?
If new growth wilts or dies after pruning, it’s often due to over-pruning, improper timing, or disease. Check for these issues:
- Timing: Pruned too late in the season?
- Cuts: Were they too close to the trunk or jagged?
- Health: Signs of fungal spots or oozing sap?
Are there smaller alternatives to a weeping willow?
If space is limited, consider these low-maintenance, compact alternatives with similar grace:
- Dwarf Willow (Salix caprea 'Pendula') – Grows 6–10 ft tall.
- Japanese Snowbell (Styrax japonicus) – Delicate branches, 15–20 ft.
- Weeping Cherry (Prunus subhirtella 'Pendula') – Ornamental flowers, 15–25 ft.
Wrapping up and next steps
Your small weeping willow tree is a stunning addition to any landscape, and with the right pruning care, it will thrive for years to come! 🌿 By following these steps—timing, technique, and tools—you’ll encourage healthy growth, prevent pests, and maintain its iconic, graceful shape.
Remember, patience and consistency are key, so don’t rush the process.
Now that you’re armed with knowledge, roll up your sleeves and give your willow the love it deserves! Start with a quick inspection of its branches, and soon, you’ll see the rewards of your effort in lush, flowing foliage. Happy pruning! ✂️🌱