Pruning
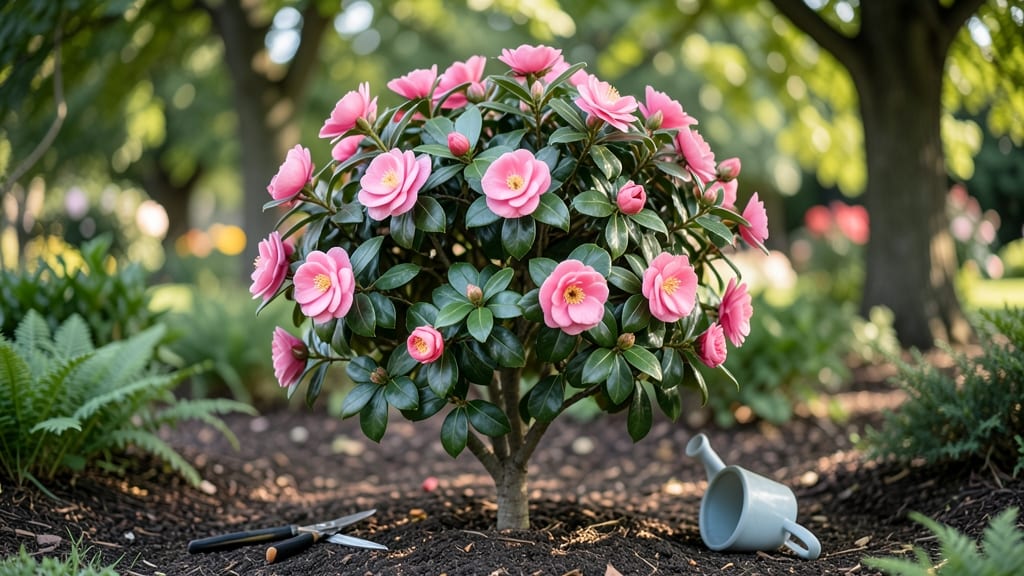
The Pink Perfection camellia tree brings showstopping color to Pacific Northwest gardens when most other plants sleep through winter. 🌸 Its glossy, deep green leaves and rosy-pink blooms create a dramatic focal point that thrives where temperatures dip below freezing—unlike many finicky camellias.
This isn’t just another flowering shrub—it’s a year-round star that shines brightest in late winter and early spring, when your garden craves color. The blooms last for weeks, and the tree’s compact, rounded shape makes it perfect for borders, foundation plantings, or as a standalone specimen.
Pair it with hellebores for early-season contrast, or let it stand alone as a bold statement piece against evergreen backdrops.
What you’ll love most is how effortlessly it transforms a space. Imagine rosy-pink cascades spilling over a retaining wall, or a single tree anchoring a shaded patio with its velvety petals. The fragrance?
Lightly sweet, like a whisper of spring. With the right placement and minimal pruning, this camellia becomes the centerpiece your garden has been missing—one that works hard even when the weather does.
Whether you’re designing a new border or refreshing an existing one, this frost-resistant beauty adapts to partial shade and well-drained soil. Let’s make your garden the envy of the neighborhood with a camellia that performs when it counts most—right through the Pacific Northwest’s chillest months.
📚 In This Guide
- What you need
- Instructions
- Tips and common mistakes
- Wrapping up and next steps
What you need
- ● Pink Perfection Camellia Tree: 1 mature plant (3–5 years old) or 1–2 young saplings (1–2 ft tall) from a trusted nursery.
- ● Well-draining soil mix: 50% native soil + 30% organic compost + 20% perlite or sand (for aeration). Pro tip: Test soil pH (ideal: 5.5–6.5).
- ● Pruning tools: Bypass pruners (sharp, clean)
- ● Loppers (for thicker branches, 1–2 pairs)
- ● Sterilizing solution (70% isopropyl alcohol or bleach-water mix)
- ● Mulch: 2–3 inches of pine bark or wood chips (acidic, retains moisture).
- ● Frost cloth or burlap: 1–2 rolls (for winter protection, if needed).
- ● Slow-release fertilizer: Acid-loving plant formula (e.g., Miracle-Gro Azalea, Camellia & Rhododendron).
- ● Tree stakes & ties: 2–4 stakes + soft ties (for young plants in windy areas).
- ● Soil moisture meter: Ensures consistent hydration (camellias hate soggy roots!).
- ○ Pruning sealant: Optional for large cuts (e.g., Tanglefoot Tree Wound Pruning Seal).
Step-by-Step guide to planting and cultivating Pink Perfection camellias
Here’s how I ensure these frost-hardy beauties thrive in Pacific Northwest climates—with lush blooms year after year.
🌱 Step 1: Select the Ideal Planting Site and Prepare the Soil
Pink Perfection camellias thrive in partial shade, receiving 4-6 hours of morning sun and afternoon shade to protect blooms from scorching. In the PNW’s cooler summers, they tolerate more sun, but avoid full afternoon exposure—it can stress the plant and reduce flowering. Test your site by observing how much sun hits it between 10 AM and 2 PM; if the area stays dappled, it’s perfect.
Camellias demand acidic, well-draining soil with a pH of 5.0–6.0. Before planting, mix 3 inches of organic compost (like peat moss or pine bark fines) into the native soil to improve drainage and acidity. If your soil is heavy clay, amend it with sand or perlite to prevent root rot—a common issue in waterlogged PNW gardens. I like to dig a hole twice as wide as the root ball but only as deep as the container’s base; camellias hate having their roots buried too deeply.
☀️ Step 2: Plant at the Right Time and Depth
Spring or early fall are the best times to plant in the PNW, when temperatures hover between 50–70°F. Avoid planting in summer heat or winter frost, as stress from extreme temps can stunt growth. Handle the root ball gently—camellias have delicate feeder roots that break easily. If the plant arrives container-bound, soak the roots in lukewarm water for 20–30 minutes before removing it from the pot.
Place the camellia in the hole so the top of the root ball sits 1–2 inches above ground level. This prevents water from pooling around the stem, which can cause rot. Backfill with the amended soil, tamping lightly to remove air pockets. Water deeply to settle the soil, then add a 2-inch layer of mulch (like pine bark or cedar chips) around the base, keeping it 6 inches away from the trunk to avoid moisture buildup. Mulch helps retain soil moisture and mimics the acidic conditions camellias love.
💧 Step 3: Water and Fertilize for Optimal Bloom Production
Newly planted camellias need deep watering once a week during the first growing season, providing 1–1.5 gallons per plant each time. In the PNW’s rainy climate, you may need to adjust—check soil moisture by sticking your finger 2 inches deep; water only if it’s dry. Overwatering is the fastest way to kill a camellia, so prioritize drainage over frequency. Once established, these trees are drought-tolerant but still appreciate consistent moisture, especially during bloom season (winter to early spring).
Fertilize in early spring (just as buds form) and late summer with an acid-loving plant fertilizer (like a 10-10-10 or 8-3-9 blend). I avoid high-nitrogen fertilizers—they encourage leafy growth at the expense of blooms. Instead, use a slow-release, acidic fertilizer (pH 5.5–6.0) and follow the label’s instructions. If your soil tests low in acidity, apply sulfur or aluminum sulfate in fall to adjust pH gradually.
✂️ Step 4: Prune for Shape and Health After Blooming
Prune Pink Perfection camellias immediately after flowering, typically in late spring or early summer. This prevents removing next year’s buds, which form on old wood. Use clean, sharp pruners to make cuts just above a leaf node or outward-facing bud, never at a 45-degree angle—this invites disease. Remove only dead, diseased, or crossing branches, and thin out crowded growth to improve airflow. Avoid heavy pruning; camellias bloom on mature wood, so drastic cuts reduce future flowers.
Watch for aphids or scale insects, common PNW pests that suck sap and weaken plants. I treat early infestations with a hose spray (the force dislodges them) or neem oil solution (1 tbsp per gallon of water). For severe cases, apply horticultural oil in late winter before buds swell. Pruning also gives you a chance to inspect the plant for fungal spots (like petal blight) or cankers—remove affected areas immediately and sterilize tools with rubbing alcohol to prevent spread.
⏰ Step 5: Protect from Frost and Winter Prep
While Pink Perfection camellias are frost-tolerant (down to 15°F), young plants or newly planted specimens may need winter protection in harsh PNW winters. Wrap the trunk with burlap or tree guard to shield it from deer browsing and sunscald (when winter sun warms the bark, then freezing temps damage it). Avoid plastic wraps—they trap moisture and cause rot. In extreme cold snaps (below 20°F), cover the plant with a lightweight frost blanket, securing it loosely to allow airflow.
Reduce watering in late fall as growth slows, but don’t let the soil dry out completely. A 2-inch layer of mulch over the root zone insulates roots and retains moisture. Prune out dead or damaged branches in early spring before new growth begins. With proper care, your Pink Perfection camellia will reward you with vibrant blooms from winter through early spring, making it the star of your PNW garden.
Tips & tricks for perfect camellia cultivation
These pro tips will help you achieve that showstopping bloom display with minimal fuss—especially in the PNW's tricky climate.
Soil pH Precision: Testing your soil's acidity before planting is non-negotiable. I use a simple pH test kit ($10 at garden centers) to confirm the 5.0–6.0 range camellias crave. If your soil tests higher, work in sulfur or aluminum sulfate in fall—it takes time to adjust pH, so don't wait until planting day. The 3 inches of organic compost mentioned in Step 1 is your first line of defense against alkaline soils, but don't skip the test.
Root Ball Handling: That 20–30 minute soak for container-bound roots in Step 2 is crucial, but I've learned the hard way that lukewarm water matters. Cold water shocks delicate feeder roots, while hot water can damage them. Aim for water that feels comfortable to your wrist—right around 70°F. After soaking, gently tease apart any circling roots with your fingers; this encourages outward growth and prevents girdling.
Watering Wisdom: The 1–1.5 gallons per week guideline in Step 3 works for most PNW gardens, but I've found that morning watering is key. Watering in late afternoon can leave foliage damp overnight, inviting fungal diseases like petal blight. For established plants, I check moisture by lifting the mulch and probing 2 inches deep with a screwdriver—if it comes out clean, no water's needed. The 2-inch mulch layer does wonders for moisture retention, but never pile it against the trunk.
Pruning Pro Tips: When pruning in late spring (Step 4), I always carry a small bottle of rubbing alcohol to sterilize my pruners between cuts. The 1 tbsp neem oil solution recommendation works, but I've had better results with a 2% horticultural oil applied in late winter—it smothers overwintering pests before they become a problem. And here's a secret: I mark my pruning schedule on my calendar right after the last frost date, so I never miss the window.
Pro Tips for Pink Perfection Camellia Tree
- These pro tips will help you achieve that showstopping bloom display with minimal fuss—especially in the PNW's tricky climate.
- Soil pH Precision: Testing your soil's acidity before planting is non-negotiable.
- Root Ball Handling: That 20–30 minute soak for container-bound roots in Step 2 is crucial, but I've learned the hard way that lukewarm water matters.
Frequently asked questions
Got questions about nurturing your Pink Perfection camellia tree? You’re not alone! Here are answers to the most common queries—from pruning tips to frost prep—so you can keep your stunning blooms thriving in the Pacific Northwest.
How do I prune my Pink Perfection camellia for maximum blooms?
Prune after flowering (late spring to early summer) to encourage new growth and next year’s blooms. Remove dead, crossing, or weak branches first, then thin out crowded stems for airflow. Never prune in fall or winter—it can damage buds forming for spring blooms! Use sterilized tools to prevent disease.
Is the Pink Perfection camellia truly frost-resistant?
Yes! This variety handles light frosts (down to 15°F/-9°C) better than many camellias, but heavy freezes can still damage buds or foliage. For extra protection, mulch the base with 2–3 inches of organic material (like wood chips) and cover young plants with frost cloth if temps drop below 20°F (-6°C).
When should I fertilize my camellia for pink perfection?
Feed your camellia twice a year: once in early spring (before new growth) with a balanced fertilizer (e.g., 8-8-8), and again in late summer (August-September) with an acid-loving plant fertilizer (like 10-6-8). Avoid fertilizing in fall or winter—it can stress the plant before dormancy.
Can I grow Pink Perfection camellias in containers?
Containers work well for small trees or as patio centerpieces. Use a well-draining acidic mix (pH 5.5–6.5) and a pot with drainage holes. Repot every 2–3 years to refresh soil, and move containers indoors or to a sheltered spot if frost threatens. Just ensure the pot is large enough (at least 18–24 inches wide) for mature roots.
What pests should I watch for on my camellia?
Common culprits include camellia scale, aphids, and spider mites. Check undersides of leaves for sticky residue or tiny webs. Treat early with neem oil or insecticidal soap. For severe infestations, prune and destroy heavily damaged branches. Healthy plants resist pests better—so keep soil moist and fertilize properly!
How long does it take for a Pink Perfection camellia to bloom?
Patience is key! Mature trees (5–10 years old) produce the most spectacular blooms, but younger plants may take 2–3 years to flower after planting. Consistent care (watering, pruning, and fertilizing) speeds up the process. If your tree isn’t blooming after 3 years, check for over-fertilization (too much nitrogen) or poor drainage.
Wrapping up and next steps
Transforming your Pacific Northwest garden into a pink perfection haven with a frost-resistant Camellia tree is easier than you think! 🌸 With the right tools, timing, and techniques, you’ll enjoy vibrant blooms year after year.
Remember, patience and precision in pruning are key—your efforts will pay off in stunning, healthy growth.
Ready to take the next step? Start by marking your calendar for late winter or early spring—pruning season is just around the corner! Grab your gloves, sharpen those shears, and get ready to cultivate a garden masterpiece that turns heads (and hearts) in your neighborhood.