Propagation
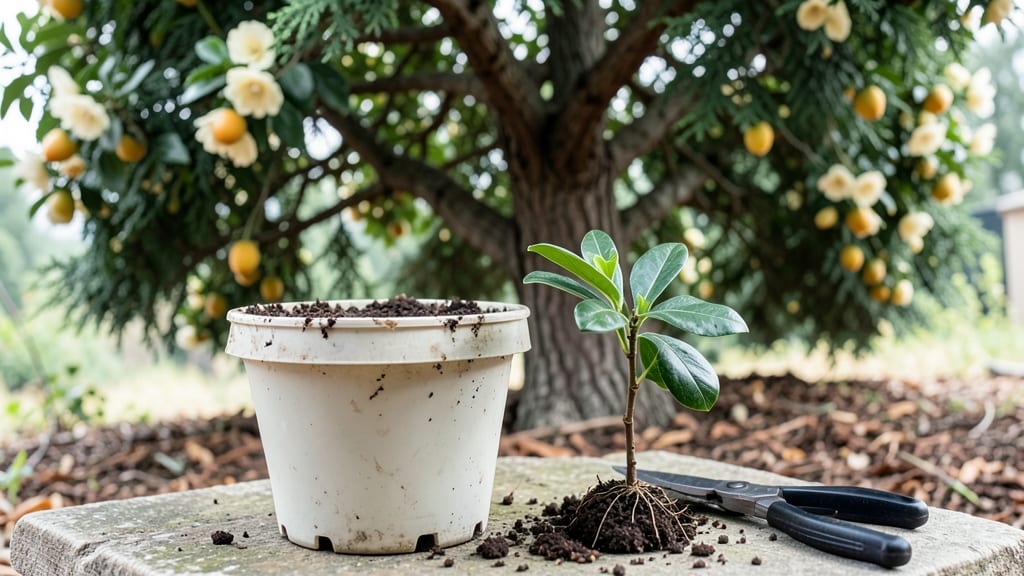
Growing a loquat tree from cutting is how I finally got my hands on this fragrant, sun-loving fruit tree—without waiting years for a nursery sapling. 🌱 The Pacific Northwest's mild winters make it perfect for this method, and once you master the basics, you'll have a tree that thrives in your yard or even a large container.
Here's the secret: semi-hardwood cuttings taken in late summer or early fall root best. You'll need sharp pruners, rooting hormone, a mix of perlite and peat moss, and a clear plastic bag to create humidity.
The process takes patience—roots typically form in 8-12 weeks—but the payoff is a tree that produces sweet, apricot-like fruit in just a few years.
What you'll end up with is a sturdy young tree with glossy leaves and the promise of golden-orange fruit by late winter. The best part? You skip the nursery price tag and get a tree perfectly adapted to your microclimate.
Just keep the soil moist (not soggy) and out of direct midday sun while roots establish.
This method works equally well for container growing or in-ground planting, so whether you have a sunny backyard or just a patio spot, you can grow your own loquat. The first year is all about root development—after that, you're just nurturing a future fruit producer.
📚 In This Guide
- What you need
- Instructions
- Tips and common mistakes
- Wrapping up and next steps
What you need
- ● Loquat cuttings: 4–6 healthy, semi-hardwood cuttings (6–12 inches long) from a mature loquat tree. Choose stems with at least 2–3 leaf nodes and no flowers or fruit.
- ● Rooting hormone: A powder or gel (e.g., Rootone or Clonex) to boost root growth.
- ○ Well-draining potting mix: A blend of perlite, vermiculite, and peat moss (or coconut coir) in a 1:1:1 ratio. Optional: Add a handful of sand for extra drainage.
- ● Small pots or trays: 4–6-inch diameter containers with drainage holes (or a seed tray with cell inserts).
- ● Spray bottle: For misting cuttings to maintain humidity.
- ● Plastic bag or humidity dome: To create a mini greenhouse effect (e.g., a zip-top bag with holes or a clear plastic clamshell).
- ● Pruning shears or sharp knife: Sterilized to make clean cuts (avoid jagged edges!).
- ● Watering can or spray bottle: For gentle hydration.
- ● Heating mat (70–75°F) to speed up rooting in cooler PNW conditions.
- ● Fungicide (e.g., Mycorrhizal inoculant) to prevent rot in damp climates.
- ● Grow lights (if propagating indoors before transplanting outdoors).
- ● Label markers to track cutting dates and progress.
Step-by-Step instructions for propagating loquat trees from cuttings
Here's how to root loquat cuttings reliably—even in our cooler Pacific Northwest climate.
🌱 Step 1: Select and Prepare Healthy Cuttings
Choose 4-6 inch long semi-hardwood cuttings from healthy loquat branches in late winter or early spring before new growth begins. Look for pencil-thick stems with 2-3 leaf nodes—these are your best bets for rooting. Use clean, sharp pruners to make a 45-degree angle cut just below a node.
Remove all but the top 2 leaves to reduce moisture loss. Dip the cut end in rooting hormone to encourage root growth—this is the single most important step for success. I like to use a gel formula because it stays put on the cutting. Place the prepared cuttings in a shady, humid spot while you prepare the propagation setup.
🪴 Step 2: Set Up the Rooting Medium
Fill 4-inch pots with a 50/50 mix of perlite and peat moss—this lightweight combination drains well while retaining enough moisture for root development. Moisten the mix until it feels like a damp sponge but doesn't drip. I tap the pots gently on the table to settle the medium before inserting cuttings.
Make a 1-inch deep hole in each pot using a pencil or your finger. Insert the cutting until the bottom node is just below the soil line—this is where roots will emerge. Gently firm the mix around the stem to eliminate air pockets that could rot the cutting.
💧 Step 3: Create Ideal Humidity Conditions
Place each pot inside a clear plastic bag or under a humidity dome to maintain 80-90% humidity—loquat cuttings need this to prevent drying out. Secure the bag loosely with a rubber band or twist tie to allow some airflow. I place a small pebble in each bag to weigh it down slightly and keep it from touching the cuttings.
Set the cuttings in bright, indirect light—direct sun will scorch the leaves. A south-facing window with sheer curtain works perfectly. Check the humidity daily by misting the leaves lightly if they look dull rather than glossy. Roots typically form in 4-8 weeks, depending on your indoor temperature.
⏰ Step 4: Monitor and Transition to Soil
After 6-8 weeks, gently tug on the cutting—if you feel light resistance, roots have formed. Remove the humidity cover gradually over 7-10 days to acclimate the new plants. Water when the top inch of soil feels dry, but avoid soaking the mix as loquat roots are sensitive to rot.
Once the cuttings show new growth and have developed a small root ball, transplant them into 6-inch pots with regular potting soil. Keep them in partial shade for another 2 weeks before moving to full sun. This gradual transition prevents transplant shock and gives your new loquat trees the best chance to thrive.
☀️ Step 5: Establish Outdoor Growth
When nighttime temperatures stay above 50°F consistently, your rooted cuttings are ready for the garden. Choose a sheltered spot with morning sun and afternoon shade—loquat trees appreciate protection from harsh afternoon heat. Plant in well-draining soil and water deeply to help roots establish.
Mulch around the base with 2-3 inches of organic mulch to retain moisture and regulate soil temperature. Young loquat trees benefit from weekly watering during their first growing season. You'll know they're settling in when they produce new leaves and begin branching out—this usually happens within 3-4 months of outdoor planting.
Tips & tricks for perfect loquat tree propagation
Here's what I've learned from years of experimenting to make loquat propagation foolproof—especially in our challenging Pacific Northwest climate.
The Cutting Secret: In Step 1, make your 45-degree cut just below a node—this is where roots will emerge. I've found that using a clean, sharp pruner makes all the difference. If you're using a dull blade, you'll crush the stem tissue and reduce rooting success. Also, look for cuttings with a slight green tint—they're more likely to root than fully browned stems.
Medium Mix Matters: When setting up your 50/50 perlite and peat moss mix in Step 2, don't skip the tapping step! This settles the medium and creates better contact between the cutting and soil. I've seen cuttings fail because they were sitting in air pockets rather than making proper contact with the moist medium. Pro tip: Add a pinch of cinnamon to the mix—it's a natural fungicide that prevents rot.
Humidity Hack: For Step 3's humidity setup, I've had the most success with clear plastic bags rather than humidity domes. The bags create a more controlled environment and are easier to monitor. Place a small pebble in each bag to keep it from touching the leaves—this prevents mold growth. If you notice condensation forming on the inside of the bag, that's a good sign you've got the right humidity level!
Transition Timing: In Step 4, when you're ready to remove the humidity cover, do it gradually over 7-10 days. I start by opening the bag for 10 minutes each day, then increase the time. This slow acclimation prevents transplant shock. Also, watch for new growth—this is your best indicator that the cutting has successfully rooted and is ready for the next stage.
Pro Tips for Loquat Tree From Cutting
- Here's what I've learned from years of experimenting to make loquat propagation foolproof—especially in our challengi...
- The Cutting Secret: In Step 1, make your 45-degree cut just below a node—this is where roots will emerge. I've found ...
- Medium Mix Matters: When setting up your 50/50 perlite and peat moss mix in Step 2, don't skip the tapping step! This...
Frequently asked questions
Got questions about growing a loquat tree from cuttings?
You’re not alone! Here are answers to the most common concerns—plus pro tips to set you up for success in the Pacific Northwest’s unique climate.
When is the best time to take loquat cuttings?
The ideal window is late winter to early spring (February–March), when the tree is still dormant but starting to show signs of new growth. Avoid taking cuttings during extreme heat or cold—PNW’s mild winters make this timing flexible, but consistency is key! For semi-ripe cuttings (summer propagation), aim for June–July when the wood is firm but not fully hardened.
How do I know if my cutting will root successfully?
Look for healthy, pencil-thick stems (4–6 inches long) with 2–3 leaf nodes. Avoid woody, brittle, or diseased branches—these rarely root. A greenish-brown base (not fully mature) and slight flexibility are good signs. Pro tip: Test the snap—it should bend slightly but not break like a dry twig!
What’s the deal with humidity for loquat cuttings?
Loquats love humidity! Use a clear plastic bag or humidity dome to trap moisture (60–70% humidity is ideal). In the PNW’s damp climate, mist cuttings daily and keep them out of direct sunlight until roots form (4–8 weeks). If leaves yellow or wilt, it’s a sign of overwatering or low humidity—adjust your setup!
Can I grow a loquat tree from cuttings if I don’t have rooting hormone?
Yes! While rooting hormone (like IBA) speeds up success, you can skip it by:
- Using sharp, sterile scissors to make a clean cut at a 45° angle.
- Dipping the base in cinnamon powder (natural antifungal) or honey (antibacterial).
- Planting in a moist, well-draining mix (perlite + peat moss).
How do I protect my cuttings from PNW’s unpredictable weather?
Loquats are tender to frost—keep cuttings indoors (60–70°F) until roots establish (check by gently tugging; resistance = roots!). If outdoors, use a cloche or cold frame and avoid soggy soil. Once rooted, harden off gradually before transplanting in spring. Bonus: PNW’s mild summers mean you can move potted cuttings outside in partial shade by June!
Wrapping up and next steps
Growing a loquat tree from a cutting is a rewarding way to expand your Pacific Northwest garden with minimal effort!
With the right tools, patience, and a little care, you can successfully propagate a thriving tree that will soon bear delicious fruit. Don’t let hesitation hold you back—start your cutting today!
Ready to take the next step? Plant your cutting in a sunny spot, keep it moist, and watch it grow! Share your progress with fellow gardeners or explore more propagation tips to keep your green thumb flourishing. 🌱✨