Trees
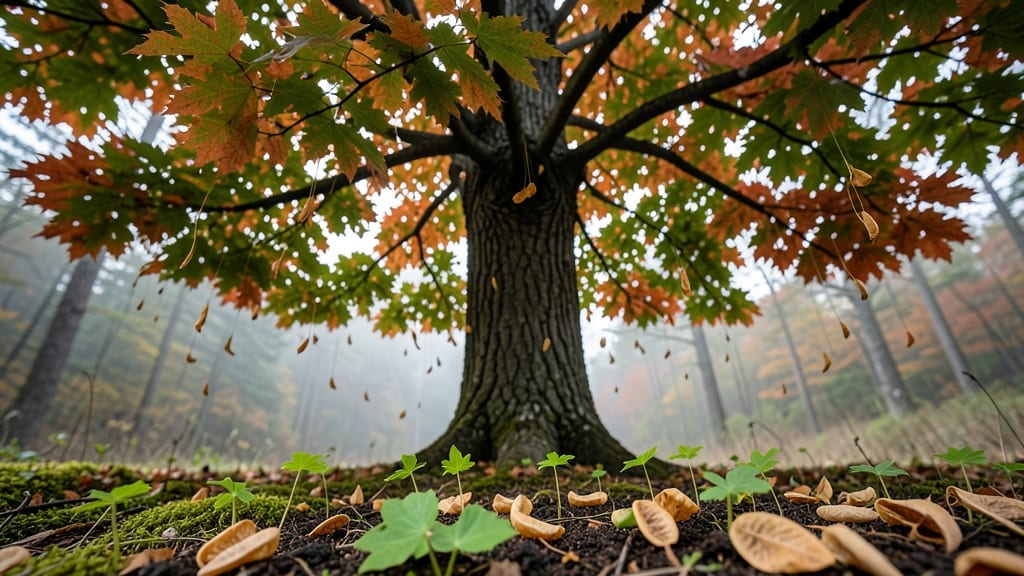
Maple trees reproduce through nature’s most dramatic show—winged seeds that spiral to the ground like tiny helicopters. 🌿 I’ve watched them transform my backyard into a forest of saplings after just one windy spring, and the process is far more fascinating than most gardeners realize.
These trees rely on both wind and wildlife to spread their seeds, but they also have hidden tricks up their bark for propagation.
The real magic happens in late winter when flowers bloom before leaves appear. Male flowers release pollen that fertilizes female flowers, producing samaras—those iconic winged seeds. A single tree can produce thousands, but only a fraction survive to grow into mature maples.
The key to success lies in timing, soil conditions, and a little patience from nature (or you, if you’re propagating them yourself).
What you end up with are towering shade providers, vibrant fall foliage, and a legacy that lasts centuries. Maple seedlings thrive in moist, well-drained soil and partial shade, making them perfect for woodland gardens or as understory trees.
With the right conditions, you could be nurturing a future giant in just a few years.
Whether you’re waiting for nature to do its work or taking cuttings for a head start, understanding this process unlocks a deeper connection to one of America’s most iconic trees. Let’s dive into how you can encourage—or even accelerate—this remarkable cycle in your own landscape.
📚 In This Guide
- What you need
- Instructions
- Tips and common mistakes
- Wrapping up and next steps
What you need
- ● Mature maple tree(s): A healthy, seed-producing tree (preferably red, sugar, or silver maple for best results). Look for trees with abundant samaras (winged seeds) in late winter/early spring.
- ● Samaras (maple "helicopters"): Collect 50–100 fresh, undamaged samaras from the ground or tree (they ripen in September–October but may stay dormant until spring).
- ● Gloves: A pair of gardening or nitrile gloves to protect hands from sap and debris.
- ● Pruning shears or small scissors: For harvesting samaras from high branches (if needed).
- ● Seedling trays or small pots: 3–4 inch pots (or a seed tray with individual cells) filled with well-draining potting mix (e.g., 60% peat moss, 30% perlite, 10% sand).
- ● Spray bottle: With water to keep soil moist during germination.
- ○ Plastic wrap or humidity dome: To create a mini greenhouse for seedlings (optional but helpful).
- ● Labeling tags: Waterproof plant tags and a pencil to mark seedling varieties/dates.
- ● Patience: Maple seeds can take 2–4 weeks to germinate (or up to 6 months if stratified naturally).
- ● Temperature control: Stratification (cold treatment): Chill seeds in a refrigerator (34–40°F) for 6–8 weeks in a moist paper towel (speeds up germination).
- ● Warmth for germination: Keep soil at 60–70°F once planted.
- ● Sunlight: Place trays in partial shade (indirect light) until seedlings are 2–3 inches tall, then gradually introduce full sun (6+ hours/day).
- ● Watering routine: Keep soil consistently moist (not soggy) but avoid overwatering.
- ● Growth hormone gel: A rooting hormone to boost early seedling growth (apply lightly to roots before planting).
- ● Soil moisture meter: To monitor moisture levels precisely.
- ● Notebook: To track germination dates, seed sources, and growth milestones.
- ● Shade cloth: 30–50% coverage for young seedlings in hot climates.
- ● Compost or worm castings: To enrich soil for faster, healthier growth.
How maple trees reproduce: understanding nature’s seed propagation process
Maple trees don’t need your help to grow—they’ve perfected their own propagation system over centuries. Here’s how nature does it, step by step.
🌿 Step 1: Observe the Maple Tree’s Flowers in Early Spring
Maple trees reproduce through a two-step process that begins in early spring when they produce flowers. Look for clusters of tiny, greenish-yellow blooms on the branches—these are the tree’s reproductive organs. Male flowers release pollen, while female flowers wait to be fertilized. This is the moment that sets everything in motion.
If you’re in a hardiness zone where maples grow naturally (typically zones 3-9), you’ll notice these flowers appear before the leaves fully emerge. The timing is critical—too early, and frost can damage them; too late, and pollinators may not be active. Watch for bees and wind to carry pollen from one tree to another.
🌱 Step 2: Identify the Fertilized Flowers That Develop Into Samaras
After pollination, the female flowers develop into small, green structures that eventually grow into the iconic maple "helicopters" or samaras. These winged seeds form in late spring and take about 8-12 weeks to mature fully. You’ll see them as paired seeds connected by a thin stem, each with a papery wing for wind dispersal.
Here’s the thing—these samaras don’t fall immediately. They wait until late summer or early fall, when the tree’s energy shifts toward dormancy. This delay ensures the seeds have the best chance of landing in favorable conditions. If you’re near a mature maple, you’ll notice them spiraling down in a slow, graceful descent.
💧 Step 3: Watch the Samaras Germinate in Ideal Conditions
For a samara to germinate, it needs three things: moisture, light, and a stable temperature between 60-70°F. Once a samara lands in a suitable spot—often in well-drained soil with some organic matter—it can take 1-3 months to sprout. The seedling’s first leaves, called cotyledons, will appear once the stored energy in the seed is used up.
Don’t expect fast results—maple seedlings grow slowly at first. In their first year, they’ll focus on developing a strong root system before putting energy into leaf and stem growth. If you’re trying to grow a maple from seed, patience is key. You’ll know germination has succeeded when you see the first true leaves emerge, typically 2-4 inches above the soil.
☀️ Step 4: Support the Seedling’s Growth in Its First Few Years
Young maple seedlings need partial shade to protect them from harsh sunlight, which can stress their delicate leaves. Once established (after 2-3 years), they’ll tolerate more sun but prefer dappled light. Water the seedling regularly, keeping the soil consistently moist but not waterlogged, especially during dry spells.
Here’s where many seedlings fail: competition with weeds or grass. Use mulch (like wood chips or straw) to suppress weeds and retain moisture. Avoid fertilizing in the first year—young maples are sensitive to excess nutrients. Instead, let the soil’s natural fertility support their slow but steady growth.
⏰ Step 5: Recognize When the Seedling Is Ready for Transplanting
Maple seedlings can be transplanted once they reach 1-2 feet tall and have developed a strong root system, usually in their second or third year. Choose a permanent spot with well-draining soil and space for the tree to mature—maples can grow 50-100 feet tall depending on the species. Dig a hole twice as wide as the root ball but no deeper.
Transplant on a cool, cloudy day to reduce stress. Water deeply after planting to help the roots settle into the new soil. In the first year after transplanting, monitor the tree closely for signs of stress, like wilting or yellowing leaves. With proper care, your young maple will grow into a majestic tree for decades to come.
Tips & tricks for perfect maple tree propagation
Here's what nobody tells you about growing maple trees from seed—these insights will help you avoid common pitfalls and give your seedlings the best start possible.
Timing is Everything: The 8-12 week window for samara development (Step 2) is non-negotiable. If you collect samaras too early, they won't be fully mature, and if you wait too long, they'll already have fallen. I always aim to collect them in late August to early September when they're just starting to turn brown but still firmly attached. This timing ensures you capture seeds at their peak viability.
Germination Conditions: That 60-70°F temperature range in Step 3 is critical—don't guess! Use a thermometer to monitor soil temperature, especially if you're in a cooler climate. I've found that placing a clear plastic dome over seedlings creates a mini greenhouse effect that maintains consistent warmth. Just remember to remove it during the day to prevent overheating.
Transplanting Strategy: The 2-3 year waiting period before transplanting (Step 5) might seem long, but it's essential. I recommend marking your seedling's growth every 6 months to track progress. When you're ready to transplant, dig a hole twice as wide as the root ball but no deeper—this prevents root damage and encourages outward growth. The key is to disturb the root system as little as possible.
Weed Prevention: Many seedlings fail in Step 4 because of weeds, not because of poor care. I've had the most success using a 3-inch layer of wood chips as mulch—it suppresses weeds while retaining moisture. The secret is to keep the mulch 2-3 inches away from the tree trunk to prevent rot. This simple step can make all the difference between a thriving seedling and one that struggles.
Pro Tips for How Do Maple Trees Reproduce
- Here's what nobody tells you about growing maple trees from seed—these insights will help you avoid common pitfalls and give your seedlings the best start possible.
- Timing is Everything: The 8-12 week window for samara development (Step 2) is non-negotiable.
- Germination Conditions: That 60-70°F temperature range in Step 3 is critical—don't guess!
Frequently asked questions
Got questions about how maple trees reproduce? You’re not alone! Here are some of the most common queries—and their answers—to help you understand the fascinating world of maple propagation.
How long does it take for a maple seed to grow into a tree?
A maple seedling can take 5 to 10 years to mature into a small tree, depending on species and growing conditions. Sugar maples, for example, grow slower than silver or red maples. Patience is key—these trees are in it for the long haul!
Can I plant maple seeds from my backyard tree?
Yes, but success isn’t guaranteed! Maple seeds have a low germination rate (often under 20%). For better odds, collect seeds from healthy trees, stratify them (mimic winter conditions), and plant in well-draining soil. Alternatively, buy nursery-grown seedlings for a foolproof start.
What’s the best time of year to plant maple seeds?
Fall is ideal—plant seeds right after harvest (late autumn) to trigger natural stratification. If planting in spring, soak seeds in water for 24–48 hours first. Avoid planting in extreme heat or drought, as young seedlings are delicate.
Why aren’t my maple seeds sprouting? Troubleshooting tips?
Common issues include:
- Poor stratification: Maple seeds need cold, moist conditions (like winter) to break dormancy.
- Low viability: Older or damaged seeds may not sprout—test freshness by cutting one open.
- Wrong soil: Use well-draining, slightly acidic soil (pH 5.0–6.5) to prevent rot.
- Pests/disease: Fungal issues or critters (like squirrels) can sabotage seedlings.
Are there faster ways to grow a maple tree besides seeds?
For quicker results, consider:
- Root cuttings: Dig up roots from mature trees (with permission!) and propagate in moist soil.
- Grafting: Combine a maple scion with a hardy rootstock for faster growth.
- Nursery seedlings: Pre-grown trees (1–3 feet tall) skip the seedling stage entirely.
Wrapping up and next steps
Maple trees reproduce through a fascinating blend of wind-pollinated flowers and winged samaras, showcasing nature’s ingenuity. Whether you’re a gardener, nature enthusiast, or simply curious, understanding this process reveals the beauty behind how these iconic trees thrive—and even inspire you to nurture your own! 🌿
Ready to take the next step? Plant a maple seedling or observe one in your area—you might just witness the magic of reproduction firsthand!