Container Gardens
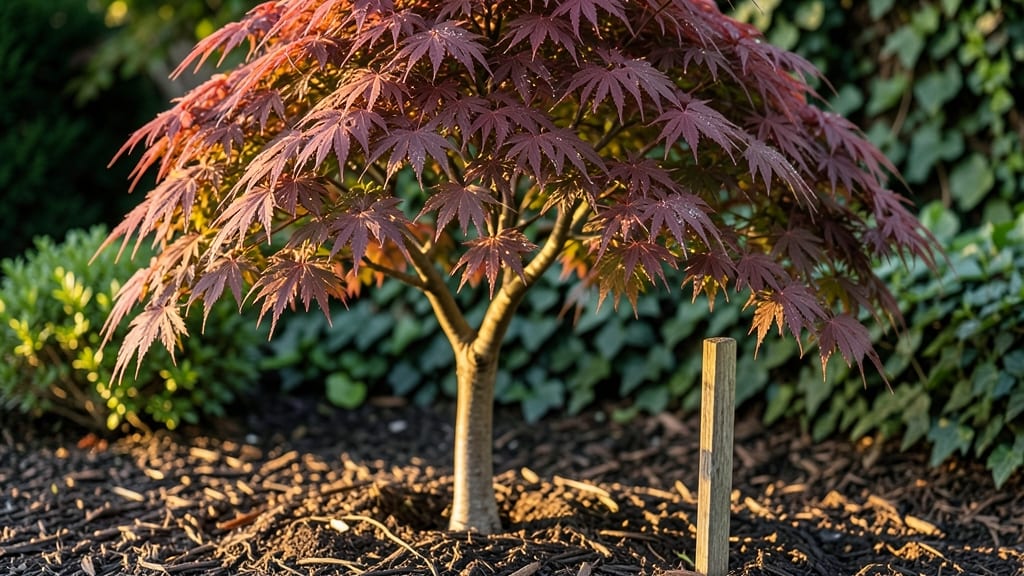
Growing a Japanese maple tree in the Pacific Northwest means you get to enjoy its fiery fall colors and its resilience against winter freezes. 🍁 I learned the hard way that choosing the right variety—like the hardy 'Bloodgood' or delicate 'Dissectum'—makes all the difference when those first frosts hit.
The secret isn't just about planting; it's about mimicking its natural habitat in your yard or container.
You'll need well-draining soil (think 60% organic matter, 40% gritty sand), a spot with morning sun and afternoon shade, and a container at least 15 gallons if growing in pots. Watering's the tricky part—too much and roots rot, too little and leaves crisp.
I've found mulching with 3 inches of wood chips keeps moisture steady without smothering roots, and that's a game-changer for PNW winters.
By spring, you'll see new growth that's shockingly lush, with leaves unfurling in shades of burgundy or chartreuse depending on the variety.
Pruning in late winter (before buds swell) keeps the shape elegant, and fertilizing with slow-release granules in early spring gives it the boost it needs for vibrant foliage all season.
Here's the thing—Japanese maples thrive when you treat them like the divas they are. They'll reward you with 10+ years of seasonal drama if you avoid common mistakes like overwatering in winter or planting too deep. Let's get yours established so it becomes the centerpiece of your garden.
📚 In This Guide
- What you need
- Instructions
- Tips and common mistakes
- Wrapping up and next steps
What you need
- ● Japanese Maple Tree: Choose a Pacific Northwest frost-resistant variety like Acer palmatum 'Bloodgood' or 'Emperor I'. Buy a 1- to 3-gallon container sapling from a reputable nursery.
- ● Container (if potted): A 15- to 20-gallon pot with drainage holes (e.g., ceramic, fiberglass, or high-quality plastic). Pro tip: Ensure it’s at least 12 inches deep for root growth! 💡
- ● Well-Draining Soil: 1 part high-quality potting mix + 1 part organic matter (e.g., compost or coco coir) + 1 part perlite or pumice for aeration.
- ● Mulch: 2-3 inches of organic mulch (e.g., shredded bark or wood chips) to retain moisture and regulate temperature.
- ● Garden Gloves (to protect your hands from thorns and soil).
- ● Trowel or Spade (for digging and transplanting).
- ● Watering Can or Hose with Gentle Nozzle (Japanese maples hate soggy roots!).
- ● Pruning Shears (sterilized, for shaping and maintenance).
- ○ pH Test Kit (optional)—Ideal soil pH: 5.0–6.5 (slightly acidic).
- ○ Fertilizer (optional)—Use a balanced, slow-release fertilizer (e.g., 10-10-10) or organic options like fish emulsion.
- ● Sunlight: Partial shade (4–6 hours of dappled sun daily). Avoid harsh afternoon sun in hot climates.
- ● Water Access: A spot near a water source (they need consistent moisture, especially in containers).
- ● Wind Protection: Young trees are sensitive to wind—place in a sheltered spot or use a burlap windbreak if needed.
- ● Patience: Japanese maples grow slowly (6–12 inches per year) but reward you with stunning foliage over time! 🌸
Step-by-Step instructions for cultivating a Pacific Northwest Japanese maple
Here’s the method I’ve used to establish healthy, frost-hardy Japanese maples in PNW climates—where winter winds and wet soil can make or break a tree.
🌱 Step 1: Select the Right Variety and Site
For the Pacific Northwest’s USDA Zones 6-8, choose a dwarf or semi-dwarf cultivar like Acer palmatum ‘Bloodgood’ or Acer japonicum ‘Aconitifolium’. These varieties handle our 10-20°F winters better than larger types. Site your tree where it gets morning sun and afternoon shade—full sun scorches leaves in summer, while too much shade weakens growth.
Japanese maples have shallow roots, so avoid low spots where water pools. The soil should drain well but retain moisture—clay-heavy PNW soil often needs amendment. Test your site’s drainage: dig a 12-inch hole, fill it with water, and check if it drains in under 2 hours. If not, raise the planting area with 2-3 inches of compost mixed into the top 6 inches of native soil.
🪴 Step 2: Prepare the Planting Hole and Amend Soil
Dig a hole twice as wide as the root ball but no deeper—burying too deep suffocates roots. Loosen the sides of the hole with a shovel to encourage root spread. Mix half native soil with half high-quality compost (avoid fresh manure—it burns roots). For acid-loving Japanese maples, add 1 pound of peat moss or sulfur to 5 gallons of soil if your soil tests above pH 6.5.
Remove the tree from its container and soak the root ball for 10 minutes to hydrate dry roots. Gently tease apart any circled or tangled roots—this prevents girdling as the tree matures. Place the tree in the hole so the top of the root ball sits 1-2 inches above ground level (settling happens over time). Backfill with your amended soil mix, tamping lightly to eliminate air pockets.
☀️ Step 3: Water Deeply and Mulch Strategically
Water immediately after planting with 5 gallons of water, applied slowly at the base. Japanese maples are drought-sensitive but hate soggy roots—water deeply every 3-4 days until new growth appears (usually 4-6 weeks). After that, water once a week unless rainfall provides 1 inch of moisture. Check soil moisture by sticking your finger 2 inches deep—if it’s dry, water.
Apply 3 inches of mulch (wood chips or bark) over the root zone, keeping it 6 inches away from the trunk to prevent rot. Mulch conserves moisture and protects roots from PNW’s fluctuating temperatures. Replenish mulch annually in early spring—never let it pile higher than 3 inches, or it’ll smother the tree.
✂️ Step 4: Prune for Structure and Winter Hardiness
Prune newly planted Japanese maples only to remove dead or damaged branches. Avoid heavy pruning—these trees grow slowly, and aggressive cuts stress them. Wait until late winter (February) to shape the tree, when it’s dormant but before bud break. Use clean, sharp pruners to make cuts just outside the branch collar (the swollen area where the branch meets the trunk).
Thin out crossing or rubbing branches first—they create wounds that invite disease. For PNW’s windy conditions, prune to open the canopy slightly, allowing air circulation. Never prune more than 25% of the foliage in one season, or you’ll weaken the tree’s ability to handle winter. Seal larger cuts (½ inch or wider) with pruning sealant to prevent moisture loss.
⏰ Step 5: Winterize for Frost and Wind Protection
In Zone 6 PNW, young Japanese maples (under 3 years old) need extra winter care. Wrap the trunk with tree guard (burlap or commercial wrap) to protect it from sunscald (winter sun damage) and rodent gnawing. Stake the tree if it’s taller than 4 feet—PNW winds can snap young stems. Bury stakes 6 inches deep and tie the tree loosely with soft cloth strips (never wire, which cuts into bark).
Apply a 2-inch layer of mulch in late fall (November) to insulate roots. If your winter dips below 10°F, drape frost cloth over the tree (secure it loosely to allow airflow). Remove the cloth in early spring once buds swell—trapped heat can cause rot. Avoid fertilizing in fall; the tree needs to harden off before dormancy. Resume feeding in early spring with a balanced 10-10-10 fertilizer applied 6 inches from the trunk.
Tips & tricks for cultivating a Pacific Northwest Japanese maple
A few key strategies can make all the difference when establishing your Japanese maple in PNW's challenging climate.
Site Selection Secret: The morning sun/afternoon shade balance is critical—especially in PNW's summer heat. I've found that east-facing locations with afternoon shade from nearby structures or larger trees create the perfect microclimate. In urban areas, consider planting near a building's east side where afternoon shade naturally occurs. The key is avoiding both full sun exposure and dense shade that weakens growth.
Drainage Test: That 2-hour drainage test in Step 1 is non-negotiable for PNW's clay-heavy soils. If your soil fails the test, don't just add compost—create a raised bed by mounding native soil 6-8 inches high before planting. This elevation prevents water from pooling around the shallow roots during our frequent winter rains. I've seen many trees fail in low spots where water sits for days.
Root Ball Prep: The 10-minute soak for the root ball in Step 2 is essential, but what happens next matters just as much. After teasing apart any circling roots, I recommend making two small vertical cuts on opposite sides of the root ball with a sharp knife. This encourages roots to grow outward rather than circling, which is especially important for young trees in windy PNW conditions. Just be careful not to cut too deeply—you're only breaking surface tension, not removing roots.
Winter Protection: When temperatures drop below 10°F in Zone 6, that frost cloth becomes your best friend. I've learned the hard way that leaving it on too long in spring can cause rot—remove it as soon as buds begin to swell in early spring. For extra protection, consider wrapping the entire tree (including frost cloth) in clear plastic wrap during extreme cold snaps. This creates a mini greenhouse effect without trapping too much heat. Just remember to remove it during the day when temperatures rise above freezing.
Pro Tips for Growing A Japanese Maple Tree
- A few key strategies can make all the difference when establishing your Japanese maple in PNW's challenging climate.
- Site Selection Secret: The morning sun/afternoon shade balance is critical—especially in PNW's summer heat. I've foun...
- Drainage Test: That 2-hour drainage test in Step 1 is non-negotiable for PNW's clay-heavy soils. If your soil fails t...
Frequently asked questions
Got questions about nurturing your Japanese maple tree? You’re not alone—these stunning trees require a little extra TLC, especially in the Pacific Northwest’s unique climate. Below, we’ve tackled the most common concerns to help you grow a thriving, frost-resistant beauty.
How cold can a Japanese maple tolerate in the PNW?
Most varieties handle 10–20°F without issue, but younger trees or tropical types (like Palmatum) may need winter protection. In the PNW, mulch heavily around the base and wrap the trunk with burlap or frost cloth for extra safeguarding. Hardy types like Acers palmatum ‘Bloodgood’ thrive in our winters!
When is the best time to plant a Japanese maple in the Pacific Northwest?
Spring (March–May) or early fall (September–October) are ideal. Avoid planting in summer heat or winter frost—roots need time to establish before extreme temps. PNW’s mild winters make fall a great option, but ensure the ground isn’t frozen.
Can I grow a Japanese maple in a container?
Smaller varieties (like ‘Emperor I’ or ‘Dwarf Moon’) thrive in containers. Use a well-draining mix, a pot with drainage holes, and repot every 2–3 years. Place it in partial shade and water consistently—containers dry out faster than ground soil!
What pests should I watch for in PNW Japanese maples?
Keep an eye out for spider mites, aphids, and scale insects, which love maple leaves. Treat early with insecticidal soap or neem oil. Japanese beetles can also be a nuisance—handpick them or use row covers. Healthy trees with proper watering and pruning are less vulnerable!
Why are my Japanese maple leaves turning yellow or brown?
Yellow leaves often signal overwatering or nutrient deficiency, while brown edges may mean underwatering or sunburn. Check soil moisture and ensure your tree gets morning sun + afternoon shade. PNW’s damp winters can also cause fungal issues—prune affected branches promptly.
Wrapping up and next steps
Growing a Japanese maple tree in the Pacific Northwest is a rewarding journey that brings year-round beauty to your garden—whether in containers or the ground. 🌿 With the right frost-resistant variety, proper care, and a touch of patience, you’ll enjoy vibrant foliage, stunning autumn colors, and even delicate flowers.
Now that you’re equipped with the essentials, it’s time to plant your tree and watch it thrive!
Start by selecting your spot and giving it the love it deserves—your future tree will thank you with breathtaking views for decades. Happy gardening! 🌟