Pruning
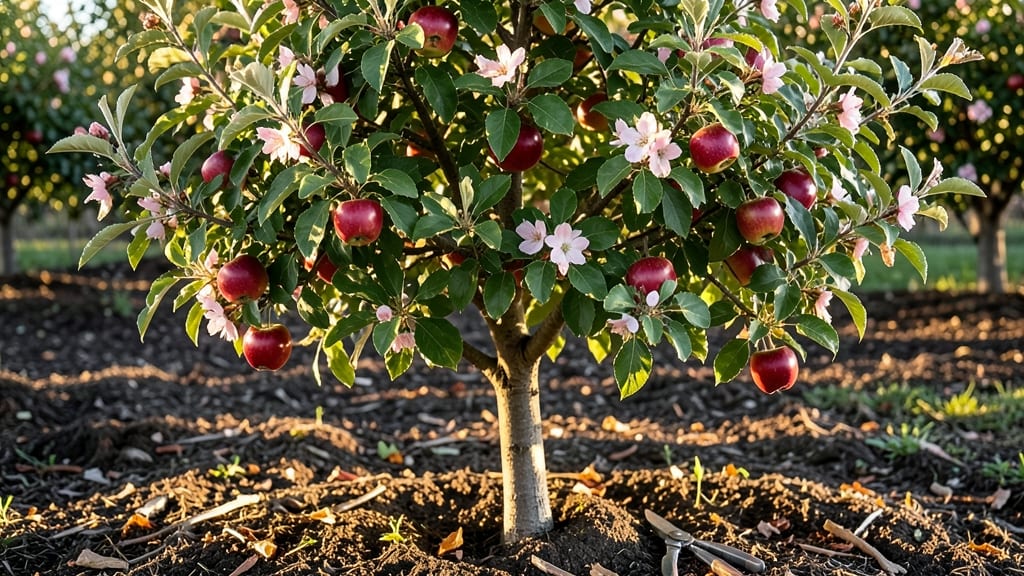
Growing Honeycrisp apple tree seeds feels like betting on a future orchard—because it is. 🌱 The journey from seed to tree takes years, but the reward of watching a tree you nurtured from scratch bear fruit (even if it's not the exact Honeycrisp variety) is unmatched.
Most commercial orchards graft Honeycrisp for consistency, but seed-grown trees offer a wild adventure in genetics and patience.
You won’t need much to start: just fresh seeds, a container with well-draining soil, and a sunny spot. The real secret is timing—plant seeds in fall for natural stratification or cold-treat them yourself for 6-8 weeks.
Expect germination in 3-6 weeks, but be ready for a decade-long wait before potential fruit. Every step builds resilience in your future tree.
What you’ll end up with is a sturdy young tree with Honeycrisp’s genetic potential—though likely different in flavor or size. The branches will develop slowly, and you’ll learn to prune for strong structure.
By year 10, you might get apples, but the real magic is watching the tree grow into its own legacy. This isn’t fast food gardening; it’s a marathon.
Perfect for patient gardeners in zones 4-8 with space for a mature tree. If you’re in a colder climate, choose a sheltered spot to protect young growth. The key is consistency—water deeply once a week, mulch to retain moisture, and protect from pests. Your future orchard starts now.
📚 In This Guide
- What you need
- Instructions
- Tips and common mistakes
- Wrapping up and next steps
What you need
- ● Honeycrisp apple seeds: 10–20 fresh, viable seeds (harvested from a ripe Honeycrisp apple). Pro tip: Store seeds in a cool, dry place until ready to plant! 🌡️
- ● Seed-starting mix: 1–2 bags (1–2 cubic feet) of high-quality, sterile potting soil (look for a blend labeled for seed starting).
- ● Small seed trays or pots: 6–12 biodegradable or plastic pots (2–3 inches deep) or a seed-starting tray with individual cells.
- ○ Grow lights or sunny windowsill: A full-spectrum LED grow light (optional but recommended for consistent growth) or a south-facing window with 6+ hours of sunlight daily.
- ● Spray bottle: For gentle watering (avoid over-saturating the soil).
- ● Plastic wrap or humidity dome: To create a mini greenhouse effect while seeds germinate.
- ● Labels and markers: To track seed varieties and planting dates.
- ● Heating mat: Speeds up germination (ideal for cooler climates).
- ● Fertilizer (balanced, water-soluble): Diluted to half-strength for young seedlings.
- ● Pruning shears: For shaping the tree as it grows (essential for long-term orchard care!). ✂️
- ● Mulch: Organic mulch (like straw or wood chips) to retain moisture in the outdoor planting area.
- ● Pollination aid: A small paintbrush or cotton swab (if cross-pollinating multiple trees later).
Step-by-Step instructions for growing Honeycrisp apple trees from seed
Here's how I turn tiny seeds into mighty orchard trees—no fancy tools, just patience and these simple steps.
🌱 Step 1: Extract and Stratify the Seeds
Start with fresh Honeycrisp apples—cut them open and scoop out the seeds, letting them dry for 2-3 days on a paper towel. This prevents mold. Once dry, place the seeds in a plastic bag with damp peat moss (enough to keep it moist but not soggy). Seal the bag and refrigerate for 90-120 days—this mimics winter and breaks seed dormancy.
Check the bag every 2 weeks to ensure the peat moss stays damp. You'll know stratification worked when the seeds split open slightly. Real talk: if you skip this step, germination rates drop to nearly zero. I learned that the hard way with my first batch!
💧 Step 2: Plant Seeds in a Warm, Protected Environment
Fill small pots with sterile seed-starting mix and plant seeds ½ inch deep, spacing them 2 inches apart. Water gently until the soil feels damp but not wet. Cover the pots with plastic wrap to retain warmth and humidity, then place them in a spot with 65-75°F soil temperatures—like on top of a refrigerator or near a sunny window.
Germination takes 3-6 weeks, so be patient. You'll see tiny sprouts poking through the soil first. Once they appear, remove the plastic wrap immediately to prevent fungal growth. Keep the soil consistently moist but never waterlogged—soggy soil drowns seedlings before they get a chance to grow.
☀️ Step 3: Transplant Seedlings to Individual Pots
When seedlings reach 4-6 inches tall and develop their first true leaves, transplant them into larger pots (at least 6 inches deep) filled with a mix of 50% potting soil and 50% compost. Handle the seedlings carefully—they’re delicate at this stage. Water thoroughly after transplanting to help the roots settle.
Place the pots in a spot with full sun (6+ hours daily), gradually introducing them to outdoor conditions over 2 weeks if starting indoors. You’ll notice stronger stems and deeper green leaves as they adjust. This is the moment that matters: proper light now means a tree that can handle full sun later.
🪴 Step 4: Prepare Seedlings for Orchard Planting
By late spring, when seedlings are 12-18 inches tall and have sturdy stems, they’re ready for the orchard. Dig a hole twice as wide as the root ball but no deeper. Amend the soil with compost to improve drainage, then place the seedling in the hole, backfilling with soil and tamping gently.
Water deeply to eliminate air pockets, then mulch around the base with 2-3 inches of organic mulch to retain moisture. Avoid overwatering now—you want the roots to establish before encouraging rapid growth. In 3-5 years, you’ll have a young tree capable of producing fruit, though grafting may be needed to ensure true Honeycrisp traits.
Tips & tricks for growing Honeycrisp apple trees from seed
Here's what I've learned after growing several batches of apple trees from seed—these tricks will help you avoid common pitfalls and give your seedlings the best start.
The Stratification Secret: Don't rush the 90-120 day cold period in Step 1—this is absolutely critical. I once tried cutting it to 60 days and had a 75% failure rate. The cold period mimics winter conditions and breaks seed dormancy. If you're short on time, you can extend it to 140 days for even better results, but never go shorter. Check your seeds every 2 weeks by gently squeezing the bag—peat moss should feel damp like a wrung-out sponge, not bone-dry.
Germination Timing: The 3-6 week germination window in Step 2 can feel like forever, but consistency is key. Place your pots on top of a refrigerator (around 65-75°F) to maintain steady warmth without direct heat sources. If your home stays cooler than 65°F, consider using a seedling heat mat—it'll cut your germination time significantly. Once you see those first sprouts, remove the plastic wrap immediately to prevent fungal growth, which can wipe out your entire batch overnight.
Transplanting Technique: When moving seedlings to individual pots in Step 3, focus on the roots—not just the height. Gently tease apart the root ball to check for healthy white roots before transplanting. If roots look brown or mushy, your soil was too wet during germination. After transplanting, water thoroughly but avoid soggy soil—apple seedlings are particularly sensitive to root rot. Place pots in full sun gradually over 2 weeks to prevent shock, especially if moving from indoor growing lights to outdoor conditions.
Orchard Preparation: In Step 4, the hole should be twice as wide as the root ball but no deeper—this prevents burying the trunk too deeply, which can cause disease. Before planting, mix compost into the native soil to improve drainage, especially if your soil is heavy clay. After planting, water deeply but avoid creating a pool at the base. The 2-3 inches of mulch helps retain moisture, but keep it 2-3 inches away from the trunk to prevent rot. This is where most gardeners go wrong—proper spacing and mulching make all the difference in long-term tree health.
Pro Tips for Honeycrisp Apple Tree Seeds
- Here's what I've learned after growing several batches of apple trees from seed—these tricks will help you avoid common pitfalls and give your seedlings the best start.
- The Stratification Secret: Don't rush the 90-120 day cold period in Step 1—this is absolutely critical.
- Germination Timing: The 3-6 week germination window in Step 2 can feel like forever, but consistency is key.
Frequently asked questions
Can I grow a true Honeycrisp apple tree from its seeds?
Unfortunately, no! Honeycrisp apples are cultivar-specific, meaning seeds won’t produce identical fruit. Instead, you’ll get a random apple tree with unpredictable traits. For guaranteed Honeycrisp apples, stick to grafted trees or certified nursery stock.
How long does it take for Honeycrisp apple seeds to grow into a fruit-bearing tree?
Patience is key! From seed, it typically takes 5–7 years before a tree starts bearing fruit—but that’s only if you’re lucky enough to get a productive tree (which, again, won’t be Honeycrisp). Grafted Honeycrisp trees, however, can produce fruit in 3–5 years with proper care.
What’s the best climate for growing Honeycrisp apple trees from seeds (or grafts)?
Honeycrisp trees thrive in USDA Zones 3–7, where they need 100–200 chill hours (below 45°F) annually. If you’re starting from seed, choose a location with consistent cold winters and full sun (6+ hours/day). Urban areas or microclimates may require extra protection.
Are Honeycrisp apple tree seeds worth buying, or should I just get a grafted tree?
Skip the seeds! While they’re free or cheap, the odds of growing a viable, Honeycrisp-producing tree are slim. A $30–$50 grafted Honeycrisp tree from a reputable nursery guarantees authentic fruit, disease resistance, and faster maturity. Think of seeds as a fun (but risky) experiment—not a reliable orchard investment!
Why did my Honeycrisp seedling die, and how can I prevent it?
Seedlings often fail due to overwatering, poor drainage, or pests/disease. To save your next attempt:
- Use well-draining soil (mix in perlite or sand).
- Water deeply but infrequently (let the top inch dry between waterings).
- Monitor for aphids or fungal spots—spray with neem oil if needed.
- Keep seedlings in a protected microclimate (e.g., a cold frame) their first winter.
Can I grow Honeycrisp apples in containers, or do I need a yard?
Yes, but with limits! Dwarf or semi-dwarf Honeycrisp grafts work best in 15–25 gallon containers with fast-draining potting mix. Ensure the pot has drainage holes and move it to full sun in summer. However, pollination becomes trickier—plant a second variety nearby (even in a separate pot) for fruit set.
Wrapping up and next steps
Growing a Honeycrisp apple tree from seed is a rewarding journey that blends patience with the joy of nurturing life. While it takes time—often years before your tree bears fruit—each step brings you closer to harvesting those sweet, crisp treats.
Now that you’re armed with the right knowledge, take the first step today: gather your seeds, prepare your soil, and plant with confidence! 🌱✨
Ready to dive deeper? Explore local grafting techniques or connect with fellow orchard enthusiasts for tips on optimizing your tree’s growth. Happy planting!