Trees
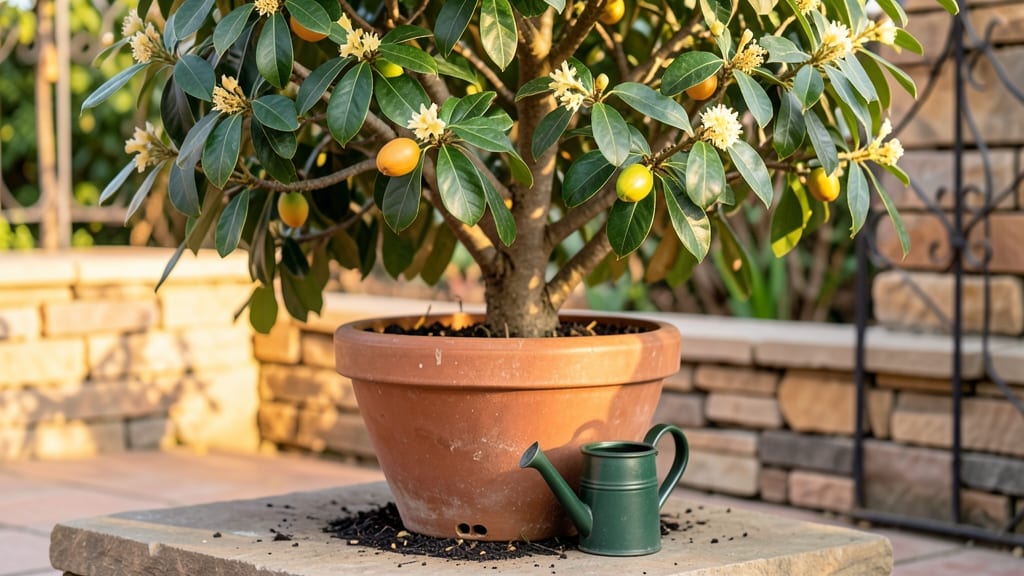
Growing loquat trees in pots lets you enjoy tropical fruit without a backyard—just a sunny spot and the right container. 🌱 I’ve grown these compact trees in 15-gallon pots for years, and they produce sweet, honey-like fruit every spring.
The key is mimicking their natural habitat: well-draining soil, afternoon shade in hot climates, and consistent moisture without soggy roots.
You’ll need a pot at least 18 inches deep (deeper for dwarf varieties), a mix of 50% potting soil and 50% perlite or orchid bark, and a location with 6+ hours of morning sun.
Loquats thrive in containers because they’re shallow-rooted, but they reward patience—your first harvest might take 2-3 years, depending on the variety. Prune lightly after fruiting to encourage bushier growth.
The payoff is worth it: glossy leaves, fragrant white blossoms, and fruit that bursts with flavor when ripe. You’ll spot the first fruits forming in late winter, turning from green to golden-yellow by spring.
The tree stays small enough for patios or balconies, making it perfect for urban gardeners or small spaces.
Watch for root-bound stress (yellowing leaves) or nutrient deficiencies (purple stems)—both fix easily with repotting or a balanced citrus fertilizer. With the right care, your potted loquat will outlive most houseplants and keep producing for decades. Let’s get those roots growing!
📚 In This Guide
- What you need
- Instructions
- Tips and common mistakes
- Wrapping up and next steps
What you need
- ● Pot: A minimum 18-inch diameter container (24+ inches ideal) with drainage holes. Choose terracotta or fabric pots for breathability.
- ● Well-draining potting mix: 1 part cactus/succulent mix + 1 part peat moss + 1 part perlite (or a commercial citrus blend with added sand).
- ● Loquat tree: A dwarf variety (e.g., ‘Big Jim’ or ‘Champagne’) from a nursery—3-5 years old for faster fruiting.
- ● Tools: Trowel or small shovel
- ● Pruning shears (sterilized)
- ● Spray bottle (for misting)
- ○ pH test kit (optional but helpful)
- ● Fertilizer: Slow-release citrus fertilizer (e.g., Osmocote) or liquid seaweed extract for a nutrient boost.
- ● Mulch: Pine bark or straw to retain moisture and regulate soil temp.
- ● Support: A small stake or trellis if your tree grows tall.
- ● Drip irrigation system: For consistent watering (especially in hot climates).
- ● Sunlight meter: To track light exposure for optimal placement.
Step-by-Step guide to growing loquat trees in containers
Here's how to cultivate a thriving loquat tree in pots—ideal for small spaces and urban balconies.
🪴 Step 1: Select the Right Pot and Drainage System
Choose a minimum 18-inch diameter pot with drainage holes—loquat trees need room for roots to spread and excess water to escape. I prefer unglazed ceramic because it breathes and prevents root rot. If using plastic, drill extra holes near the bottom to improve airflow. Place a 2-inch layer of gravel or broken pottery at the base to create a drainage reservoir that prevents soggy soil.
Loquats tolerate mild root restriction but will reward you with better fruit production if you upgrade to a 24-inch pot after two years. The key is ensuring the pot is at least 12 inches deep—shallow containers stunt root growth and limit nutrient uptake. I always add a mesh screen over the drainage holes to keep soil in place while allowing water to flow freely.
🌱 Step 2: Prepare Well-Draining Soil and Plant Your Sapling
Fill the pot with a mix of 60% premium potting soil, 30% perlite or pumice, and 10% compost—this lightweight blend prevents compaction and mimics the loquat’s native well-draining conditions. I avoid garden soil; it compacts in containers and suffocates roots. Before planting, moisten the mix until it feels like a slightly damp sponge—not wet, not dry.
Gently remove your loquat sapling from its nursery pot and tease the roots outward if they’re circling. Position it so the graft union (visible bump near the base) sits 1 inch above soil level—this prevents root rot and ensures proper healing. Backfill with your mix, pressing lightly to eliminate air pockets, but avoid compacting the soil. Water deeply until it drains from the bottom holes.
☀️ Step 3: Position for Full Sun and Consistent Care
Loquats thrive in full sun (6+ hours daily) but need afternoon shade in zones hotter than 9b to prevent leaf scorch. I place mine on a south-facing balcony with a 50% shade cloth from 1 PM to 4 PM during summer. Young trees benefit from morning sun exposure to harden off gradually—move them outdoors only after last frost risk passes.
Water when the top 2 inches of soil feel dry—overwatering is the #1 killer of potted loquats. I use a self-watering pot with a moisture meter to avoid guesswork. Fertilize every 6 weeks in spring/summer with a balanced 10-10-10 formula, reducing to half-strength in winter. Prune leggy branches in late winter to encourage bushier growth and better fruit set.
⏰ Step 4: Winter Care and Long-Term Container Management
When temperatures drop below 40°F, move your loquat indoors near a sunny window or under grow lights for 12 hours daily. I wrap the pot in bubble wrap to protect roots from cold drafts—loquats are subtropical but can handle brief dips to 20°F if dry. Reduce watering to every 3-4 weeks once growth slows in fall, and stop fertilizing entirely in winter.
Every 2-3 years, refresh the soil by removing the top 4 inches and replacing it with fresh mix. This prevents nutrient depletion and improves drainage. If your tree outgrows its pot (you’ll see roots circling the drainage holes), repot into a container 2-4 inches larger in early spring. Loquats fruit best when slightly root-bound, so don’t rush upgrades—wait until you see roots escaping the drainage holes.
Tips & tricks for growing loquat trees in containers
These pro tips will help you nurture a healthy, fruit-bearing loquat tree even in limited space.
Pot Size Strategy: In Step 1, when selecting your 18-inch pot, consider adding a second drainage hole if your pot only has one. Loquats are sensitive to waterlogging, and extra drainage prevents root rot. I've found that adding a mesh screen over the holes (as mentioned) also prevents soil loss while allowing proper drainage. The 24-inch upgrade after two years is worth it—it gives roots room to spread and supports better fruit production.
Soil Mix Secrets: For Step 2, when mixing your 60-30-10 blend of potting soil, perlite, and compost, I recommend adding a handful of worm castings to the compost portion. This boosts nutrient availability and improves soil structure. Also, if you notice the soil compacting after watering, fluff it gently with a small fork—loquats hate dense soil that restricts airflow.
Sunlight Optimization: In Step 3, if you're in a hotter zone than 9b, consider using a movable shade screen instead of a fixed 50% shade cloth. This gives you flexibility to adjust coverage as the sun moves. For morning sun exposure, place your tree near a south-facing window if balcony space is limited. Remember, gradual hardening is key—don't move young trees directly from indoor to full sun.
Winter Care Pro Tip: When temperatures drop below 40°F in Step 4, I've found that placing your wrapped pot near a south-facing window with supplemental grow lights creates the ideal 12-hour light cycle. If you notice leaves dropping during winter, it's normal—just reduce watering further. The bubble wrap trick works wonders, but don't wrap the pot too tightly; roots still need to breathe.
Pro Tips for Growing Loquat Trees In Pots
- These pro tips will help you nurture a healthy, fruit-bearing loquat tree even in limited space.
- Pot Size Strategy: In Step 1, when selecting your 18-inch pot, consider adding a second drainage hole if your pot onl...
- Soil Mix Secrets: For Step 2, when mixing your 60-30-10 blend of potting soil, perlite, and compost, I recommend addi...
Frequently asked questions
Got questions about growing loquat trees in pots? You’re not alone! Here are some of the most common concerns—and their answers—to help you grow confidently, even in small spaces.
How big should my pot be for a loquat tree?
A young loquat tree thrives in a 5-gallon pot (12–16 inches wide) for the first year. As it matures, upgrade to 15–20 gallons (18–24 inches wide) for better stability and root growth. Ensure the pot has drainage holes to prevent root rot—loquats hate soggy feet!
When is the best time to plant a loquat tree in a pot?
Plant in early spring (after the last frost) or late fall (before temperatures drop below 40°F). Avoid summer heat stress—loquats dislike transplant shock. If buying bare-root, soak roots for 1–2 hours before potting to rehydrate them.
Can I grow a loquat tree from seed, or should I buy a grafted sapling?
While you can grow from seed, it’s a gamble—seedlings may not produce fruit true to the parent tree. For faster, fruit-bearing results, opt for a grafted loquat sapling (available at nurseries). Grafted trees start fruiting in 2–3 years vs. 5+ for seeds.
What if my potted loquat tree isn’t fruiting? How can I troubleshoot?
Check these common issues:
- Age: Young trees (under 3 years) focus on growth, not fruit. Be patient!
- Light: Loquats need 6+ hours of sunlight daily. Move pots to a sunnier spot if leaves yellow.
- Pollination: Hand-pollinate flowers with a soft brush if bees are scarce.
- Nutrients: Feed with citrus-specific fertilizer in spring and summer.
How do I protect my potted loquat tree in winter?
Loquats tolerate mild winters (down to 15°F), but pots freeze easily. Move trees to a garage or sheltered patio when temps drop below 30°F. Wrap the pot in bubble wrap or use a tree blanket for extra insulation. Water sparingly in winter—overwatering can drown roots.
Wrapping up and next steps
Growing loquat trees in pots is a rewarding way to enjoy tropical fruit even in small spaces! With the right container, soil, and care, your tree can thrive and produce delicious harvests year after year.
Whether you're a beginner or a seasoned gardener, the key is patience, consistency, and a little love—your efforts will pay off with fragrant blossoms and sweet, juicy fruit.
Ready to take the next step? Start with a healthy young tree or propagate your own from seeds, then watch your green thumb grow! 🌱✨ Happy potting—and happy harvesting!