Pruning
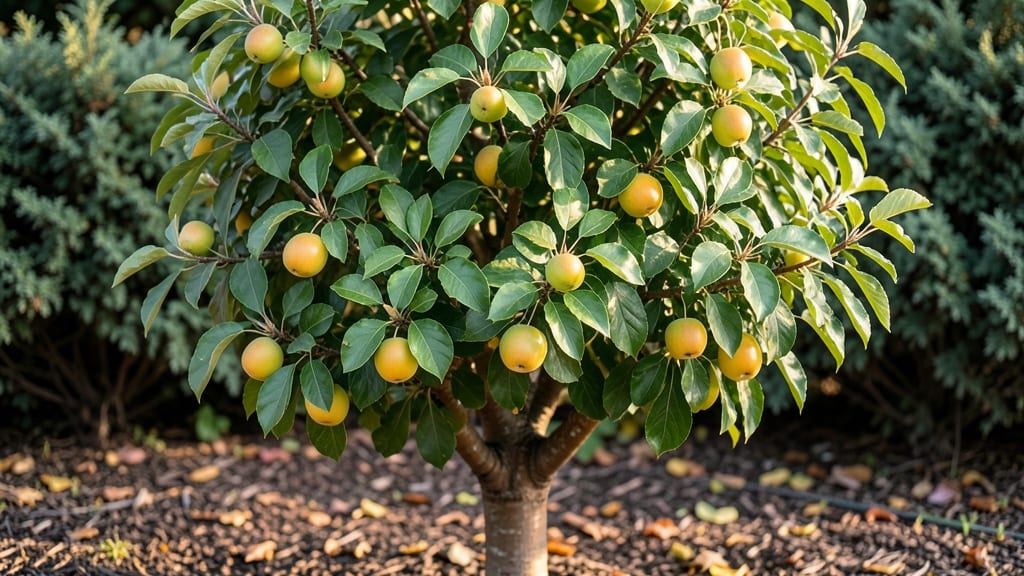
Growing a gold plum tree in the Pacific Northwest means you’ll have a stunning, low-maintenance centerpiece that thrives even when winter hits hard. 🌱 I’ve watched mine survive freezing temps while still bursting with golden foliage come spring—proof that this tree isn’t just pretty, but tough.
The secret lies in its natural resilience and smart pruning to shape it for both beauty and health.
These trees love full sun but adapt to partial shade, making them perfect for smaller yards or urban gardens. Well-draining soil is key—amend heavy clay with compost to keep roots happy. Water deeply once established, but don’t overdo it; soggy soil invites root rot.
The real magic happens in late winter or early spring when you prune to encourage vibrant new growth and maintain that iconic golden hue.
By summer, you’ll have a tree that’s both a conversation starter and a pollinator magnet, with delicate spring blooms and glossy foliage that glows like liquid gold. The best part? It handles our region’s frosts like a champ, so you won’t lose it to sudden cold snaps.
Just keep an eye out for aphids or scale—spray with neem oil if needed—and you’re all set.
Whether you’re planting a young sapling or shaping an older tree, the Pacific Northwest’s climate actually works in your favor. This tree isn’t just surviving here—it’s thriving, and with the right care, it’ll be the star of your garden for decades.
📚 In This Guide
- What you need
- Instructions
- Tips and common mistakes
- Wrapping up and next steps
What you need
- ● Gold Plum Tree Sapling: 1–2 frost-hardy varieties (e.g., Prunus salicina ‘Golden Japan’ or ‘Santa Rosa’). Check local nurseries for PNW-adapted rootstock.
- ● Pruning Shears: Bypass pruners (sharp, 6–8” blades) for clean cuts on branches <½” thick.
- ● Loppers: 1 pair (for branches ½”–1½” thick). Look for ratcheting models for leverage.
- ● Hand Saw: Pruning saw (7–10” blade) for thick branches >1½”.
- ● Disinfectant: 70% isopropyl alcohol or 10% bleach solution (1 part bleach to 9 parts water) to sterilize tools between cuts.
- ○ Pruning Sealant: Optional but recommended for large cuts (>¾” diameter) to prevent disease. Use a tree wound paint with copper or sulfur.
- ● Gloves: Heavy-duty leather or nitrile-coated gloves (PNW thorns are no joke!).
- ● Work Boots: Steel-toe or sturdy shoes with ankle support.
- ● Watering Can/Hose: 2–3 gallons capacity for post-pruning hydration.
- ● Mulch: 2–3 inches of wood chips or straw (keep 6” away from trunk to avoid rot).
- ● Extension Pole: 6–10 ft. for high branches (save your back!).
- ● Ladder: Sturdy, non-slip ladder for mature trees (30+ ft. height).
- ● Tree Bag: For young saplings to protect from deer/squirrels (PNW wildlife loves tender bark!).
- ● Soil Moisture Meter: To monitor root zone hydration during PNW’s dry summers.
- ● Frost Cloth: Lightweight row cover (30–50% shade) for young trees during late frosts (common in PNW springs!).
- ● Organic Fertilizer: Balanced 10-10-10 or composted manure (apply in early spring).
Step-by-Step guide to pruning your gold plum tree for Pacific Northwest resilience
Here's how to shape your tree for strong growth while protecting it from our region's wild temperature swings.
✂️ Step 1: Time Your Pruning for Optimal Healing
Prune your gold plum tree during its dormant season, ideally between late winter and early spring—just as buds begin to swell but before new growth appears. This timing ensures the tree isn't stressed by cold snaps or early blooms. In the Pacific Northwest, aim for February to March when daytime temperatures consistently stay above 40°F. Avoid pruning in fall, as late-season cuts won't harden off properly before winter.
Watch for the first signs of bud swell—tiny green bumps forming along the branches. That's your signal to grab your tools. If you prune too early, you risk exposing fresh cuts to late frosts. If you wait too long, you'll encourage tender new growth that can't survive our unpredictable spring weather.
🌿 Step 2: Remove Dead, Damaged, or Crossing Branches First
Start by identifying branches that are dead, diseased, or rubbing against each other. These compete with healthy growth and create entry points for pests. Use sharp pruning shears to make clean cuts at a 45-degree angle, about ¼ inch above an outward-facing bud. For larger branches over ½ inch thick, use loppers and cut just outside the branch collar—the swollen area where the branch meets the trunk.
Look for branches growing inward toward the center of the tree. These crowd the canopy and reduce airflow, increasing disease risk. Remove these first, as they won't affect the tree's overall shape. You'll know you're on the right track when you see sunlight filtering through the branches more easily after this initial cleanup.
☀️ Step 3: Shape the Tree for Sun Exposure and Airflow
Open the center of the tree by removing 20-30% of the smallest branches to improve light penetration and airflow. Focus on branches growing straight up or horizontally—these create dense areas where moisture lingers. Cut back to a lateral branch or bud that grows outward. In gold plums, this encourages the tree to develop a more open, vase-like shape that's better equipped to handle our region's damp winters.
Step back frequently to visualize the tree's structure. You want a balanced silhouette with no single branch dominating. Pacific Northwest winters can bring heavy snow and wind—this open shape helps prevent branch breakage. Avoid heavy pruning in one session; spread it over 2-3 years if needed to reduce stress.
⏰ Step 4: Prune for Frost Resistance and Fruit Production
To protect against late frosts, remove water sprouts—those fast-growing, vertical shoots that appear along branches. These are weak and prone to frost damage. Cut them back to a lateral branch or bud. Also, thin out clusters of fruit to 6-8 inches apart on each branch. This ensures the remaining fruit gets enough sunlight and nutrients, and reduces the risk of frost damage to developing blossoms.
Pay special attention to the tree's lower branches. While gold plums can handle some shade, removing lower limbs that block sunlight from reaching the ground helps prevent fungal diseases that thrive in damp conditions. You'll know you've pruned correctly when the tree's canopy looks airy and the ground beneath receives at least 4-6 hours of sunlight daily during summer.
🪴 Step 5: Clean Up and Protect Your Tree
After pruning, sterilize your tools with 70% rubbing alcohol to prevent spreading disease. Rake up and dispose of all clippings—don't compost them, as they may harbor fungal spores. Apply a 2-3 inch layer of mulch around the base of the tree, keeping it 6 inches away from the trunk. This insulates roots from temperature swings and retains moisture during our dry summers.
Finally, consider wrapping the trunk with tree guard if you're in an area with heavy deer browsing or late frosts. This protects young bark from damage. Water deeply after pruning to help the tree recover. You'll see new growth emerging within 4-6 weeks—strong, healthy shoots that signal your pruning was successful.
Tips & tricks for pruning gold plum trees in the Pacific Northwest
These practical tips will help you navigate our region's unique climate challenges while keeping your gold plum tree healthy and productive.
Timing is Everything: The February to March window is ideal because it gives your tree time to heal before our unpredictable spring rains arrive. I've seen too many trees stressed by late frosts because pruning happened too early—wait until those tiny green buds appear, but don't delay past early spring when new growth begins. In colder PNW microclimates, you might need to wait until late March when daytime temps consistently stay above 40°F for at least a week.
Branch Angle Matters: When making cuts in Step 2, aim for that 45-degree angle just above an outward-facing bud. This creates a natural shield that protects the cut from rain and snow. I learned this the hard way after seeing water pool in poorly angled cuts during our wet winters. For branches thicker than ½ inch, use loppers and cut just outside the branch collar—this prevents unsightly stubs that can trap moisture and invite disease.
Visualize the Canopy: Step back frequently during Step 3 to check your progress. The goal is sunlight reaching the ground—you should see dappled light patterns on the soil beneath. I use the "cup of tea" test: if you can see sunlight filtering through the branches like tea leaves in hot water, you're on the right track. This open structure helps prevent fungal diseases that thrive in our damp climate while allowing air to circulate and reduce frost pockets.
Frost Protection Strategy: For water sprouts in Step 4, don't just cut them back—remove them completely at the base. These vertical shoots grow so fast they can't withstand our late spring frosts. I've seen them blacken dramatically after a 28°F night. Also, thin fruit clusters to 6-8 inches apart—this spacing ensures each plum gets enough sunlight to ripen properly and reduces the risk of frost damage to developing blossoms.
Pro Tips for Gold Plum Tree
- These practical tips will help you navigate our region's unique climate challenges while keeping your gold plum tree healthy and productive.
- Timing is Everything: The February to March window is ideal because it gives your tree time to heal before our unpredictable spring rains arrive.
- Branch Angle Matters: When making cuts in Step 2, aim for that 45-degree angle just above an outward-facing bud.
Frequently asked questions
What’s the best time to prune a gold plum tree in the PNW?
Prune your gold plum tree in late winter or early spring (February–March), just before buds swell but before new growth starts. This timing helps avoid frost damage while encouraging strong spring blooms. Avoid heavy pruning in fall, as it can stimulate tender growth that won’t survive winter.
How cold-hardy is a gold plum tree, and how do I protect it from frost?
The gold plum tree is frost-resistant to USDA Zone 5, but young trees or tender new growth may need extra care. Mulch the base with 4–6 inches of organic mulch (like straw or wood chips) in fall, and wrap the trunk with burlap or tree wrap if temps drop below 20°F. Water deeply before the first freeze to help roots withstand cold.
Can I prune a gold plum tree too much? What are the signs?
Yes! Over-pruning can stress the tree, leading to fewer flowers, weak growth, or even dieback. Signs include excessive leaf drop, stunted new shoots, or bare branches. Stick to removing no more than 25% of the canopy per year, and avoid "topping" (cutting back to a flat top)—this creates weak, vulnerable growth.
Why aren’t my gold plum tree’s fruits ripening properly?
If your plums stay small, tart, or fail to color, it’s often due to poor pollination, insufficient sunlight, or nutrient deficiencies. Ensure your tree gets 6+ hours of sun daily and plant a compatible pollinator variety nearby (like ‘Methley’ or ‘Stanley’). Test soil pH (ideal: 6.0–7.0) and fertilize in early spring with a balanced 10-10-10 formula.
What’s a good alternative if I can’t grow a gold plum tree?
If your climate or space is challenging, consider these frost-tolerant, low-maintenance alternatives:
- Apricot trees (e.g., ‘Goldcot’): Sweeter fruit, slightly less cold-hardy but still Zone 5-friendly.
- Cherry plums (e.g., ‘Flapjack’): Hardy, self-pollinating, and great for small gardens.
- Hardy figs (e.g., ‘Chicago Hardy’): Thrives in PNW microclimates with winter protection.
- Aronia berries: Super cold-hardy (Zone 3), disease-resistant, and packed with antioxidants.
Wrapping up and next steps
The gold plum tree is a stunning, frost-resistant addition to Pacific Northwest gardens—with the right pruning techniques, you’ll enjoy its beauty and bounty for years to come! 🌿 Remember to focus on open-center shaping, disease prevention, and seasonal timing to keep your tree thriving.
Now that you’re armed with the knowledge, roll up your sleeves and give your tree the care it deserves—your future harvests will thank you!
🔹 Next step: Grab your pruners, mark your calendar for late winter/early spring, and start pruning with confidence! 🌟