
Pruning
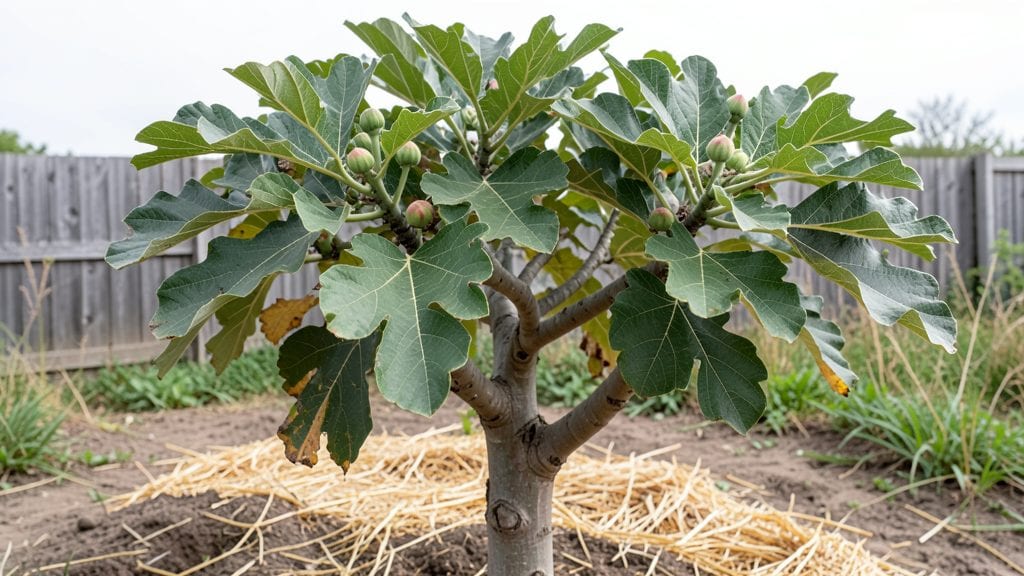
Fig tree budding opens doors to varieties you can't buy—like the sweet, sun-ripened 'Brown Turkey' or the delicate 'Celeste'—right in your backyard. 🌿 I learned the hard way that timing and technique make all the difference, but once you master it, you'll have fruit trees that outperform nursery plants in just a season or two.
The process starts with the right tools—a sharp grafting knife, rubber budding tape, and a rootstock that thrives in your climate. Spring is ideal, when new growth is just beginning but before the heat sets in.
Most beginners struggle with bark slippage or bud death, but the key is keeping everything clean and moist until the graft takes.
By summer, you'll see new shoots emerging from your bud—proof the graft worked. These young trees grow faster than seeds, resist pests better, and produce fruit years sooner. Imagine plucking fresh figs from branches you nurtured yourself, instead of waiting for store-bought plants to catch up.
Works for both container growers and backyard gardeners, though container budding requires extra care for humidity. Whether you're expanding a collection or rescuing a struggling tree, this method delivers reliable results. Let's get those knives sharp and start grafting!
📚 In This Guide
- What you need
- Instructions
- Tips and common mistakes
- Wrapping up and next steps
What you need
- ● Fig tree scions: 4–6 healthy, pencil-thick shoots (6–12 inches long) with 2–3 buds each, ideally from a variety you love.
- ● Rootstock: A young, disease-free fig tree (1–2 years old) with a trunk diameter of ½–1 inch.
- ● Budding knife: A sharp, clean grafting knife (or a razor blade in a pinch) with a tangential blade for precise cuts.
- ● Rubber budding strips: 4–6 strips (½ inch wide) to secure the graft.
- ● Pruning shears: Sterilized shears for trimming excess growth.
- ○ Pruning sealant: Optional but helpful (e.g., grafting wax or tree sealant) to prevent drying.
- ● Grafting tape: A backup to rubber strips for extra security.
- ● Hormone rooting gel: Speeds up root development (apply sparingly to the cut).
- ● Plastic bag or humidity dome: Creates a mini greenhouse to retain moisture.
- ● Spray bottle: For misting the graft site daily.
- ● Notebook & pen: To track graft dates, varieties, and progress!
How to budd fig trees for stronger, more productive growth
Budding fig trees is the secret to propagating varieties that don’t root from cuttings—and it’s easier than you think.
🌱 Step 1: Select Compatible Scion and Rootstock
Choose a mature, healthy fig tree as your rootstock—it should be disease-free with a 1-2 inch diameter trunk. For the scion, select a branch from the fig variety you want to reproduce, ensuring it’s pencil-thick and has 3-4 buds. I always pick scions in late spring when they’re firm but not woody.
Here’s the thing—compatibility matters. Mediterranean figs (like Brown Turkey) usually graft well together, but tropical types may struggle. If you’re unsure, test one branch first. Watch for swelling at the bud site within 2-3 weeks—that’s your first sign it’s working.
🪴 Step 2: Prepare the Rootstock and Scion for Grafting
Sharpen your grafting knife with a fine-tooth file so it cuts cleanly without tearing bark. On the rootstock, make a horizontal cut about 4-6 inches above ground level, removing a 1-inch strip of bark in a T-shape. The vertical cut should be 1 inch long, and the horizontal cut ½ inch. This creates a flap you can lift.
On the scion, take a 4-inch cutting with one bud centered on the stem. Make a shallow, slanted cut just below the bud, about ½ inch long. The goal is a clean match—when you slide the scion under the rootstock bark, the cambium layers (that green layer just under the bark) should align perfectly.
💧 Step 3: Insert the Scion and Secure the Graft
Slide the scion under the rootstock bark flap, positioning the bud centered in the T-cut. The top of the scion should stick out slightly—this ensures the bud stays exposed. Wrap the graft tightly with rafting tape or parafilm, leaving the bud uncovered. Seal the edges with a dab of grafting wax to prevent drying.
Don’t over-tighten the tape—you want it snug enough to hold but not so tight it cuts into the bark. I like to make two overlapping wraps for extra security. Water the rootstock lightly before covering the graft with a plastic bag to retain moisture. Check daily for condensation—if it’s dripping, remove the bag for a few hours to prevent rot.
☀️ Step 4: Monitor and Encourage New Growth
Keep the grafted tree in partial shade for the first 4-6 weeks, protecting it from direct sun and wind. Watch for the bud to swell—this usually happens in 3-4 weeks. Once you see new growth (about 2 inches tall), the graft has taken. Remove the tape and wax carefully, leaving the new shoot intact.
Here’s where it gets exciting: prune the rootstock just above the graft to encourage the scion to take over. If the rootstock sprouts new shoots, remove them immediately—they’ll compete with your new variety. Within 8-12 weeks, your scion should be strong enough to support itself, and you’ll know it’s thriving when it starts producing leaves.
✂️ Step 5: Mature the Grafted Tree for Harvest
After the first growing season, your grafted fig tree will need full sun and regular watering to establish roots. Fertilize lightly in spring with a balanced 10-10-10 mix to avoid burning the new growth. By the second year, you’ll see fruit buds forming—this is your reward for patience.
Real talk: the first harvest might be small, but each year the tree matures, the yield improves. I’ve seen grafted figs produce twice as much fruit as seed-grown trees by year three. Just remember, figs need warmth and consistency—don’t move the tree once it’s planted, or you’ll shock the roots.
Tips & tricks for perfect fig tree budding
Mastering fig tree budding takes practice, but these pro tips will help you avoid common pitfalls and boost your success rate.
Tool Prep is Everything: Before you start cutting, sterilize your grafting knife and file with rubbing alcohol. Clean tools prevent bacterial infections that can kill your graft. I also like to sharpen the knife until it can slice through a piece of paper—this ensures clean cuts that heal properly. In Step 2, take your time making the T-cut on the rootstock; a clean cut means better cambium alignment and faster bud growth.
Bud Selection Matters: When choosing your scion in Step 1, look for buds that are plump and firm, not shriveled or dried out. The bud should feel slightly resistant when pressed—this indicates it's healthy and ready to grow. I've found that buds from the middle section of branches tend to be more vigorous than those from the very tips or base. If you're unsure about compatibility, start with a single test graft before committing to multiple branches.
Moisture Management: In Step 3, don't skip the plastic bag covering—it creates a humid microclimate that prevents the graft from drying out. Check it daily for condensation, but leave it on unless you see actual dripping. I've ruined several grafts by either leaving them uncovered too long or keeping them too wet. The goal is to maintain moisture without creating a soggy environment that promotes rot. A spray bottle can help maintain humidity if you need to remove the bag temporarily.
Patience Pays Off: Remember that the 2-3 week waiting period in Step 1 isn't just about watching for swelling—it's about letting the tissues heal. Don't be tempted to check the bud too often, as handling it can disrupt the healing process. I've learned that marking your calendar and checking only every 3-4 days gives the graft the best chance to establish itself. The same goes for the 4-6 week partial shade period in Step 4; gradual exposure to sunlight prevents shock to the new growth.
Pro Tips for Fig Tree Budding
- Mastering fig tree budding takes practice, but these pro tips will help you avoid common pitfalls and boost your success rate.
- Tool Prep is Everything: Before you start cutting, sterilize your grafting knife and file with rubbing alcohol.
- Bud Selection Matters: When choosing your scion in Step 1, look for buds that are plump and firm, not shriveled or dried out.
Frequently asked questions
Got questions about fig tree budding? You're not alone! Here are some of the most common queries—and their straightforward answers—to help you navigate the process with confidence.
When is the best time to bud fig trees?
The ideal window is late spring to early summer (May–July in most climates), when the rootstock is actively growing but hasn’t yet hardened off for winter. Avoid extreme heat or frost—buds need just enough warmth to take without stressing the tree. Pro tip: Morning sun and afternoon shade create perfect conditions!
How long does it take for buds to grow after grafting?
Patience is key! Buds typically sprout 4–8 weeks post-grafting, depending on weather and tree health. You’ll see tiny shoots (called "slips") emerge from the bud—once they’re 1–2 inches tall, tie them securely to support growth. If nothing appears after 10 weeks, check for moisture stress or improper sealing.
Can I use any fig variety for budding, or are there restrictions?
Most figs are compatible, but common figs (Ficus carica) work best as rootstocks for other varieties. Avoid grafting onto weeping figs (Ficus benjamina)—they’re ornamental, not edible. For best results, match climate-hardy rootstocks (like 'Desert King') with your desired fruit variety (e.g., 'Brown Turkey' or 'Celeste').
What should I do if my bud dies or fails to grow?
Don’t panic! First, check for moisture (too dry = dead bud; too wet = rot). If the bud shrivels, re-graft it higher on the rootstock. For stubborn failures, try a T-budding method instead of whip-and-tongue. If the rootstock itself looks weak, it may need a nutrient boost (fertilizer low in nitrogen).
Are there alternatives to traditional budding for fig trees?
Yes! If budding feels tricky, try:
- Layering: Bend a low branch to the ground, bury it, and let roots form before severing.
- Air layering: Wrap a branch with damp moss and plastic, then transplant once rooted.
- Cutting propagation: Snip healthy stems (6+ inches), dip in rooting hormone, and plant in soil.
Wrapping up and next steps
Watching your fig tree budding into a thriving, fruit-bearing plant is incredibly rewarding! 🌱 By mastering the art of grafting, you’ve taken a proactive step toward ensuring a bountiful harvest. Remember, patience and precision are key—don’t hesitate to revisit your tree as it grows to monitor its progress.
Now that you’re equipped with the know-how, why not share your new skills with fellow gardeners? Or, if you’re feeling ambitious, experiment with different fig varieties to expand your orchard. Happy grafting—and may your tree flourish! 🌿✨