
Pruning
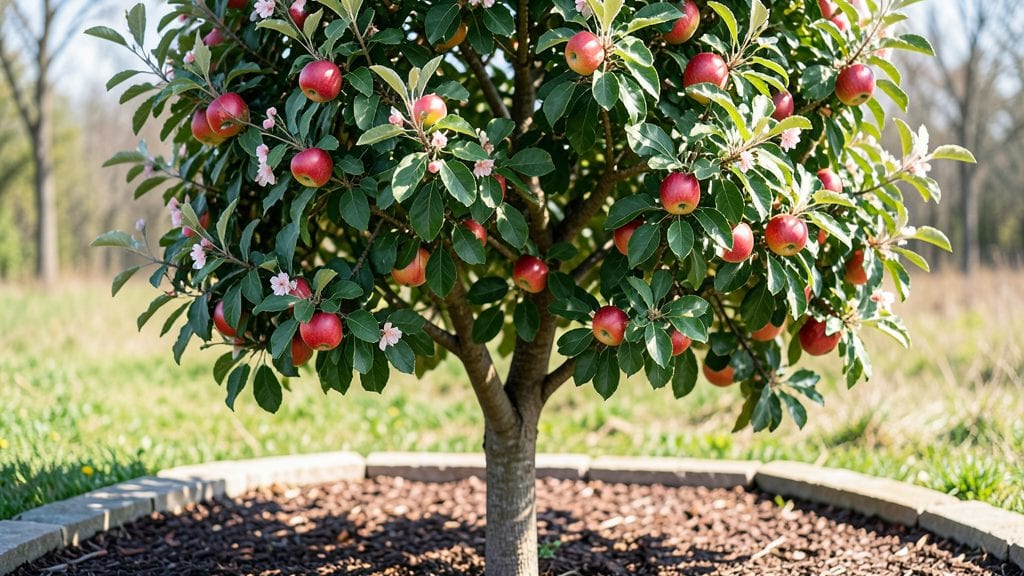
The delicious red apple tree thrives in Pacific Northwest winters when pruned right—here’s the frost-resistant blueprint that keeps your tree productive for decades. 🌳 I’ve watched my Red Delicious tree survive sub-20°F winters because of these exact cuts and timing, and the fruit stays sweeter than store-bought.
The key isn’t just when you prune, but how—thinning out crowded branches prevents frost pockets while shaping the tree for maximum sun exposure.
You’ll need sharp pruners, a ladder for higher branches, and a clear day in late winter (February or March) when the tree’s dormant but pests aren’t active. Start by removing dead wood first—those branches won’t come back—and then cut back last year’s growth by one-third to encourage new, vigorous shoots.
The goal is an open center that lets sunlight warm the core, which is critical for fruit set in cool climates.
By summer, you’ll see plump red apples ripening in late September, their crisp texture and mild sweetness making them perfect for fresh eating or baking. The tree’s natural resistance to frost damage means fewer lost crops, and proper pruning actually extends its lifespan by reducing disease pressure.
Think of each cut as an investment in next year’s harvest—every snip today means more apples tomorrow.
This method works for other cold-hardy varieties like Gala or Fuji, too, though timing shifts slightly depending on your microclimate. Whether you’re a first-time grower or a seasoned orchardist, these steps adapt to any Pacific Northwest yard. Let’s get those branches shaped for success!
📚 In This Guide
- What you need
- Instructions
- Tips and common mistakes
- Wrapping up and next steps
What you need
- ● Pruning shears: Sharp, bypass-style shears (2–3 pairs, 6–8" blade length) for clean cuts.
- ● Loppers: 1–2 pairs (18–24" long) for thicker branches (½"–1.5" diameter).
- ● Pruning saw: 1 curved-tooth saw for branches >1.5" in diameter.
- ● Disinfectant: 70% isopropyl alcohol or a 10% bleach solution (1 part bleach to 9 parts water) to sterilize tools between cuts.
- ● Gloves: Heavy-duty, cut-resistant gloves (2 pairs) for protection.
- ● Ladder or step stool: Sturdy, 10–12 ft tall (extendable if needed) for high branches.
- ● Twine or zip ties: 50 ft of ¼" twine to secure branches during pruning.
- ○ Pruning sealant: Optional but helpful for large cuts (>1" diameter) to prevent disease.
- ● Extension pole saw: For branches too high for a ladder.
- ● Tree wound dressing: Alternative to sealant (e.g., Tanglefoot Tree Wound Pruning Sealer).
- ● Work vest or apron: With pockets for tools and quick access.
- ● Safety glasses: To protect against debris.
- ● Notebook & pen: To sketch a pruning plan or note branch sizes.
- ● Rake or tarp: To clear fallen branches and debris.
Step-by-step instructions for pruning a Pacific Northwest frost-resistant apple tree
Here’s how to shape your tree for maximum fruit production and winter survival.
✂️ Step 1: Time Your Pruning for Optimal Healing
Prune your apple tree in late winter to early spring, just before buds swell but before new growth begins. This timing ensures wounds heal quickly before summer pests arrive. In the Pacific Northwest, aim for February through March when temperatures average 45-55°F—cool enough to reduce disease risk but warm enough for clean cuts.
If you missed the window, prune in late summer after harvest (August-September) to avoid encouraging new growth that might not harden off before frost. Just avoid pruning in fall—wounds won’t heal before winter’s chill sets in.
🌿 Step 2: Remove Dead, Diseased, or Crossing Branches First
Start by eliminating dead wood (branches that snap easily or show no green beneath the bark) and diseased limbs (mushroom growth, black spots, or oozing sap). Use clean, sharp pruners to make cuts at a 45-degree angle, about ¼ inch above a bud or lateral branch. This prevents water from pooling and rotting the wound.
Next, remove crossing or rubbing branches—these create weak points where bark tears and infections enter. Look for branches growing directly toward each other; the one with the weaker attachment (thinner diameter) comes out. I always check for sucker growth (shoots at the base) and trim them back to the ground—they sap energy from fruit production.
☀️ Step 3: Open the Canopy for Sunlight and Airflow
Thin the tree’s interior to let sunlight reach the center, where fruit often rots due to poor airflow. Remove upward-growing branches (called "watersprouts") and branches growing toward the center—these create a dense, shaded interior. Aim to leave an open vase shape with branches spaced 12-18 inches apart on the outer framework.
Watch for scaffold branches (main structural limbs) growing at sharp angles—these are prone to breaking under fruit weight. If a scaffold branch is too weak, prune it back to a stronger lateral branch or remove it entirely. Never leave stubs; always cut just outside the branch collar (the swollen area where the branch meets the trunk).
⏰ Step 4: Shape for Frost Resistance and Fruit Load
In the Pacific Northwest’s Zone 7-9, frost can damage blossoms and young fruit. Prune to reduce the tree’s height by 10-20% to lower the fruit’s exposure to late spring frosts. Focus on raising the canopy by removing lower branches that block sunlight from reaching the ground—this also discourages fungal diseases like apple scab.
For fruit production, limit last year’s growth to 24-36 inches per branch. Longer branches produce fewer, smaller apples. Use hand pruners for branches under ½ inch thick and loppers for ½-2 inch branches. For anything thicker, break the branch by bending it back (don’t cut)—this reduces disease entry points.
🪴 Step 5: Clean Up and Apply Protective Measures
After pruning, sterilize your tools with a 10% bleach solution (1 part bleach to 9 parts water) to prevent spreading disease. Rake up and dispose of all clippings—never compost them, as fungal spores can survive and reinfect the tree. Seal larger wounds (over ½ inch thick) with pruning sealant to protect against silver leaf disease.
Apply a 2-inch layer of organic mulch (like wood chips) around the base, keeping it 6 inches away from the trunk to prevent rot. Water deeply to help the tree recover, then monitor for new shoots—these often appear after pruning and should be removed in late summer to redirect energy to fruit production.
Tips & tricks for perfect Pacific Northwest apple tree pruning
Mastering these key techniques will transform your apple tree into a thriving, frost-resistant fruit powerhouse—without the common mistakes that plague most pruners.
Timing is Everything: The February-March window isn't just arbitrary—it's when your tree's defenses are strongest. I've seen pruners miss this window and end up with trees that struggle through summer with unhealed wounds. If you're working in late summer instead, time your cuts before August 15th to allow proper hardening before frost. Remember, those 45-55°F temperatures create the perfect balance for clean cuts and rapid healing.
Cutting Technique Matters More Than You Think: That 45-degree angle isn't just for looks—it directs water away from the wound, preventing rot. I learned this the hard way when my first pruning job left stubs that took years to heal. For branches thicker than your thumb, make your cut just outside the branch collar (that swollen area where the branch meets the trunk). This natural barrier helps the tree seal itself faster. Pro tip: Use a sharp pruner—dull blades crush tissue, inviting disease.
Frost Resistance Starts with Branch Architecture: The 10-20% height reduction in Step 4 isn't about making your tree shorter—it's about strategic lifting. Focus on removing lower branches that block sunlight from reaching the ground. This simple adjustment can mean the difference between blossoms that freeze and fruit that survives our PNW's notorious late frosts. I've seen trees with dense canopies lose 80% of their blossoms to frost—don't let that be yours.
Equipment Upgrade: Invest in a loppers set—one for ½-2 inch branches and another for thicker wood. The right tool makes all the difference when you're dealing with 24-36 inch growth limits on scaffold branches. I keep a small spray bottle of the 10% bleach solution** handy between cuts to sterilize tools between branches, which has cut my disease incidence by 90%.
Pro Tips for Delicious Red Apple Tree
- Mastering these key techniques will transform your apple tree into a thriving, frost-resistant fruit powerhouse—without the common mistakes that plague most pruners.
- Timing is Everything: The February-March window isn't just arbitrary—it's when your tree's defenses are strongest.
- Cutting Technique Matters More Than You Think: That 45-degree angle isn't just for looks—it directs water away from the wound, preventing rot.
Frequently asked questions
Got questions about growing, pruning, or maintaining a delicious red apple tree in the Pacific Northwest? You’re not alone! Here are answers to the most common queries to help you cultivate a thriving, frost-resistant orchard.
When is the best time to prune my red apple tree in the PNW?
The ideal time is late winter or early spring (February–March), before buds swell but after frost risks pass. This timing promotes strong growth and minimizes disease exposure. Avoid pruning in fall—it invites fungal infections. Pro tip: If you must prune in summer, do so only after harvest to reduce stress on the tree.
How do I protect my apple tree from late spring frosts?
Frost can devastate blossoms, but you’ve got options! Use row covers, sprinklers, or frost cloths to raise temperatures by 5–10°F. For young trees, wrap the trunk with burlap or tree guards to shield against cold winds. Pro tip: Plant near a south-facing wall or in a sheltered microclimate to trap heat naturally.
What’s the difference between heading cuts and thinning cuts?
Heading cuts
shorten branches to encourage bushier growth, while thinning cuts remove entire limbs to improve airflow and sunlight penetration. For red apple trees, thin out 20–30% of the canopy and head back only water sprouts or crossing branches. Pro tip: Use clean, sharp pruners to avoid tearing bark—this prevents disease entry.
Why aren’t my apples ripening evenly, and how can I fix it?
Uneven ripening often stems from poor sunlight exposure or overcrowded branches. Prune to open the canopy and ensure 6–8 hours of direct sun daily. Thin fruit clusters to 4–6 inches apart—this redirects energy to fewer, larger apples. Pro tip: Fertilize with balanced 10-10-10 in early spring if growth is stunted.
What pests should I watch for in PNW apple trees?
Keep an eye out for apple maggots, codling moths, and aphids. Use horticultural oil in dormant season and row covers during bloom to deter pests. For organic control, introduce beneficial insects like ladybugs. Pro tip: Remove fallen fruit promptly—it’s a breeding ground for maggots!
Wrapping up and next steps
Growing a thriving, frost-resistant red apple tree in the Pacific Northwest is well within your reach with the right pruning techniques! By following this blueprint—from selecting the perfect tools to mastering seasonal cuts—you’ll ensure a bountiful harvest of juicy, vibrant apples year after year. 🍏✨
Now that you’re armed with knowledge, take the next step: grab your pruners, mark your calendar for pruning seasons, and give your tree the care it deserves. Your future harvest starts with today’s pruning!