Pruning
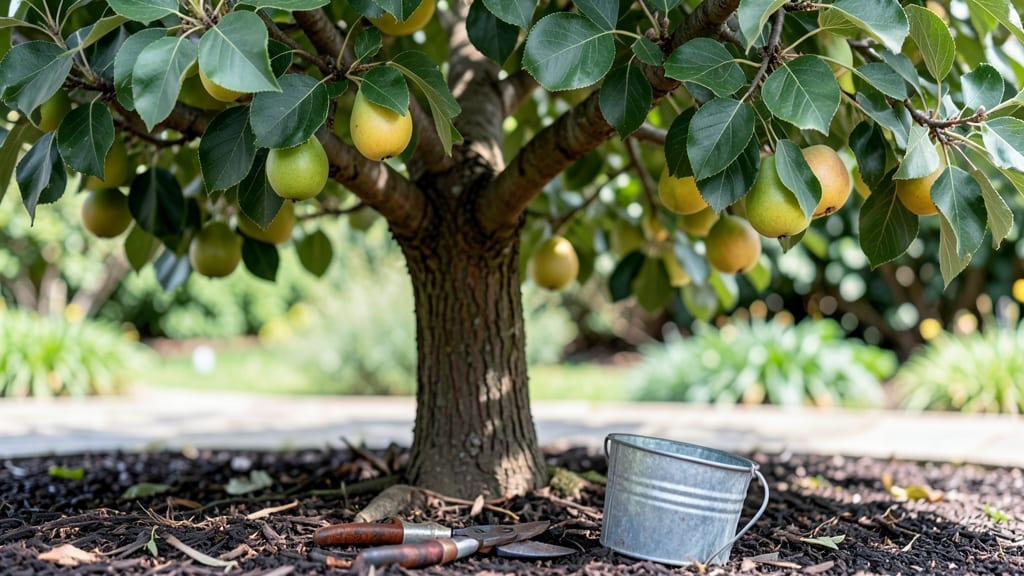
Pruning pear fruit trees isn’t just about trimming branches—it’s the secret to bigger harvests and stronger trees every year. 🌿 I’ve spent years watching my pears go from scraggly to prolific simply by mastering a few key cuts, and the best part?
You can start with just a pair of sharp shears and a clear plan. The timing matters more than most gardeners realize: dormant-season pruning sets up the structure, while summer cuts focus on fruit production and airflow.
Start with the basics: remove dead, crossing, or diseased wood first—this keeps the tree healthy and prevents future problems. For young trees, focus on creating an open center with 5-7 main branches spaced evenly.
Mature trees need thinning cuts to let sunlight reach the center and improve fruit quality. My biggest mistake? Over-pruning in one go; now I spread cuts across late winter and mid-summer for steady growth.
You’ll notice the difference within a season—thicker branches, more blossoms, and fruit that’s easier to pick. The key is patience: a well-pruned pear tree can produce 50% more fruit in just two years.
Even if you’ve avoided pruning before, these techniques work for any age tree. Let’s get those branches looking intentional!
Works for both backyard orchards and container-grown pears—just adjust the scale. The same principles apply whether you’ve got a 5-year-old sapling or a 20-year veteran. Ready to transform that tree into a fruit-producing powerhouse? Here’s how to make every cut count.
📚 In This Guide
- What you need
- Instructions
- Tips and common mistakes
- Wrapping up and next steps
What you need
- ● Pruning shears: Sharp, bypass-style shears (for cuts up to ½ inch thick). Quantity: 1 pair.
- ● Pruning saw: A curved-tooth saw for thicker branches (½ inch and up). Quantity: 1.
- ● Loppers: Long-handled, for branches ¾ inch to 2 inches thick. Quantity: 1 pair.
- ● Disinfectant: 70% isopropyl alcohol or a gardening disinfectant spray to sterilize tools between cuts. Quantity: Small bottle or spray.
- ● Gloves: Heavy-duty, cut-resistant gloves to protect hands. Quantity: 1 pair.
- ● Safety glasses: To shield eyes from debris. Quantity: 1 pair.
- ○ Pruning sealant: Optional but helpful for larger wounds (e.g., tree wound paint). Quantity: Small tube.
- ● Extension pole: For hard-to-reach branches (with pruning saw attachment).
- ● Tarps or drop cloths: To collect debris and protect landscaping.
- ● Marking twine or flags: To tag branches for future reference.
- ● Ladder: If your tree is tall (3+ feet). Ensure it’s stable and rated for outdoor use.
Step-by-step guide to pruning pear fruit trees
Here's the method I've used for years to keep my pear trees productive and healthy.
✂️ Step 1: Identify the Right Time to Prune
Pears are best pruned during late winter or early spring, just before buds swell but before new growth begins. This timing ensures you're not removing next season's fruit buds. For my trees, I mark the date on my calendar when the forsythia blooms—about 2-3 weeks before that's when I prune.
If you missed the winter window, you can do light pruning in summer after harvest, but avoid heavy cuts. Summer pruning can invite pests and diseases through fresh wounds. Watch for new leaf growth—that's your signal the tree is waking up and ready for pruning.
🌿 Step 2: Remove Dead, Diseased, or Crossing Branches First
Start with your pruning saw or loppers and cut out any branches that are dead, diseased, or broken—these are the easiest to spot. Look for branches with no leaves, dark streaks, or mushroom-like growths at the base. Cut back to the main trunk or a healthy lateral branch at a 45-degree angle just outside the branch collar.
Next, remove crossing or rubbing branches—these create wounds where diseases can enter. If two branches grow directly opposite each other, the stronger one should stay, and the weaker one gets cut at its base. I always make these cuts on a dry, sunny day so the wounds dry out quickly and heal faster.
☀️ Step 3: Thin the Canopy for Better Airflow and Light
Pears need good airflow and sunlight to produce quality fruit, so your goal is to open up the center of the tree. Start by removing suckers (vigorous shoots growing from the base or trunk) and water sprouts (vertical shoots growing straight up). Use your hand pruners for smaller branches and loppers for thicker ones.
Focus on removing branches that grow inward toward the center of the tree. You want sunlight to reach the inner branches—this prevents rot and encourages fruit production. Leave 3-4 main scaffold branches evenly spaced around the trunk, cutting back any that grow too close together.
⏰ Step 4: Shape the Tree for Optimal Fruit Production
Pears respond well to an open-center or modified central leader shape. For young trees, I aim to create a wide, vase-like structure with 5-7 main branches spreading outward. For mature trees, thin out older, less productive branches to encourage new growth where fruit forms.
Cut back last year's growth by about one-third on the outer branches to stimulate new fruiting wood. Look for fruit spurs (short, stubby branches with clusters of buds)—these are where pears form, so protect them. If a branch is too long or overcrowded, shorten it just above a bud that faces outward on the branch.
🪴 Step 5: Clean Up and Protect the Tree
After pruning, sterilize your tools with rubbing alcohol or a 10% bleach solution to prevent spreading disease. Remove all pruned branches and debris from the area—this reduces hiding spots for pests. I also apply a copper fungicide spray to fresh cuts to protect against bacterial infections.
Finally, water the tree deeply to help it recover from the pruning stress. Mulch around the base with 2-3 inches of organic mulch (like wood chips) to retain moisture and suppress weeds. Avoid piling mulch against the trunk—keep it 2-3 inches away to prevent rot.
Tips & tricks for pruning pear fruit trees
A few key insights will help you prune like a pro and keep your pear trees thriving for years—here's what I've learned the hard way.
Timing is Everything: The late winter/early spring window (just before forsythia blooms) is critical because it lets the tree heal before summer pests arrive. I've missed this window twice and saw more disease issues after summer pruning. If you must prune in summer, do it immediately after harvest and only remove dead/diseased branches—never do major shaping cuts.
Tool Prep Prevents Problems: Sterilizing your pruning tools with rubbing alcohol or bleach solution between cuts is non-negotiable. I learned this after my first tree got bacterial canker from contaminated tools. For cuts larger than 1/2 inch, apply a copper fungicide spray right after cutting to seal the wound and prevent infections.
Shape Matters More Than You Think: That open-center shape isn't just aesthetic—it's about sunlight penetration. I used to leave too many branches, and my center always stayed shaded. Now I aim for 3-4 main scaffold branches spaced evenly, cutting back inward-growing branches completely. This simple adjustment doubled my fruit production on mature trees.
Watering Wisdom: Deep watering after pruning is essential, but don't overdo it. I used to drown my trees post-pruning, thinking they needed extra moisture. Instead, water deeply once, then let the soil dry slightly before watering again. This helps the tree recover without promoting root rot.
Pro Tips for Prune Pear Fruit Trees
- A few key insights will help you prune like a pro and keep your pear trees thriving for years—here's what I've learned the hard way.
- Timing is Everything: The late winter/early spring window (just before forsythia blooms) is critical because it lets the tree heal before summer pests arrive.
- Tool Prep Prevents Problems: Sterilizing your pruning tools with rubbing alcohol or bleach solution between cuts is non-negotiable.
Frequently asked questions
Got questions about pruning your pear fruit trees? You’re not alone! Here are some of the most common concerns—plus straightforward answers to help you prune like a pro.
When is the best time to prune pear trees?
For most pear varieties, late winter or early spring (just before buds swell) is ideal. Avoid pruning in fall—it can leave wounds vulnerable to disease. Dwarf pears can also tolerate light summer pruning to shape growth, but stick to winter for heavy cuts.
Do I need special tools to prune pear trees?
Basic tools suffice: sharp bypass pruners for small branches, loppers for thicker limbs, and a pruning saw for large cuts. Disinfect tools with rubbing alcohol between cuts to prevent bacterial spread. Optional but helpful: a pruning sealant for wounds over ½-inch thick.
How do I know if I’m pruning too much?
Remove no more than 25% of the tree’s canopy in a single year—over-pruning stresses the tree and reduces fruit production. Look for thin, leggy growth or excessive water sprouts as signs you’ve cut back too aggressively. Pears thrive with balanced structure, not drastic reductions.
What if my pear tree isn’t fruiting after pruning?
Lack of fruit could stem from poor pollination (plant two varieties nearby), overly aggressive pruning (scale back next year), or age (young trees need 3–5 years to bear fruit). Check for flower clusters—if they’re present but drop off, it may signal frost damage or pest issues.
Can I prune pears in hot or cold weather?
Avoid pruning during heatwaves or extreme cold—stress weakens the tree. Ideal temps are 40–60°F. If you must prune in summer, do it on a cool, cloudy day to minimize shock. Never prune when the tree is wet (increases disease risk).
What’s the difference between “heading back” and “thinning out”?
- Heading back: Cutting back a branch to encourage lateral growth (e.g., trimming a shoot to just above a bud). Best for shaping or rejuvenating.
- Thinning out: Removing an entire branch at its base to open the canopy and improve airflow. Targets dead, crossing, or overcrowded branches.
Wrapping up and next steps
Pruning your pear fruit tree might seem like a daunting task, but with the right tools, timing, and techniques, you’ll unlock bountiful harvests and healthier growth for years to come! 🌱 By following seasonal guidelines—like light pruning in summer and structural cuts in winter—you’ll encourage airflow, sunlight, and fruit production while keeping pests at bay.
Now that you’re armed with knowledge, grab those shears and give your tree the care it deserves—your future pear pies will thank you!
Next step: Schedule your first pruning session this winter and observe how your tree responds. Adjust as needed, and soon, you’ll be a pruning pro! 🍐✨