
Watering
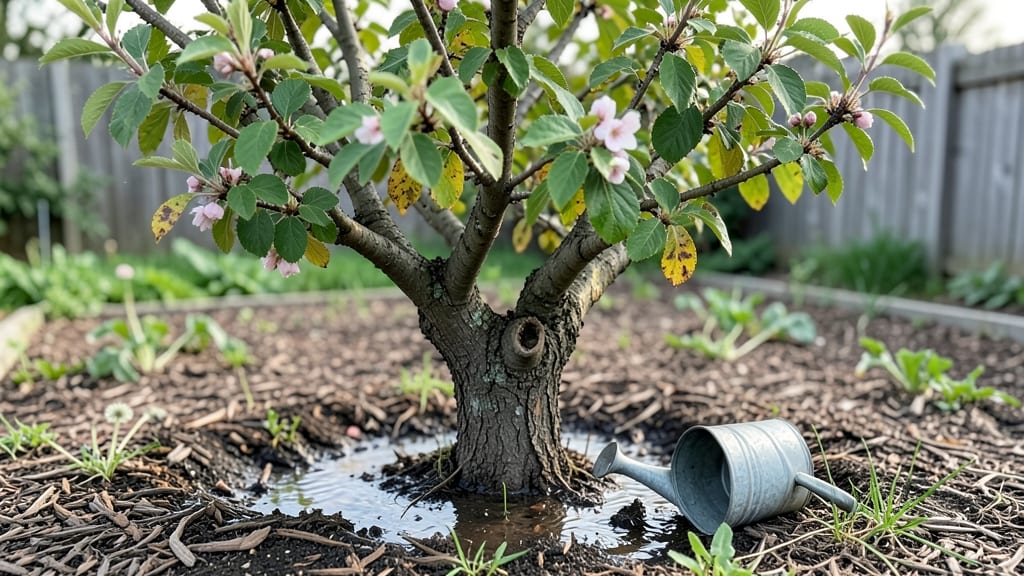
Even if your cherry tree’s leaves yellow and droop from too much water, root rot isn’t always a death sentence—just a wake-up call for your soil. 🌱 I’ve nursed back more struggling cherry trees than I’d like to admit, and the fix starts with stopping the waterlogging that’s suffocating those roots.
The first step is easy but critical: stop watering immediately. Let the soil dry out completely before you even think about touching it again. Most gardeners overcompensate by watering less, but cherry trees need consistent moisture—not soggy conditions.
Grab a trowel and check the roots—if they smell rotten or look mushy, you’ve got root rot, and pruning the damaged sections is your next move.
What you’ll end up with is a tree that’s no longer gasping for air. Within 2-3 weeks, new growth will signal the roots are healing, and those once-sagging branches will firm up again.
The key is balancing moisture: water deeply once a week (or when the top 2 inches of soil are dry) instead of daily shallow soaks.
For long-term peace of mind, amend the soil with compost or perlite to improve drainage, and consider raising the tree’s base with a mound of soil or gravel if your yard stays wet.
If the tree still looks weak after a month, it’s time to call in an arborist—some cases need deeper intervention.
📚 In This Guide
- What you need
- Instructions
- Tips and common mistakes
- Wrapping up and next steps
What you need
- ● Watering can or hose with a gentle spray nozzle – For controlled watering (5-gallon capacity recommended).
- ● Garden trowel or spade – For digging around the base of the tree (6-8 inches deep).
- ● Well-draining potting mix or compost – At least 2-3 gallons (look for a blend labeled "for root rot-prone plants").
- ○ Fungicide (optional but helpful) – Copper-based or hydrogen peroxide (3%) for treating root rot (16 oz bottle).
- ● Mulch (organic, like wood chips or straw) – 2-3 inches to improve drainage and retain moisture.
- ● Garden gloves – To protect your hands from soil and potential pathogens.
- ● Pruners (sterilized) – For trimming any visibly damaged roots or branches.
- ● Measuring tape or ruler – To check soil depth and mulch thickness.
- ● Soil moisture meter – To monitor water levels accurately (prevents over- or under-watering).
- ● Drainage tiles or gravel – If replanting, add a 2-inch layer at the bottom of the hole to improve drainage.
- ● Root stimulator (like mycorrhizal fungi) – Helps revive stressed roots (follow package instructions).
- ● Waterproof cover or tarp – To protect the area from heavy rain while the tree recovers.
Simple steps to save your cherry tree from overwatering
Here’s how to diagnose and fix root rot before it’s too late—no fancy tools needed.
🌱 Step 1: Check the Roots and Soil for Signs of Rot
Gently dig around the base of your cherry tree with a small hand trowel, focusing on the outer 6-12 inches of soil. Look for roots that feel mushy or dark brown instead of firm and light tan. Healthy roots should snap when bent, while rotted ones will crumble like overcooked pasta. If the soil smells sour or like rotting fruit, that’s your first red flag—root rot thrives in waterlogged conditions.
I like to test soil moisture by pressing my finger 1-2 inches deep. If it feels cold and stays clumpy when squeezed, your tree’s been drowning. Grab a handful of soil and let it dry on your palm—if it doesn’t crumble within a minute, you’ve got a drainage problem. Write down where the rot is worst so you can target fixes there first.
✂️ Step 2: Prune Damaged Roots and Improve Soil Drainage
Using sterilized pruning shears, trim away any blackened, mushy roots you uncovered. Cut ½ inch back from the rotted section to healthy tissue—this prevents the rot from spreading further. I always clean my shears with rubbing alcohol between cuts to avoid introducing bacteria. For every 1 inch of root you remove, the tree will regrow 2 inches of healthy root if given proper care.
Now focus on the soil. Mix in 2-3 inches of coarse sand or perlite into the top 6 inches of soil around the roots. This creates air pockets that help water drain faster. If your tree is in a container, check the drainage holes—if they’re clogged with soil, use a wire to clear them. For in-ground trees, consider creating a slight mound of soil around the base to encourage water to run off instead of pooling.
💧 Step 3: Adjust Your Watering Routine and Monitor Recovery
Stop watering immediately and let the soil dry out completely before adding water again. Cherry trees need deep but infrequent watering—aim for 1-2 inches of water per week, delivered in one long session rather than daily sprinkles. Use a moisture meter or your finger to check: water only when the top 2-3 inches of soil feel dry. If you’re unsure, underwatering is safer than overwatering at this stage.
Watch for new growth as a sign of recovery. Within 4-6 weeks, you should see fresh green leaves emerging from the tips of branches. If the tree still looks weak after 8 weeks, consider applying a mycorrhizal fungus to the roots—it helps restore beneficial soil microbes. Keep an eye out for wilting leaves or yellowing foliage, which could mean the rot has spread deeper or you’re still watering too much.
Tips & tricks for saving your cherry tree from overwatering
Here's what nobody tells you about rescuing a waterlogged cherry tree—these simple tricks make all the difference.
Root Inspection Trick: In Step 1, when checking those outer 6-12 inches of roots, focus on the transition zone where healthy roots meet rotten ones. This is where you'll find the most dramatic color change—healthy roots stay light tan, while rotten ones turn dark brown or black. I've seen trees where only 20% of the roots were actually healthy, so don't be discouraged if you find more rot than you expected. The key is identifying that healthy boundary to know exactly where to cut.
Pruning Precision: When you're cutting back those ½ inch sections in Step 2, use a sharp, sterilized knife or shears to make clean cuts. The cleaner the cut, the faster the tree can seal off that wound and start growing new roots. I've learned the hard way that jagged cuts slow down recovery—think of it like giving your tree a fresh haircut rather than a messy buzz cut. And remember, for every 1 inch you remove, you'll get 2 inches of new growth if conditions are right!
Drainage Hack: For container-grown trees, don't just clear those drainage holes—make them work for you. After clearing clogs, place a layer of ¼-inch gravel at the bottom of the pot before adding soil. This creates a permanent drainage layer that prevents future clogging. For in-ground trees, that slight mound of soil around the base should be about 2-3 inches high—just enough to create a gentle slope that directs water away from the trunk.
Recovery Timeline: Those 4-6 weeks for new growth to appear might feel like forever, but trust me—it's worth the wait. I've seen trees that looked completely dead come back to life with just a little patience. Set a reminder in your calendar for the 8-week mark to check if you need to apply that mycorrhizal fungus. And if you see wilting leaves after that point, it's usually a sign you're still watering too much rather than the roots not recovering.
Pro Tips for Cherry Tree Too Much Water
- Here's what nobody tells you about rescuing a waterlogged cherry tree—these simple tricks make all the difference.
- Root Inspection Trick: In Step 1, when checking those outer 6-12 inches of roots, focus on the transition zone where healthy roots meet rotten ones.
- Pruning Precision: When you're cutting back those ½ inch sections in Step 2, use a sharp, sterilized knife or shears to make clean cuts.
Frequently asked questions
Got questions about saving your cherry tree from overwatering? You’re not alone—let’s tackle the most common concerns so you can get your tree back on track!
How do I know if my cherry tree has root rot from too much water?
Look for yellowing leaves, mushy brown roots when inspected, or a sour, foul smell at the base. If the trunk feels soft or spongy, root rot is likely. Act fast—prune affected roots and improve drainage immediately!
How long does it take for a cherry tree to recover from overwatering?
Recovery time varies, but with proper care (reduced watering, aerated soil, and pruning), you may see improvement in 4–8 weeks. Severe cases could take months. Monitor soil moisture—stick your finger 2–3 inches deep before watering again.
Can I still harvest cherries if my tree is overwatered?
Mature cherries may still ripen, but overwatering stresses the tree, reducing yield and fruit quality. Focus on saving the tree first. If fruit appears, pick it promptly to avoid further stress. Next season, adjust your watering routine!
What’s the best alternative to watering my cherry tree deeply?
Switch to drip irrigation or soaker hoses for slow, even moisture. Water early in the morning to reduce evaporation, and mulch around the base (but keep it 3–4 inches away from the trunk) to retain moisture without suffocating roots.
My cherry tree’s leaves are wilting—is it too late to save it?
Not yet! Act now: Stop watering, prune dead branches, and improve drainage with sand or perlite. If the root system is severely damaged, you may need to transplant the tree to a well-draining spot. Patience and consistency are key!
Wrapping up and next steps
Your cherry tree’s health is in your hands—and with the right care, it can bounce back stronger than ever! 🌱 Remember, drainage is key: adjust your watering habits, trim affected roots, and give your tree the space it needs to thrive.
Don’t let root rot win—your tree’s comeback starts with consistent, mindful action.
Ready to take the next step? Monitor your tree weekly and celebrate small victories, like new leaves or firmer soil. If you’re unsure, consult a local arborist—they’re your secret weapon for long-term success! 🌟