Pruning
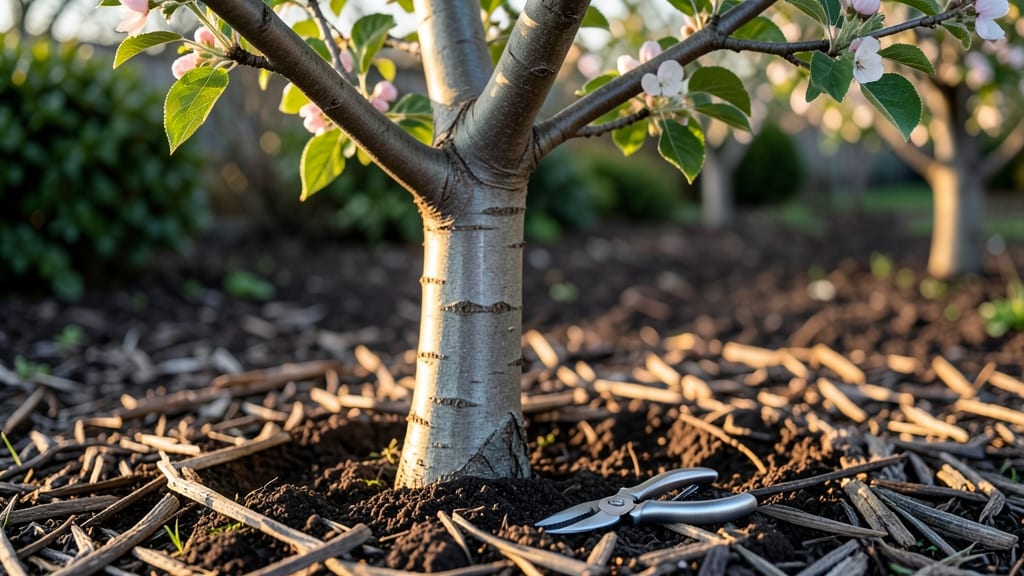
Proper apple tree care in spring is the secret to transforming a tangled mess into a thriving orchard—one precise cut at a time. 🌳 I’ve pruned over a dozen trees now, and the difference between a scraggly mess and a fruit-laden beauty comes down to timing, technique, and a sharp pair of shears.
The goal? Open up the canopy to sunlight and air, encourage strong branch growth, and set the stage for next year’s harvest.
Most gardeners wait until after the blooms fade, but the real magic happens in late winter to early spring—before buds swell but after the worst frosts pass. You’ll need a clean, sharp pruner, rubbing alcohol for sterilizing cuts, and a clear day to see the tree’s structure.
The key is removing dead, crossing, or weak branches first, then thinning out crowded areas to let light reach the center.
What you end up with is a tree that bursts with bright green leaves by summer and heavy fruit by fall. Proper pruning now means fewer apples on the ground come harvest time, and a stronger tree that fights disease better.
Plus, those first tender shoots in spring? They’re your promise of a bountiful season ahead.
Works for young saplings and mature trees alike—just adjust the cuts. Here’s how to do it right, step by step, without turning your tree into a disaster zone.
📚 In This Guide
- What you need
- Instructions
- Tips and common mistakes
- Wrapping up and next steps
What you need
- ● Pruning shears: Bypass pruners (sharp, clean, and sterilized with rubbing alcohol to prevent disease). Size: 6–8 inches for small branches.
- ● Loppers: For thicker branches (½–2 inches in diameter). Look for: Long handles (24+ inches) and a smooth cutting action.
- ● Pruning saw: For branches thicker than 2 inches. Type: Bow saw or folding pruning saw with fine teeth (8–10 TPI).
- ● Gloves: Heavy-duty, cut-resistant gloves (e.g., Mechanix Wear or similar) to protect hands from thorns and rough bark.
- ● Disinfectant: 70% isopropyl alcohol or a commercial pruning sealant (e.g., Tanglefoot Pruning Seal) to sterilize tools between cuts.
- ● Rag or paper towels: For wiping tools and branches before/after cuts.
- ● Ladder or step stool: Sturdy and tall enough to reach the highest branches safely. Pro tip: Use a harness if working on very tall trees!
- ● Marking twine or tape: Colored twine (e.g., red/white) to flag branches for removal or special attention.
- ● Trash bags or bucket: For collecting pruned debris (avoid leaving it under the tree to prevent disease).
- ● Hand pruners: For small, precise cuts (e.g., anvil or bypass style).
- ● Tree wound paint: Controversial but some gardeners swear by it for large cuts (e.g., Tanglefoot Tree Wound Pruning Seal).
- ● Pole saw: Extendable saw for high branches without a ladder.
- ● Garden hose: For rinsing tools and branches post-pruning.
- ● Notebook & pen: To jot down pruning notes (e.g., branch IDs, cuts made).
Step-by-step instructions for pruning apple trees in spring
Here's the method I rely on to keep my apple trees healthy and productive year after year.
🌱 Step 1: Time Your Pruning for Optimal Growth
Prune your apple tree during its dormant season, ideally in late winter or early spring before buds swell—this is usually 4-6 weeks before your last frost date. The goal is to shape the tree while it's still resting, so it can focus all its energy on new growth when spring arrives. I always check the weather forecast and wait until a dry, calm day to avoid spreading disease with wet tools or conditions.
If you missed the dormant window, you can do a light pruning in late spring after flowering but before fruit sets. Just avoid heavy cuts—this can stress the tree and reduce next year's harvest. You'll see fresh green leaves starting to form, signaling it's time to act.
✂️ Step 2: Gather Tools and Sanitize for Safety
Use a sharp pruning saw for thick branches over ½ inch in diameter, and bypass pruners for smaller cuts. I also grab rubbing alcohol or a 10% bleach solution to sanitize my tools between cuts—this prevents spreading bacterial or fungal diseases from one branch to another. Wipe down blades thoroughly after each tree, and store tools in a dry place to keep them sharp and rust-free.
Grab a glove (preferably one with a textured grip) and a ladder if your tree is taller than 8 feet. Never stand on wobbly surfaces—apple trees can be heavy, and a slip could send you (and the ladder) crashing down. I like to work in layers, starting with the lowest branches and moving upward for safety and efficiency.
🌿 Step 3: Remove Dead, Diseased, or Crossing Branches First
Start by cutting out any dead, broken, or diseased wood—these branches won’t produce fruit and can harbor pests. Look for dark, shriveled branches or ones with peeling bark and oozing sap. Remove these all the way back to healthy wood, making cuts at a 45-degree angle just outside the branch collar (the swollen area where the branch meets the trunk). This ensures the tree can heal properly.
Next, eliminate crossing or rubbing branches—these create wounds where disease can enter. If two branches intersect, remove the smaller one or the one growing upward. You’ll see scars or calloused areas where branches have been rubbing, signaling it’s time to act. This step opens up the canopy, allowing sunlight and air to reach the center of the tree.
☀️ Step 4: Shape the Tree for Sunlight and Airflow
Open the center of the tree by removing branches that grow inward—this prevents crowding and improves airflow, which reduces the risk of fungal diseases like apple scab. Aim to create a vase-like shape with a strong central leader (main upward-growing branch). If your tree has multiple leaders, select the strongest one and prune the others back to a bud or side branch to encourage a single, dominant trunk.
Thin out excessive growth by cutting back one-third of the oldest branches each year. This keeps the tree from becoming overloaded with fruit and encourages vigorous new growth. You’ll notice thicker, sturdier branches forming over time—this is a sign you’re doing it right. Avoid cutting more than 25% of the tree’s canopy in a single season to prevent stress.
🪴 Step 5: Finish with Light Pruning for Fruit Production
Now, focus on fruit-bearing branches—these are the 1- to 3-year-old wood that produce the most apples. Prune back last year’s fruit spurs (short, stubby branches with clusters of buds) by one-third to encourage more buds to form. Look for small, swollen buds along the branches—these will become next year’s fruit. Cut just above an outward-facing bud to direct growth away from the center.
Finally, remove any suckers (shoots growing from the base or roots) and water sprouts (fast-growing vertical shoots). These compete with the main branches for energy. After pruning, clean up all debris from the ground—this removes hiding spots for pests and reduces disease spread. Your tree should now have an open, sunlit canopy with room for new growth.
Tips & tricks for perfect apple tree pruning
Pruning an apple tree might seem intimidating, but these practical tips will help you achieve professional results while keeping your tree healthy and productive.
Timing is Everything: The dormant season window of 4-6 weeks before your last frost date is critical—this ensures your tree isn't stressed by new growth during cold weather. I've learned the hard way that pruning too early (when buds are still dormant but temperatures fluctuate) can shock the tree. Use your local frost date as your guide, and always check for bud swelling before you start. If you missed the dormant window, remember that light pruning after flowering but before fruit sets is still beneficial, but avoid heavy cuts during this period.
Tool Prep Prevents Problems: Your pruning saw and bypass pruners should be sharper than a chef's knife—dull tools tear wood instead of making clean cuts, which slows healing and invites disease. I keep a small bottle of rubbing alcohol in my tool bag specifically for sanitizing between cuts. Don't skip this step! Even if the branches look healthy, you're preventing potential disease spread. And for heaven's sake, wear gloves—those thorns aren't just for show. A good pair with textured grip will save your hands from painful punctures while giving you better control.
Visual Cues Over Guessing: When making those 45-degree angle cuts just outside the branch collar, look for the swollen area where the branch meets the trunk—this is your target. For crossing branches, the smaller one or the upward-growing branch should go. I've found that holding the branch up to the sunlight helps me spot the subtle differences between healthy and diseased wood—look for dark, shriveled areas or peeling bark that signal trouble. And when you're thinning out excessive growth, aim to remove one-third of the oldest branches each year—this keeps the tree balanced without overstressing it.
Post-Pruning Cleanup: After you've finished, don't just leave the debris on the ground—this creates hiding spots for pests and spreads disease. I collect all clippings in a heavy-duty trash bag and dispose of them in the green waste bin. For larger branches, you can burn them (safely, away from the tree) or chop them into smaller pieces for mulch. This final step might seem minor, but it's one of the most important for keeping your tree healthy long-term.
Pro Tips for Apple Tree Care In Spring
- Pruning an apple tree might seem intimidating, but these practical tips will help you achieve professional results while keeping your tree healthy and productive.
- Timing is Everything: The dormant season window of 4-6 weeks before your last frost date is critical—this ensures your tree isn't stressed by new growth during cold weather.
- Tool Prep Prevents Problems: Your pruning saw and bypass pruners should be sharper than a chef's knife—dull tools tear wood instead of making clean cuts, which slows healing and invites disease.
Frequently asked questions
Got questions about spring apple tree care? You’re not alone! Here are some of the most common concerns—and their straightforward answers—to help you prep like a pro.
When is the best time to prune my apple tree in spring?
Prune your apple tree before buds swell (late winter to early spring) to avoid disease spread and encourage strong growth. If you miss the window, wait until after flowering but before leaves fully emerge. Pro tip: Avoid pruning during wet weather to prevent fungal infections.
How much should I cut back my apple tree in spring?
Remove no more than 25% of the tree’s canopy in a single session. Focus on:
- Dead, diseased, or crossing branches
- Suckers (shoots growing from the base)
- Water sprouts (fast-growing vertical shoots)
What if my apple tree has black spots or oozing sap after pruning?
Black spots may signal apple scab or sooty mold. Clean tools with 70% rubbing alcohol and prune in dry weather. Oozing sap? It’s likely a wound response—seal cuts larger than ½ inch with pruning sealant to prevent pests. Monitor for pests like borers if sap persists.
Do I need to fertilize my apple tree after pruning?
Yes! Apply a balanced fertilizer (10-10-10) or organic compost 4–6 weeks after pruning (when new growth starts). Avoid heavy nitrogen right after pruning—it can stress the tree. Pro tip: Test soil pH first (ideal: 6.0–6.5) for best nutrient uptake.
Can I prune a young apple tree the same way as a mature one?
Not quite! Young trees (under 3 years) need structural shaping to establish a strong scaffold. Focus on:
- Removing competing leaders (vertical stems)
- Thinning branches to improve air circulation
- Avoiding heavy cuts—prioritize training over aggressive pruning.
Wrapping up and next steps
Spring is your apple tree’s golden opportunity to thrive—and with the right care, you’ll be rewarded with abundant harvests for years to come! 🍎✨ By mastering pruning techniques, monitoring health, and feeding your tree, you’ve set the stage for strong growth and delicious fruit.
Now, take that knowledge and watch your orchard flourish.
Ready to put it into action? Grab your tools, schedule a pruning day, and enjoy the journey of nurturing your apple tree into a fruitful powerhouse. Happy gardening!