
Trees
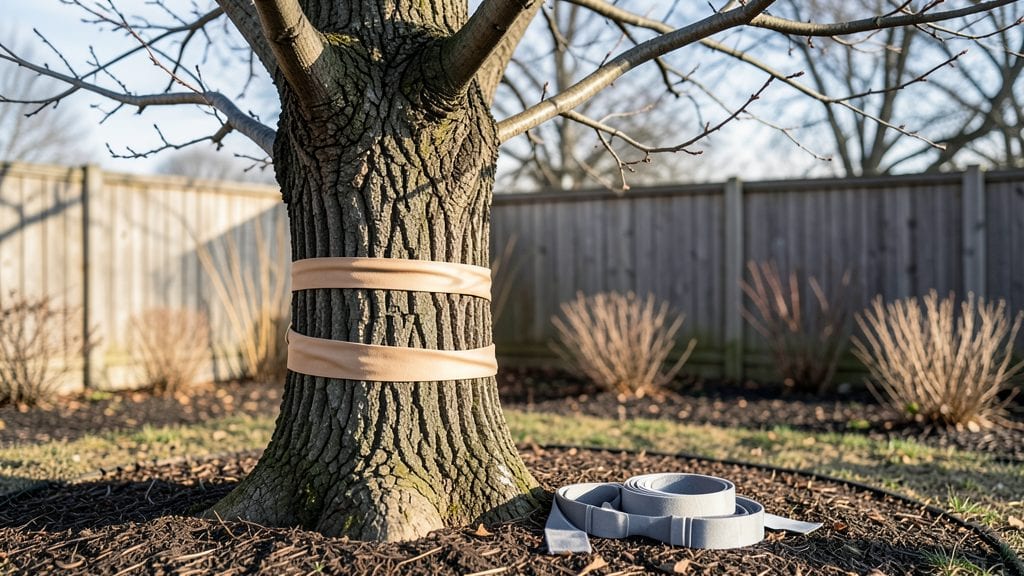
Wrapping trees for winter isn’t just a chilly-season chore—it’s the secret to keeping your yard’s youngest trees alive through frost, sunscald, and hungry critters. 🌳 I learned the hard way when my newly planted oak’s bark split like dry paper after just one winter, leaving it vulnerable to disease.
The right wrap acts like a cozy sweater for trees, shielding tender bark from temperature swings and gnawing rodents.
You’ll need tree wrap (the spiral kind lasts years) or burlap, plus a few tools: pruning shears, a tape measure, and a sharp knife to trim excess. Start wrapping in late fall after the first hard frost when temperatures drop below freezing at night.
The key is snug but not tight—imagine wrapping a gift just loose enough to slide your hand between layers. For extra protection, add a layer of reflective bubble wrap under the main wrap to deflect harsh winter sun.
By spring, you’ll see healthy bark where others’ trees bear scars. The wrap keeps moisture in, prevents cracking, and deters deer from rubbing their antlers against young trunks. Most trees—especially birch, maple, and fruit trees—thrive with this simple shield.
Just remember to remove it in early spring before new growth starts, or you’ll trap too much moisture against the bark.
Common mistakes? Wrapping too tightly (restricts growth) or leaving it on past March (traps heat). And yes, even mature trees benefit—just focus on trunks under 4 inches in diameter. This one technique could save your investment and keep your yard looking lush year after year.
📚 In This Guide
- What you need
- Instructions
- Tips and common mistakes
- Wrapping up and next steps
What you need
- ● Tree wrap (frost cloth or burlap): Choose breathable fabric (avoid plastic—it traps moisture!).
- ● Quantity: Enough to wrap the tree 2–3 times from base to top.
- ● Measuring tape: For accurate sizing (especially for young or delicate trees).
- ● Scissors or a utility knife: To trim wrap material to size.
- ● Twist ties, staples, or landscape staples: To secure the wrap (avoid nails—they can damage bark!).
- ○ Garden twine or burlap strips (optional but helpful): For extra reinforcement at the base.
- ● Anti-desiccant spray: Apply to wrapped areas to prevent drying (great for broadleaf evergreens like oak or maple).
- ● Reflective tape or markers: Helps deter animals (like deer or rabbits) from chewing the wrap.
- ● Insulating foam tubes: For protecting small trunks or grafted areas.
- ● Gloves and knee pads: Because winter prep is easier (and more comfortable) with the right gear! 🧤
Step-by-Step guide to wrapping trees for winter protection
Here's how to shield your trees from harsh winter damage using simple, effective techniques.
🪴 Step 1: Choose the Right Tree Wrap Material
Select a breathable tree wrap designed for winter protection—never plastic sheeting, which traps moisture and causes bark damage. I prefer burlap or commercial tree wrap fabric because it allows air circulation while blocking harsh winds and frost. For smaller trees, a spiral wrap made of cotton or jute works well, while larger trunks need a single, snug layer of fabric.
Measure the trunk circumference first, then cut your wrap material 2-3 inches wider than the measurement to ensure full coverage. The extra width allows for overlap and prevents gaps where cold air could penetrate. If you're using burlap, soak it in water first to help it conform tightly to the bark.
☀️ Step 2: Clean and Prepare the Trunk
Start by removing any loose bark, dead branches, or debris from the trunk using a soft-bristle brush or your hands. This prevents pests from hiding under the wrap and ensures a smooth surface for the material to adhere. Avoid using sharp tools—scratches can create entry points for disease once the wrap is removed in spring.
Inspect the bark for cracks or wounds. If you find any, apply a tree wound dressing (like a commercial sealant) to these areas before wrapping. This extra step gives the tree a better chance to heal properly during the dormant season. Once the trunk is clean and sealed, you're ready to apply the protective layer.
🌿 Step 3: Apply the Wrap Correctly
Begin wrapping at the base of the trunk, leaving a 2-inch gap between the wrap and the ground. This prevents moisture buildup at the soil line, which can rot the bark. For spiral wraps, start at the bottom and overlap each turn by half an inch as you spiral upward. For fabric wraps, fold the edges inward to create a clean, smooth finish.
Secure the wrap with staples or soft cloth strips—never use nails or wire, which can puncture the bark. I like to staple every 12-18 inches to keep the material taut but not tight enough to restrict the tree’s natural expansion and contraction. The wrap should fit snugly, like a second skin, without squeezing the trunk.
⏰ Step 4: Add Extra Protection for Young or Sensitive Trees
For young trees or varieties known for thin bark (like birch or cherry), add an extra layer of insulation. Wrap the tree wrap with a layer of bubble wrap or straw, then secure it with twine. This creates an air pocket that acts as an insulator against extreme temperature swings. Remove the bubble wrap in early spring before the tree starts to wake up.
If your tree is in a windy area, consider adding tree guards made of hardware cloth or plastic mesh around the base. These protect against rodent damage and prevent the wrap from flapping in strong winds. Check the wrap monthly during winter to ensure it hasn’t shifted or torn—adjust as needed to maintain full coverage.
✂️ Step 5: Remove the Wrap at the Right Time
Wait until late winter or early spring—when the tree shows signs of new growth (like swollen buds or tiny leaf shoots)—before removing the wrap. Pulling it off too early can expose the bark to late frosts, while leaving it on too long can trap heat and encourage pest activity. Use a sharp utility knife to cut the wrap carefully, starting at the bottom and working upward.
Peel the wrap away gently, checking the bark for any damage or moisture buildup. If you notice any issues, give the tree a few weeks to recover before rewrapping if needed. Once removed, dispose of the wrap immediately—never reuse it, as old wraps can harbor pests or diseases that could infect healthy trees.
Tips & tricks for perfect tree wrapping
These simple but essential tips will help you protect your trees like a pro—without the common mistakes that can actually harm them.
Material Matters: In Step 1, when choosing your wrap material, avoid anything plastic—it traps moisture and can suffocate the bark. I've seen people use old plastic bags as a shortcut, and it always leads to mold and bark damage. Stick with breathable fabrics like burlap or commercial tree wrap that allow air circulation while blocking harsh winds. For extra security, pre-soak burlap in water to help it conform tightly to the trunk's contours.
Cleanliness is Key: Before applying your wrap in Step 2, take the extra 10 minutes to thoroughly clean the trunk. I've learned this the hard way—leaving debris under the wrap creates perfect hiding spots for pests and can trap moisture against the bark. Use a soft brush to gently remove loose bark and debris, then inspect for any wounds. If you find cracks, apply a tree wound dressing immediately—this small step can prevent major damage during winter.
Proper Spacing Prevents Damage: When you're wrapping in Step 3, that 2-inch gap between the wrap and the ground is crucial. I've seen too many people skip this step, and it always leads to moisture buildup that causes bark rot. Also, when securing your wrap with staples, space them every 12-18 inches—this keeps the material taut without restricting the tree's natural movement. The wrap should fit snugly but never squeeze the trunk.
Seasonal Checkups: In Step 4, if you're adding extra insulation for young trees, remember to check your wrap monthly during winter. I've had clients call me in spring with trees that had their bark damaged because the wrap shifted in winter winds. A quick monthly inspection ensures everything stays in place and your trees stay protected until spring.
Pro Tips for Wrap Trees For Winter
- These simple but essential tips will help you protect your trees like a pro—without the common mistakes that can actually harm them.
- Material Matters: In Step 1, when choosing your wrap material, avoid anything plastic—it traps moisture and can suffocate the bark.
- Cleanliness is Key: Before applying your wrap in Step 2, take the extra 10 minutes to thoroughly clean the trunk.
Frequently asked questions
Got questions about wrapping your trees for winter? You’re not alone! Here are some of the most common concerns—and straightforward answers—to help you protect your yard like a pro.
Why do I need to wrap my trees at all?
Tree wrapping shields tender bark from harsh winter elements like sun scald (caused by cold days and warm sun) and burrowing rodents. Young or thin-barked trees (like birch, maple, or fruit trees) are especially vulnerable. Think of it as giving your trees a cozy sweater—preventative care saves stress (and money) later!
When is the best time to wrap trees for winter?
Wrap trees after the first hard frost (when temps drop below 20°F/-7°C) but before heavy snowfall. This timing balances protection against early cold snaps while avoiding moisture buildup under wraps. Pro tip: Check local freeze dates—your county extension office is a great resource!
What’s the difference between burlap and tree wrap?
| Burlap | Tree Wrap (Plastic/Fabric) |
|---|---|
| Breathable, biodegradable, and great for rodent deterrence (mice hate it!). Best for young trees or rodent-prone areas. | Long-lasting (3–5 years), protects against sun scald and cracking. Use for mature trees or high-risk species. |
| Downside: Needs reapplication yearly; can mold if wet. | Downside: Non-breathable—remove in early spring to avoid bark suffocation. |
Need a budget fix?
Combine both: Wrap the trunk with plastic and wrap that with burlap for extra rodent defense!
My tree wrap is tearing or falling off—what now?
Don’t panic! Loose or damaged wraps can cause more harm than good. Fix it ASAP:
- Tighten it: Use duct tape or zip ties (buried under the wrap) to secure gaps.
- Check for moisture: If the wrap feels damp, unwrap the tree for a day to dry, then reapply.
- Replace if needed: Torn plastic wraps should be swapped out—never leave jagged edges (they can cut bark).
Prevention tip: Overlap wraps by 1–2 inches and secure with staple-free fasteners to avoid future tears.
Are there trees that don’t need wrapping?
Yes! Mature trees with thick, rugged bark (like oak, pine, or hickory) usually skip wrapping. Also, evergreens (spruce, fir) benefit more from watering in fall and mulching than trunk protection. Focus on young, thin-barked, or high-value trees (fruit trees, ornamental varieties) for best results.
Wrapping up and next steps
Wrapping your trees for winter isn’t just a chore—it’s a simple, effective way to protect them and ensure they thrive for years to come. 🌳❄️ From choosing the right materials to mastering proper techniques, every step counts in safeguarding your yard’s greenery against harsh weather.
Whether you’re a seasoned gardener or just starting out, these tips make the process easy and rewarding.
Now that you’re armed with the knowledge, roll up your sleeves and give your trees the winter care they deserve! Start by inspecting your yard this weekend—your trees will thank you come spring! 🌱