
Planting
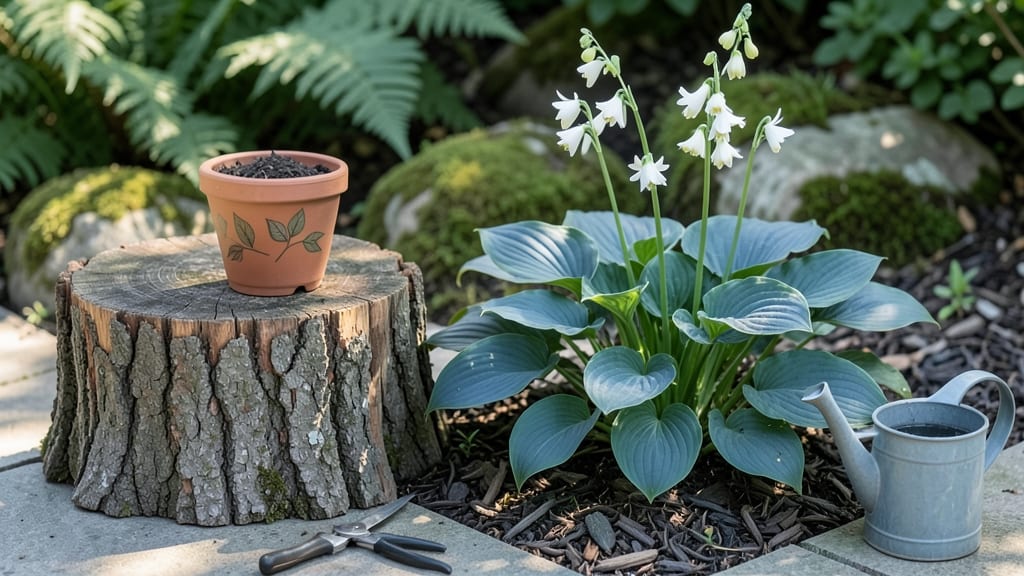
That tree stump in your yard isn’t dead weight—it’s the perfect tree stump plant stand waiting to happen. I transformed a leftover stump into a rustic elevated display that now holds my herbs and succulents, adding instant charm to my patio.
The best part? It takes less than an hour, costs almost nothing, and gives your garden a one-of-a-kind focal point.
You’ll need just a few supplies: a drill, screws or brackets, potting soil, and your choice of plants. The key is stability—drill holes for drainage and secure the stump to a base if needed.
Paint or stain it for a polished look, or leave it natural for that organic, woodland vibe. This project works for everything from tiny succulents to trailing herbs, making it perfect for small spaces.
Imagine your patio transformed: lush greenery spilling over the edges of a stump that once seemed like a nuisance. The elevated design keeps plants safe from ground pests, and the rustic texture adds warmth to any garden style.
Plus, it’s a sustainable way to upcycle something you’d otherwise remove. Let’s get started—your garden’s new centerpiece is just a few tools away.
Whether you’re going for farmhouse charm or modern minimalism, this stand adapts to your aesthetic. For extra stability, add a weighted base or sink it slightly into the ground. The possibilities are endless, and the results? Pure garden magic. Ready to turn that stump into a statement piece?
📚 In This Guide
- What you need
- Instructions
- Tips and common mistakes
- Wrapping up and next steps
What you need
- ● 1 tree stump – Freshly cut or naturally weathered (diameter: 6"–12" for small plants, 12"–24" for larger displays).
- ● 1 drill – With a 1/4"–3/8" wood bit (for drainage holes).
- ● Sandpaper (80–120 grit) – To smooth rough edges and surfaces.
- ○ Non-toxic wood sealant or paint – Optional but recommended for weatherproofing (e.g., outdoor polyurethane or milk paint).
- ● Potting soil – Lightweight, well-draining mix (1–2 bags, depending on stump size).
- ● 1–2 small potted plants – Succulents, herbs, or trailing plants (e.g., sedum, mint, or string of pearls).
- ● Saucer or tray – To catch excess water (size: slightly larger than stump base).
- ● Stain or natural dye – For custom colors (e.g., walnut or coffee stain).
- ● Decorative moss or pebbles – To enhance rustic charm.
- ● Watering can with a long spout – For easy watering without over-saturating.
- ● Screws or brackets – If attaching the stump to a post or wall for stability.
Step-by-Step instructions for crafting a tree stump plant stand
Turn a humble stump into a charming elevated garden display with just a few simple tools and materials.
Select and Prepare the Stump
Choose a stump that's at least 12-18 inches in diameter—the wider the base, the more stable your stand will be. Look for one with a flat top or one you can easily sand down. I like to pick stumps that still have some bark intact for that natural, rustic look.
Clean the stump thoroughly with a wire brush to remove dirt, loose bark, and any remaining roots. If the stump is wet or damp, let it dry completely in the sun for 24-48 hours before proceeding. This prevents mold growth later on. Sand down any rough edges or splinters with 80-grit sandpaper to make it safe to handle.
Create Drainage Holes and Add a Liner
Use a 1-inch wood bit to drill 4-6 drainage holes around the stump's circumference, spaced evenly about 3-4 inches apart. These holes prevent water from pooling at the bottom, which can rot the stump over time. Make sure the holes are large enough to allow water to drain freely but not so big that soil washes out easily.
Line the inside of the stump with a heavy-duty landscape fabric or burlap sack. This keeps soil from falling out through the drainage holes while still allowing excess water to escape. Secure the fabric with staple gun or twine at the top edge, ensuring it’s snug but not stretched tightly.
Fill the Stump with Soil and Plant
Fill the stump about halfway with a lightweight potting mix designed for containers. I like to mix in a handful of perlite or vermiculite to improve drainage—this is especially important for elevated planters. Press the soil down gently to remove air pockets, but don’t compact it too firmly.
Plant your chosen succulents, herbs, or small perennials in the center of the stump. For a 4-plant display, arrange them evenly around the edges, leaving about 3-4 inches between each plant. Water lightly after planting to help settle the soil around the roots. If the stump feels top-heavy, add a few small rocks to the base for extra stability.
Add Finishing Touches and Watering Routine
Top off the stump with a 1-2 inch layer of decorative mulch, like pine bark fines or gravel, to keep moisture in and prevent soil erosion. This also adds a polished look to your rustic stand. If the stump has a natural hollow in the center, fill it with moss or small pebbles for a whimsical touch.
Water the plants deeply once a week, allowing water to drain completely through the holes. Avoid overwatering—elevated planters dry out faster than ground-level ones. Check the soil moisture by sticking your finger 1 inch deep; if it feels dry, it’s time to water. Place your stump stand in a spot with partial sun to light shade for best results.
Tips & tricks for perfect tree stump plant stand
Transforming a simple stump into a stunning garden feature is easier than you think—here are my favorite tricks to ensure your elevated plant stand turns out beautiful and functional every time.
Stump Selection Secret: Look for stumps with natural character like cracks or hollows—they add charm without extra work. I always check for stability by gently rocking the base; if it wiggles more than a few millimeters, skip it. The 24-48 hour drying time in Step 1 is non-negotiable—wet stumps develop mold within days, and nobody wants a soggy, smelly planter. Place your stump on a flat surface or small rocks to ensure proper drainage from the start.
Drainage Hack: When drilling those 4-6 drainage holes in Step 2, space them slightly higher on one side if your stump has a natural slope. This creates a subtle water flow direction, preventing soil from clogging the holes over time. For extra insurance, place a small piece of landscape fabric over the holes before adding soil—it catches debris while still allowing water through.
Plant Placement Pro Tip: In Step 3, arrange your 4 plants in a circular pattern rather than a straight line. This creates visual balance and makes the most of the stump's natural shape. For extra stability with top-heavy plants, tuck a few small rocks into the soil near the base of each plant instead of just at the center. This distributes weight more evenly and prevents tipping.
Watering Wisdom: That once-a-week watering routine in Step 4 works best if you water in the morning. The elevated design means soil dries out faster, but morning watering gives plants time to absorb moisture before evening heat. I like to use a watering can with a narrow spout to direct water precisely to the soil—avoid overhead watering which can wash soil out through the drainage holes.
Pro Tips for Tree Stump Plant Stand
- Transforming a simple stump into a stunning garden feature is easier than you think—here are my favorite tricks to ensure your elevated plant stand turns out beautiful and functional every time.
- Stump Selection Secret: Look for stumps with natural character like cracks or hollows—they add charm without extra work.
- Drainage Hack: When drilling those 4-6 drainage holes in Step 2, space them slightly higher on one side if your stump has a natural slope.
Frequently asked questions
Got questions about turning a tree stump into a stylish plant stand? Here are some of the most common ones—and their answers!
How long does it take to turn a tree stump into a plant stand?
A basic stump stand can be ready in as little as 15–30 minutes if you’re using a pre-cut stump or a simple design. For a more polished look (like sanding or staining), plan for 1–2 hours or even a full day if you’re customizing it. Pro tip: If you’re repurposing an old stump, skip the drying time—just clean and prep!
Do I need special tools to make a tree stump plant stand?
Not necessarily! A basic kit includes a saw (hand saw or chainsaw), sandpaper, and a drill (for drainage holes). For extra flair, add paint, stain, or decorative hardware. No power tools? A handsaw and sanding block work fine for small stumps!
Will a tree stump plant stand hold up in rain or snow?
Yes, but only if you prep it right! Seal the stump with outdoor wood sealant or paint to prevent rot and water damage. For heavy snow, add support brackets or place it under a covered porch. Avoid leaving potted plants in freezing temps—opt for frost-resistant pots!
What’s the best way to clean a dirty or moldy tree stump?
Start by scrubbing with a stiff brush and soapy water. For stubborn mold or mildew, mix 1 part bleach to 3 parts water, spray it on, and let it sit for 10 minutes before rinsing. Safety tip: Wear gloves and work in a ventilated area!
Can I use a tree stump plant stand for heavy pots or large plants?
It depends on the stump’s size and stability. A small stump (under 6 inches wide) may only support lightweight pots (5–10 lbs). For heavier plants (like large succulents or small trees), choose a wider, thicker stump or reinforce it with metal brackets. Test stability by gently rocking it before planting!
Wrapping up and next steps
Transforming a simple tree stump into a stunning plant stand is easier—and more rewarding—than you might think! With just a few basic tools and a little creativity, you’ve got a rustic, elevated garden display that adds charm to any outdoor space.
Whether you’re a seasoned gardener or a beginner, this project is a fantastic way to repurpose nature’s leftovers into something beautiful.
Ready to take the next step? Grab a stump, gather your supplies, and start crafting! 🌿✨ Share your creations with fellow plant lovers—your unique stand might just inspire someone else’s next green project.