Pruning
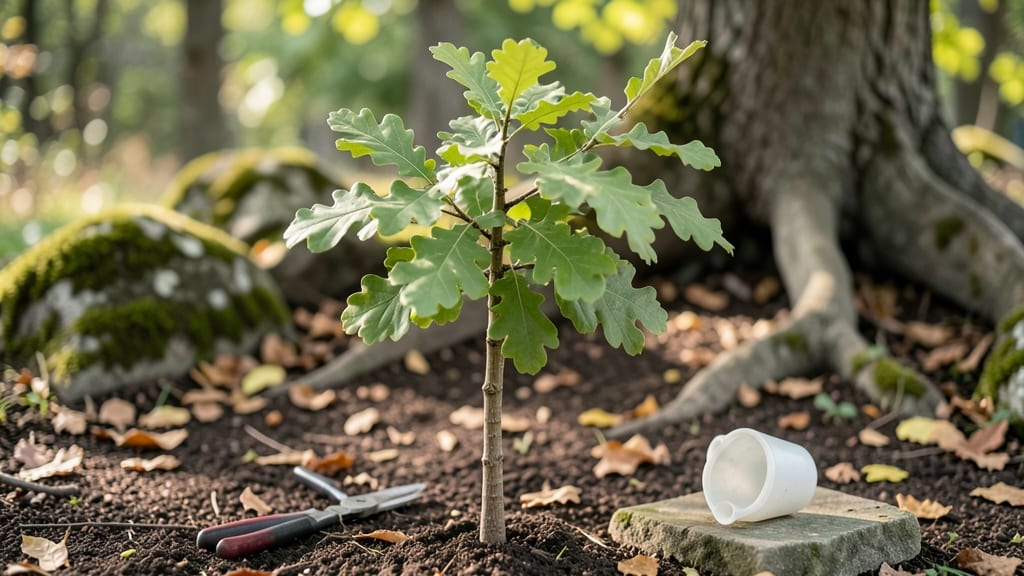
Mastering tree sapling identification by leaf shape, bark, and branch patterns saves years of guesswork—and the heartbreak of planting the wrong species in your yard. 🌱 I’ve spent years watching saplings transform into towering shade trees, and the key to success starts with knowing what you’re bringing home.
A single leaf can tell you whether that sapling will thrive in your climate or struggle for years.
The right tools make this simple: a magnifying glass for bark texture, a ruler for leaf measurements, and a field guide (or phone app) for quick comparisons. My go-to method? Start with leaf shape—needle-like for pines, lobed for oaks, or smooth-edged for maples—and then check bark color and branch arrangement.
Most nurseries sell saplings with tags, but learning to read the tree itself builds confidence for future plantings.
Once you’ve matched the sapling to your space, planting depth and soil prep become effortless. A sapling with the right leaf shape in the right spot grows into a strong, healthy tree with minimal stress.
Picture your future yard: the perfect shade tree, the one that flowers in spring, or the windbreak that protects your garden. This is how you get there.
Works for any climate zone and garden size—whether you’re restoring a forest edge or adding a single specimen to your lawn. The next step? Grab a notebook and let’s decode those leaves together.
📚 In This Guide
- What you need
- Instructions
- Tips and common mistakes
- Wrapping up and next steps
What you need
- ● Field Guide or App: A tree identification app (like LeafSnap, iNaturalist, or Arboretum’s Tree ID) or a printed field guide (e.g., "Peterson Field Guide to Trees").
- ● Notebook & Pen: For sketching leaf shapes, bark textures, and branch patterns. A small ruled notebook or waterproof paper works best.
- ● Magnifying Glass: A 10x handheld magnifier to inspect fine details like leaf veins, bud scales, or bark fissures.
- ● Measuring Tape or Ruler: A 6-inch ruler or flexible tape measure to record leaf length/width or branch spacing.
- ○ Camera or Smartphone: With a macro lens attachment (optional but helpful) for close-up shots of leaves, buds, or bark.
- ○ Gloves (Optional but Recommended): Nitrile or leather gardening gloves to protect hands from thorns, sap, or rough bark.
- ● Pruning Shears (Sterilized):strong> A small, sharp pair (for safely collecting a few leaves/branches if needed—never harm the tree!).
- ● Tree Sapling Identification Key: A printed or digital dichotomous key (e.g., from the USDA Forest Service) for advanced ID.
- ● Sapling Stakes or Flags: Plastic stakes and labels to mark saplings you want to track over seasons.
- ● Portable UV Light: A blacklight (like a $20 UV flashlight) to check for fluorescence in leaves/bark (some species glow!).
- ● Field Binoculars: 8x42 or 10x25 to spot high branches or canopy clues.
- ● Sapling Database Access: Offline maps (like iTree or Google Earth) to cross-reference locations.
How to identify tree saplings using leaf, bark, and branch clues
Here’s the foolproof method I use to tell saplings apart—no guesswork, just clear visual cues.
🌿 Step 1: Examine Leaf Shape and Arrangement
Start by looking at the leaves—they’re your first big clue. Hold a sapling’s branch near the top and observe how the leaves grow. Deciduous trees like maples have opposite leaves (paired directly across the stem), while oaks and hickories display alternate leaves (spaced singly along the branch). Measure leaf size too—maple leaves are 3-6 inches wide with pointed lobes, while birch leaves are smaller, oval, and smooth-edged.
Pay attention to leaf edges: serrated (like oak), lobed (like maple), or smooth (like willow). I always run my thumb along the edge—rough teeth mean a different species than silky smooth margins. If the sapling has compound leaves (multiple leaflets on one stem), it’s likely a hickory, walnut, or ash.
🌱 Step 2: Inspect Bark Texture and Color
Bark changes as trees age, but saplings reveal their secrets early. Smooth, silver-gray bark with horizontal lenticels (pores) is a birch. If the bark is deeply furrowed with diamond-shaped plates, it’s likely a young oak. Younger maples have smooth, greenish bark that turns rougher with age, while beech bark stays smooth and gray for decades.
Scratch the bark gently with your fingernail—some species, like sycamore, have peeling patches even as saplings. If the bark is reddish-brown and scaly, you’re probably looking at a young red maple. I always compare the sapling’s bark to a mature tree’s bark in nearby photos—it’s a great cross-check.
☀️ Step 3: Study Branch Structure and Buds
Examine the branch tips for buds and their arrangement. Opposite buds (paired at each node) are classic for maples and dogwoods, while alternate buds (single at each node) appear on oaks and hickories. Press the buds gently—some, like those on willows, are sticky or resinous, while others, like those on birches, are smooth and pointed.
Look at the branch angles too: upright, stiff branches suggest a young oak, while weeping or drooping branches point to a willow. I often trace the branch’s path with my hand—if it grows in a zigzag pattern, it’s likely a hickory or walnut. Don’t forget to check for thorns—hawthorn saplings have sharp, paired thorns right at the buds.
✂️ Step 4: Cross-Reference with Seasonal Clues
Timing matters—spring and summer reveal the most details. In spring, notice when buds open: maples unfurl early, while oaks lag behind. Summer leaf color helps too—yellow-green leaves might be a young ash, while deep green with white undersides suggests a beech. I always jot down notes on leaf color, size, and arrangement in my field journal.
Fall is another key season: bright red leaves = maple, golden yellow = birch, brown and crunchy = oak. If you’re unsure, snap a photo and compare it to a tree identification app or field guide. I keep a laminated quick-reference chart in my pocket—it’s saved me from mistakes more times than I can count.
Tips & tricks for perfect tree sapling identification
Here's what nobody tells you—these tricks will help you spot even the trickiest saplings like a pro.
Leaf Texture Test: In Step 1, when examining leaf edges, don't just look—touch! Rub your thumb along the edge to feel the difference between smooth (like willow) and serrated (like oak). I learned this the hard way after misidentifying a young hickory as a maple because I only looked, not felt. The texture can be the deciding factor when shapes look similar.
Bark Scratch Technique: For Step 2, take it a step further with the bark test. After scratching gently with your fingernail, look closely at the color underneath. Sycamore bark often reveals a pale, almost white layer when scratched, while maple bark shows a more consistent greenish tone. This hidden detail can confirm your guess when the outer bark looks similar.
Bud Seasonal Timeline: In Step 3, remember that bud timing varies by region. In colder climates, maples might not bud until late April, while in warmer areas, they could start as early as March. I keep a small notebook to track bud opening dates in my area—this helps me predict when to expect leaves and adjust my identification timeline accordingly.
Photographic Cross-Check: For Step 4, when using seasonal clues, always take a photo from multiple angles. Snap a close-up of the leaf underside (some species have distinctive hairiness or color patterns there), the bark texture, and the branch structure. Later, you can compare these photos to reference guides with confidence, especially when dealing with tricky species like elms or ashes.
Pro Tips for Tree Sapling Identification
- Here's what nobody tells you—these tricks will help you spot even the trickiest saplings like a pro.
- Leaf Texture Test: In Step 1, when examining leaf edges, don't just look—touch!
- Bark Scratch Technique: For Step 2, take it a step further with the bark test.
Frequently asked questions
Got questions about identifying tree saplings? You’re not alone! Here are some of the most common queries—plus clear, actionable answers to help you confidently spot the right species in your yard or garden.
How do I tell the difference between a young oak and a young maple sapling?
Look at the leaf shape and arrangement: Oak leaves are lobed (like fingers) and often have bristly edges, while maple leaves are smooth-edged with pointed lobes. Check the bark too—young oaks have smoother bark, while maples may have a slightly rougher texture. Pro tip: Oaks also have alternate leaves (one per node), while maples can be opposite (two per node).
When is the best time of year to identify tree saplings?
Spring and early summer are ideal! Leaves are fully unfurled, making leaf shape and arrangement easy to study. Avoid winter (when leaves are gone) or late fall (when some trees drop leaves early). If you’re unsure, compare saplings to mature trees in your area—growth patterns often give clues.
What if my sapling doesn’t match any identification guides?
Start by noting key traits: leaf type (simple/compound), bark texture, branch patterns, and fruit/seeds (if present). Use a tree ID app like LeafSnap or PictureThis to cross-reference. If it’s still unclear, share a photo in local gardening groups—experts often spot details you might miss!
Can I identify a sapling just by its bark?
Yes, but it’s best combined with other traits. Smooth bark (like birch) or ridged bark (like sycamore) can hint at species. However, bark changes as trees age—young trees may not show mature patterns. Pair bark observations with leaves or buds for accuracy. Example: A sapling with peeling paper-like bark is likely a birch!
What’s the easiest way to confirm a sapling’s species?
Combine 3 methods for certainty:
- Photograph the sapling (include leaves, bark, and branches).
- Compare to a regional field guide or online database (like NPS Tree ID).
- Observe growth habits—does it grow fast? Drop leaves early? Cluster buds?
Wrapping up and next steps
Identifying tree saplings doesn’t have to be a daunting task—with the right tools and a little practice, you’ll soon become a pro! 🌱 By focusing on leaf shape, bark texture, and branch patterns, you can confidently distinguish species and nurture your young trees.
Whether you're restoring a garden, supporting local ecosystems, or simply satisfying your green thumb, every sapling you recognize brings you one step closer to a thriving outdoor space.
Ready to put your new skills to work? Start by planting or tagging one of the saplings you’ve identified—then watch as it grows into a beautiful, healthy tree! 🌳