Trees
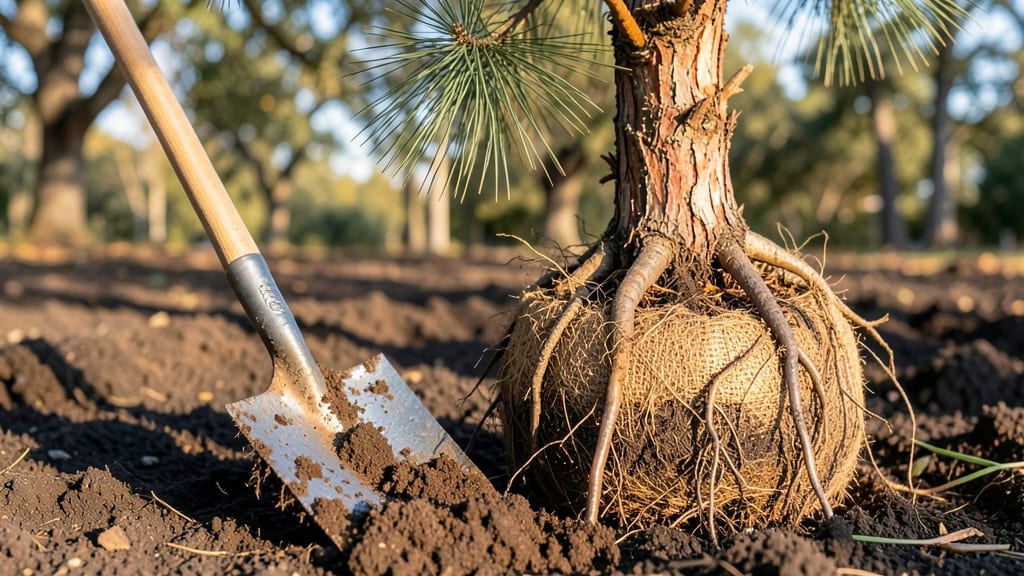
Transplanting a tree with a root ball isn’t just about digging a hole—it’s about giving your new tree the best shot at thriving for decades.
I’ve buried more trees than I’d like to admit, and the difference between a struggling sapling and a sturdy, leafy giant often comes down to how you handle that root ball.
The roots need air, moisture, and room to spread without strangling or drying out, and one wrong move can set a tree back for years.
Start by preparing the root ball before it even leaves the nursery: inspect the burlap or container for tightness, loosen any circling roots gently with your fingers, and keep the root ball moist until planting day.
When you’re ready to plant, dig a hole twice as wide as the root ball but only as deep as it is tall—sinking it too low invites rot, while planting too high strangles growth.
The goal is to mimic the tree’s natural soil conditions as closely as possible, so amend the native soil with compost if it’s heavy clay or pure sand.
📚 In This Guide
- What you need
- Instructions
- Tips and common mistakes
- Wrapping up and next steps
What you need
- ● Tree root ball: The burlapped or bare-root tree you’re transplanting (ensure it’s the right size for your space!).
- ● Shovel or spade: A sturdy, sharp-edged digging tool (18–24" wide for small trees, larger for mature ones).
- ● Garden fork or root pruner: For loosening compacted soil or trimming overgrown roots (if needed).
- ● Wheelbarrow or tarp: To transport soil and the root ball (1–2 yards of soil, depending on tree size).
- ● Stakes and twine: 2–4 wooden or metal stakes (6–8 ft long) + soft twine to secure the tree temporarily.
- ● Pruning shears: For trimming damaged or overly long roots (sterilized blades recommended).
- ● Watering can or hose with nozzle: A gentle spray attachment is ideal for post-transplant hydration.
- ● Mulch (organic): 2–3 inches of shredded bark, wood chips, or pine straw (keep 6" away from the trunk!).
- ● Transplanting fabric or burlap: If your root ball isn’t pre-wrapped, use biodegradable material to protect roots.
- ○ Root stimulator or mycorrhizal fungi: Optional but helpful for stressed trees (follow product instructions).
- ● Soil amendments: Compost or peat moss (mix 20–30% into native soil if it’s poor-quality).
- ● Tree collar guard: Protects the trunk from mulch or lawnmower damage.
- ● Post-hole digger: For creating a precise planting hole (if hand-digging is tricky).
- ● Gloves & knee pads: Because digging is way more fun with these! 😉
- ● Soil test kit: Check pH and nutrient levels before planting (especially for young trees).
Instructions for transplanting a tree with a root ball
Here's how to move a tree successfully without damaging its roots or stressing the plant.
Prepare the New Planting Site
Choose a location that matches the tree's light and soil needs. Dig a hole twice as wide as the root ball but only as deep—planting too deep can suffocate the roots. I like to add a 2-inch layer of compost to the bottom of the hole to improve drainage and provide nutrients right where the roots will spread.
Break up any large clumps of native soil in the hole with a shovel or your hands. The goal is loose, aerated soil that won't compact around the roots. If your soil is heavy clay, mix in a handful of sand or perlite to help it drain better. Water the hole thoroughly before planting to settle the soil and remove air pockets.
Remove the Tree from Its Container or Burlap
If your tree is in a container, gently squeeze the sides to loosen the root ball before lifting it out. For burlap-wrapped root balls, use a sharp knife to cut away any twine or wire that might girdle the roots as the tree grows. Don't remove the burlap entirely—it helps hold the root ball together during transplanting.
Inspect the root ball for any circling or tangled roots. If you see roots growing in circles, carefully tease them outward with your fingers. These roots can strangle the tree if left undisturbed. Place the tree in the hole so the top of the root ball sits level with the surrounding soil—never bury the trunk deeper than it was before.
Position and Backfill the Hole
Center the tree in the hole and adjust its position before backfilling. The trunk should stand straight, and the root ball should sit perfectly in the middle of the hole. Have someone hold the tree upright while you shovel soil back into the hole—this prevents the root ball from shifting as you work.
Fill the hole in stages, tamping down each layer lightly with your hands or a shovel handle. This removes air pockets and ensures the soil settles evenly around the roots. Water the tree deeply after each third of the hole is filled to help the soil compact naturally. Stop when the hole is 2-3 inches below the surrounding soil level—this allows for final settling.
Mulch and Water the Transplanted Tree
Spread a 2- to 3-inch layer of mulch over the soil surface, keeping it at least 6 inches away from the tree trunk to prevent rot. Use organic mulch like wood chips or shredded bark, which will break down and improve the soil over time. Mulch helps retain moisture and regulates soil temperature, both of which are critical for a tree's recovery.
Water the tree thoroughly after mulching, soaking the root ball until water runs out the bottom of the hole. This ensures the roots make full contact with the moist soil. Avoid overwatering, though—you want the soil to be damp, not soggy. Water deeply every 7-10 days for the first year, adjusting for rainfall. The goal is to encourage deep root growth, not shallow, water-dependent roots.
Tips & tricks for perfect tree root ball transplanting
Moving a tree without stressing its roots takes more than just digging a hole. Here are the key tricks to ensure your transplant thrives from day one.
Soil Preparation Secret: The 2-inch layer of compost in Step 1 isn't just about nutrients—it creates the perfect transition zone between the root ball and native soil. For heavy clay soils, mix in sand or perlite to improve drainage, but don't overdo it. Too much sand can create air pockets that roots avoid. I've seen trees fail after transplanting because the soil was too compacted around the roots—always aim for that loose, aerated texture.
Root Ball Inspection: In Step 2, when you're checking for circling roots, be gentle but thorough. These roots can wrap around the root ball like a noose, cutting off circulation. I've had to carefully untangle roots that were completely circling the root ball—something you can't see from the outside. Use your fingers to gently work them outward, and if you find any that are particularly tight, you might need to make small cuts to free them up.
Backfilling Technique: The staged backfilling in Step 3 is where most people go wrong. Instead of dumping soil back in and calling it done, fill the hole in thirds, tamping each layer lightly. This prevents air pockets that can suffocate roots. I've seen trees lean because the root ball shifted during backfilling—always have someone hold the tree upright while you work, and use your hands (not a shovel) to tamp the soil gently.
Mulching Wisdom: The 2- to 3-inch layer of mulch in Step 4 is crucial, but placement matters just as much as thickness. Keep that mulch at least 6 inches away from the trunk to prevent rot. I've seen cases where mulch piled against the trunk created a moist environment that led to fungal issues. Organic mulch like wood chips breaks down over time, improving soil quality, but it also helps regulate temperature—critical for young transplants adjusting to their new home.
Pro Tips for Tree Root Ball
- Moving a tree without stressing its roots takes more than just digging a hole.
- Soil Preparation Secret: The 2-inch layer of compost in Step 1 isn't just about nutrients—it creates the perfect transition zone between the root ball and native soil.
- Root Ball Inspection: In Step 2, when you're checking for circling roots, be gentle but thorough.
Frequently asked questions
Got questions about transplanting a tree root ball? You’re not alone! Here are some of the most common concerns—and their straightforward answers—to help you tackle your project with confidence.
What’s the best time of year to transplant a tree with a root ball?
The ideal window is late fall to early spring (dormant season) when trees aren’t actively growing. Avoid extreme heat or frost—root systems recover best in mild, moist conditions. For container-grown trees, you can transplant anytime, but spring is still optimal for establishment.
How do I know if my tree’s root ball is too big or too small?
Size matters! A root ball should be 10–12 inches in diameter per inch of trunk diameter (e.g., a 3-inch trunk needs a 30–36-inch root ball). Too small? Roots may struggle to support the tree. Too large? It’s harder to handle and may dry out faster. Check the burlap or container—if roots circle tightly, it’s overgrown and needs pruning.
Should I water the root ball before or after transplanting?
Do both!
Water the root ball 2–3 days before transplanting to saturate the soil, then water immediately after planting to eliminate air pockets. After that, keep the soil consistently moist (but not soggy) for the first 6–12 weeks. Deep watering 2–3 times per week is key for survival.
Do I need to remove the burlap or container when transplanting?
It depends! If the burlap is natural fiber, leave it on but slit it open to free roots. If it’s synthetic, remove it entirely to prevent girdling. For container-grown trees, gently tease roots at the bottom if they’re circling. Pro tip: Never wrap the root ball in plastic or wire—it strangles growth!
What if my tree’s leaves turn yellow or wilt after transplanting?
Don’t panic—this is often normal stress! Yellowing leaves (chlorosis) usually mean too much water or poor drainage, while wilting signals underwatering or root shock. Trim any dead branches, ensure proper watering, and mulch the base (keep mulch 3–4 inches deep, 6 inches from the trunk). If symptoms persist after 2–3 weeks, check for root rot or pests.
Can I transplant a tree with a root ball in heavy clay soil?
Clay soil drains poorly, but it’s not a deal-breaker! Amend the planting hole with compost or sand to improve drainage, and add organic matter to the backfill mix. Consider a tree well (a raised ring) to encourage root expansion. Monitor moisture closely—clay holds water longer, so adjust watering to avoid soggy roots.
Wrapping up and next steps
Mastering the art of transplanting a tree root ball ensures your new planting thrives for years to come! 🌱 Whether you're a seasoned gardener or a beginner, taking the time to prepare the root ball, dig carefully, and provide proper aftercare makes all the difference.
Your hard work will soon be rewarded with a lush, healthy tree that enhances your landscape and the environment.
Ready to give your tree the best start? Pick a perfect day—one with mild weather and plenty of moisture—and get your tools ready. You’ve got this! 🌳💚