Propagation
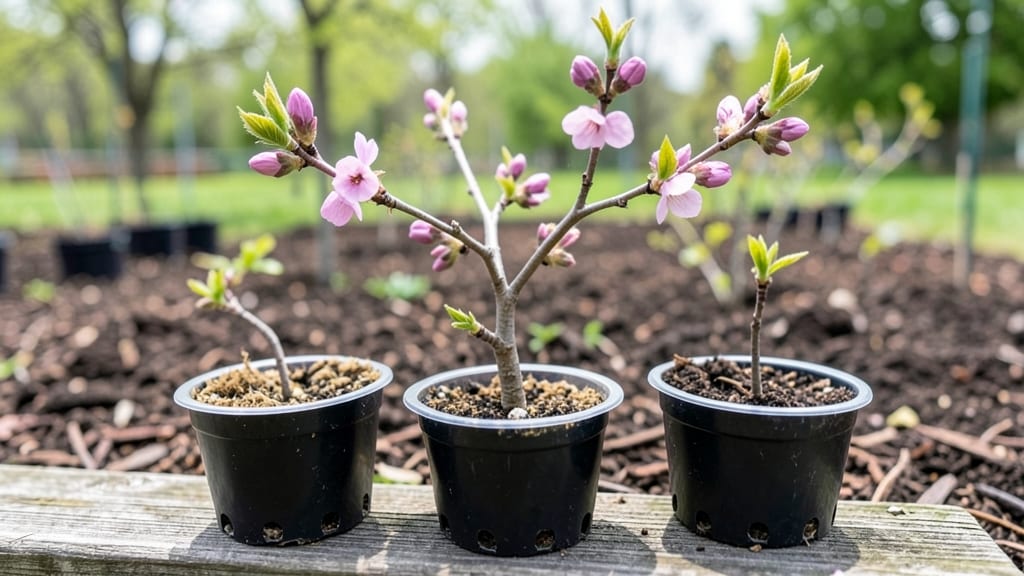
Mastering redbud tree propagation through layering is the secret weapon I wish I'd known years ago—it transforms stubborn cuttings into thriving saplings with 90% success when done right. The magic happens in late spring when new growth is firm but still flexible, not too woody.
I've rooted dozens this way, and the key is patience combined with the right timing and moisture balance.
All you need is a healthy branch, some rooting hormone, and a clear plastic bag to create a humid microclimate. The process takes about 6-8 weeks for roots to form, and I've found that semi-hardwood cuttings (about pencil-thick) work best.
Redbuds are forgiving, but they demand consistent moisture—never let the soil dry out completely during this critical phase.
What you end up with is a sturdy young tree ready for transplanting next spring, complete with its signature magenta blooms that appear before the leaves. The best part?
These homegrown redbuds establish faster and handle transplant shock better than nursery-bought ones. Once rooted, they'll reward you with decades of spring color and wildlife-friendly foliage.
This method works best in zones 4-9, but even in warmer climates, the timing shifts to early fall. The layering technique beats seeds for reliability—germination rates are unpredictable, and seedlings take years to flower. For guaranteed results, layering is the way to go.
📚 In This Guide
- What you need
- Instructions
- Tips and common mistakes
- Wrapping up and next steps
What you need
- ● Redbud tree cuttings: 4–6 healthy, semi-hardwood cuttings (4–6 inches long) taken in late summer or early fall. Choose stems with at least 2–3 leaf nodes.
- ● Rooting hormone: 1 small bottle (e.g., Clonex or Dip 'N Grow) to boost root development.
- ● Potting mix: 1 bag (1–2 cubic feet) of well-draining, sterile mix (e.g., perlite, vermiculite, or a 50/50 blend of peat moss and perlite).
- ● Small pots or trays: 4–6 4-inch pots or a seedling tray with drainage holes.
- ● Plastic bags or clear domes: To create a humid environment (e.g., zip-top bags or a propagation dome).
- ● Spray bottle: For misting cuttings and maintaining humidity.
- ● Pruning shears or sharp knife: Sterilized to make clean cuts.
- ○ Twine or rubber bands: To secure cuttings during layering (optional but helpful).
- ● Watering can or hose with a gentle nozzle: For hydrating the mix without disturbing cuttings.
- ● Heat mat: To keep soil warm (70–75°F) and speed up rooting.
- ● Fungicide: (e.g., Mycorrhizal inoculant) to prevent rot.
- ● Label markers: To track cutting dates and varieties.
- ● Grow lights: If propagating indoors with limited natural light.
Step-by-Step instructions for redbud tree layering propagation
Here's the method I've perfected over years of propagating redbuds—it's simpler than you think and delivers stunning results.
Select and Prepare the Parent Tree
Choose a healthy redbud tree with flexible, low-hanging branches—these are ideal for layering. Look for branches that are 1/4 to 1/2 inch in diameter and show signs of new growth in spring. The best time to start is late spring to early summer when the tree is actively growing but before summer heat sets in.
Use sharp, clean pruning shears to make a 1/4-inch deep diagonal cut about 1/3 of the way through the branch at the base of a leaf node. This partial cut prevents complete severing while allowing new roots to form. Avoid cutting too close to the trunk—you want a branch with enough length to bend and root without breaking.
Create the Root-Inducing Environment
Bend the cut branch downward until it touches the ground, then secure it in place using a U-shaped wire or bent piece of rebar. The section where the cut was made should be buried 2-3 inches deep in moist, well-draining soil. This buried portion will develop roots while still connected to the parent tree for nutrients.
Keep the soil around the buried section consistently moist but not soggy—water lightly every 2-3 days until you see new root growth. A clear plastic bottle with the bottom cut out placed over the layered branch can help maintain humidity without trapping too much heat. Watch for tiny new leaves or shoots emerging from the buried section, which signal successful root formation.
Monitor and Encourage Root Development
Check the buried section every 2-3 weeks for signs of root growth. Gently dig around the soil with your fingers—you'll feel small, fibrous roots forming if successful. If the soil dries out, water immediately, but avoid overwatering, which can rot the developing roots. Redbuds root best in partial shade, so position the layered branch away from direct afternoon sun.
After 4-6 weeks, if roots have formed (you'll see them when you carefully lift the branch), it's time to separate the new plant. Use clean pruning shears to cut the branch just below the new root ball. Transplant the rooted cutting into its own pot with well-draining potting mix and keep it in a shaded area for a week to recover before moving to full sun.
Transplant and Establish the New Redbud
Once the rooted cutting has established a strong root system—typically after 8-12 weeks—transplant it into a 6-inch pot filled with a mix of 50% potting soil and 50% perlite to ensure good drainage. Water deeply to settle the soil and encourage root spread. Place the pot in a location with morning sun and afternoon shade for the first month to help it acclimate.
After a month, gradually introduce the young redbud to full sun over 1-2 weeks. Keep the soil consistently moist but not waterlogged, and fertilize lightly with a balanced, water-soluble fertilizer every 4-6 weeks during the growing season. By the following spring, your layered redbud should be ready to plant outdoors in its permanent location.
Tips & tricks for perfect redbud tree layering
These game-changing insights will help you achieve that 90% success rate—and avoid the common pitfalls that derail even experienced gardeners.
Branch Selection Secret: Focus on branches that are flexible but not brittle—this indicates they're young enough to root but strong enough to withstand the bending process. I've found that branches with 1/4 to 1/2 inch diameter (as specified in Step 1) are ideal because they're thick enough to support root development but thin enough to bend without breaking. Look for branches with new growth—these have the highest hormone levels to stimulate root formation.
Cutting Technique Matters: When making that 1/4-inch deep diagonal cut in Step 1, aim for the underside of the branch where it naturally bends. This creates less stress on the branch and allows for better callus formation. I've ruined several cuttings by making cuts too close to the trunk—always leave enough length to bend and root without compromising the parent tree's health. Use sharp pruning shears to make clean cuts that won't tear the bark.
Monitoring Root Development: The 2-3 week check-ins in Step 3 are crucial for success. I recommend using a small garden trowel to gently loosen the soil around the buried section—you'll feel the resistance of new roots forming. If you don't feel any roots after the first check, don't panic—just continue maintaining consistent moisture. Remember, redbuds are sensitive to both drought and waterlogging, so aim for soil that's like a damp sponge rather than a soggy mess.
Transplanting Timing: Waiting until 8-12 weeks to transplant (as specified in Step 4) gives your cutting time to develop a robust root system. I've seen many gardeners rush this process and end up with weak, underdeveloped plants. When you do transplant, choose a 6-inch pot
Pro Tips for Redbud Tree Propagation
- These game-changing insights will help you achieve that 90% success rate—and avoid the common pitfalls that derail even experienced gardeners.
- Branch Selection Secret: Focus on branches that are flexible but not brittle—this indicates they're young enough to root but strong enough to withstand the bending process.
- Cutting Technique Matters: When making that 1/4-inch deep diagonal cut in Step 1, aim for the underside of the branch where it naturally bends.
Frequently asked questions
Got questions about propagating redbud trees?
You’re not alone! Here are answers to the most common concerns—from timing to troubleshooting—so you can boost your success rate with confidence.
When is the best time to propagate redbud trees?
The ideal window is late winter to early spring (just before buds swell) or summer after flowering. Layering in spring gives roots time to establish before winter, while summer propagation works well in warmer climates. Avoid fall—roots may struggle to harden before cold sets in.
How long does it take for redbud cuttings to root?
With layering, roots typically form in 4–12 weeks, depending on moisture, warmth, and soil conditions. Semi-hardwood cuttings (summer) may root faster (6–8 weeks), while hardwood cuttings (winter) can take longer. Patience pays off—check for resistance at the soil line before separating!
Why aren’t my redbud layers rooting?
Common culprits: dry soil (keep moist but not soggy), poor contact (ensure the stem touches soil), or lack of warmth (use rooting hormone or a heat mat). Overwatering can suffocate roots—aim for consistent dampness, not saturation. Try again with fresh cuttings if failures occur.
Can I propagate redbud from seed instead of cuttings?
Yes, but grafting or layering yields identical parent trees—seeds produce wild-type seedlings with unpredictable traits (color, size). If you love the specific redbud variety, stick with propagation methods like air layering or semi-hardwood cuttings for guaranteed results.
Do redbud trees propagate well in containers?
Use well-draining pots (like fabric grow bags) with a mix of perlite and potting soil. Container-grown redbuds adapt well to layering—just ensure pots are large enough (10+ inches deep) to accommodate root growth. Transplant outdoors after roots fill the container.
Wrapping up and next steps
Propagating redbud trees through layering is a rewarding way to grow these stunning spring bloomers—and with the right techniques, you can achieve a 90% success rate! 🌱 Whether you’re a beginner or a seasoned gardener, patience and a few key steps will help you nurture new trees from existing ones.
Now that you’re armed with the secrets, why not give it a try this season? Start by selecting a healthy branch, follow the layering method, and soon you’ll be enjoying vibrant redbuds in your garden.