Landscaping
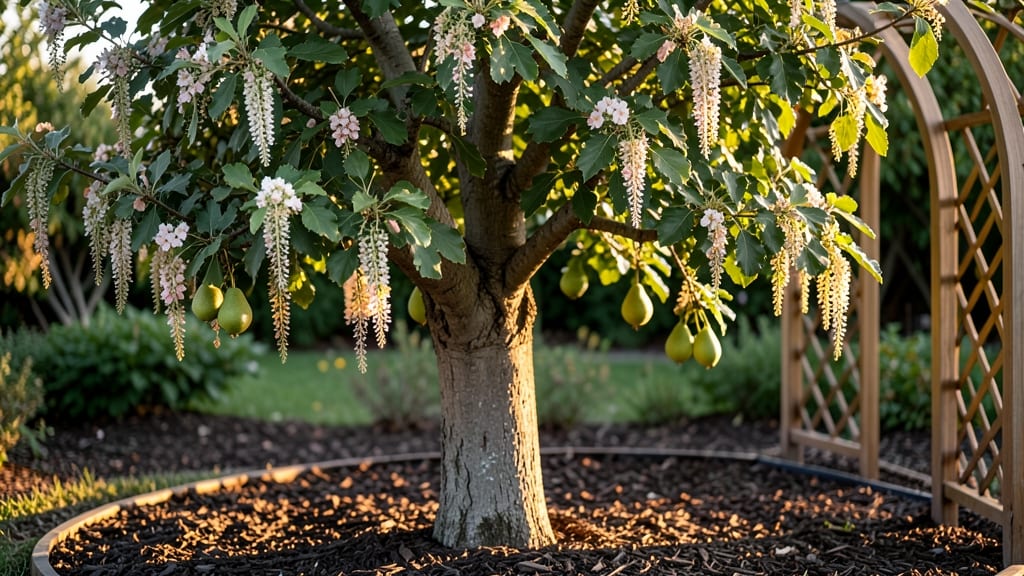
This pear tree landscaping in the Pacific Northwest turns ordinary yards into vibrant, fragrant havens—mine, planted last spring, now steals the show with its May blooms. These varieties thrive where others fail, bearing fruit even after light freezes.
The secret lies in placement and companions. Position your tree where it gets morning sun and afternoon shade, with enough space (15-20 feet from structures) for proper airflow. Pair it with ornamental grasses, lavender, or rhododendrons to create a layered, textured look that stays beautiful year-round.
The roots appreciate a 2-inch layer of wood chips to retain moisture while keeping weeds at bay.
By late summer, you’ll enjoy not just the fruit but the showstopping foliage—deep green leaves that turn golden in fall. The tree’s natural shape requires minimal pruning, just a few strategic cuts to open the canopy for sunlight.
Neighbors will ask how you did it, and you’ll smile knowing it’s all about the right variety in the right spot.
Works equally well in urban backyards or rural homesteads. The key is choosing a cold-hardy variety like ‘Seckel’ or ‘Bartlett’ and giving it room to grow. Your landscape will thank you for years to come.
📚 In This Guide
- What you need
- Instructions
- Tips and common mistakes
- Wrapping up and next steps
What you need
- ● Pear Tree Sapling: 1 frost-resistant variety (e.g., Pyrus calleryana ‘Chanticleer’ or Pyrus communis ‘Moonglow’)
- ● Size: 5–7 ft tall (for faster establishment) or bare-root for DIY planting
- ● Soil Amendments: 5–10 lbs of compost or well-rotted manure
- ● 2–3 lbs of balanced fertilizer (10-10-10 or organic option)
- ● 1–2 lbs of sulfur (if soil pH is >6.5; pears prefer acidic soil)
- ● Planting Supplies: 1 5-gallon bucket (for mixing soil amendments)
- ● 1 shovel (round-point for digging)
- ● 1 pruning shears (sterilized, sharp)
- ● 2–3 stakes (4–5 ft tall) + twine (for support)
- ● 1 mulch (3–4 inches of wood chips or straw, 3 ft radius)
- ● Watering Tools: 1 hose with adjustable nozzle or watering can
- ○ 1 soaker hose (optional but ideal for deep watering)
- ● Design Enhancements: Decorative tree guard (to protect from critters)
- ● Companion plants: 2–3 heuchera (coral bells) or ferns for underplanting
- ● Lighting: 1–2 solar-powered path lights (for evening ambiance)
- ● Maintenance Gear: Loppers (for future pruning)
- ● Tree tie wraps (if staking long-term)
- ● Fungicide (e.g., copper-based, for disease prevention)
- ● Safety & Comfort: Gloves (gardening or work gloves)
- ● Knee pads (for comfort during planting)
Step-by-Step guide to planting frost-resistant pear trees
Here’s how to establish a thriving pear tree in the Pacific Northwest’s cool climate.
Choose the Right Location and Variety
Select a site with full sun exposure (6-8 hours daily) and well-draining soil. Frost-resistant varieties like ‘Seckel’ or ‘Bartlett’ thrive in the Pacific Northwest’s chilly winters. Avoid low spots where cold air pools—even hardy pears need protection from late frosts.
Test your soil’s drainage by digging a 12-inch hole and filling it with water. If it drains in under an hour, the spot is ideal. Amend heavy clay soil with 3-4 inches of compost to improve texture. I always plant in early fall or late winter to give roots time to establish before summer heat arrives.
Prepare the Planting Hole and Soil
Dig a hole twice as wide but no deeper than the tree’s root ball. This encourages roots to spread horizontally rather than settling into a confined space. Gently loosen the roots if they’re circling tightly—you’ll see them wrapped like a ball when you remove the tree from its container.
Mix the native soil with 50% compost to create a nutrient-rich blend. Avoid fresh manure, which can burn young roots. Place the tree in the hole so the graft union (the swollen area near the base) sits 2-3 inches above soil level. This prevents rot and ensures proper healing.
Plant and Water Deeply
Backfill the hole with the soil-compost mix, tamping lightly every 6 inches to remove air pockets. Water immediately to settle the soil around the roots. A newly planted pear tree needs 10-15 gallons of water to encourage root growth into the surrounding soil.
Mulch the base with 2-3 inches of wood chips or straw, keeping it 6 inches away from the trunk to prevent rot. Water deeply every 7-10 days during the first growing season, checking that the top 6 inches of soil stay moist but not soggy.
Provide Support and Protection
Stake the tree only if necessary—young pears can handle light winds, but a 4-foot stake tied loosely with soft fabric (like an old T-shirt) prevents swaying in storms. Prune any broken branches immediately, but avoid heavy pruning in the first year.
In winter, wrap the trunk with tree guard or burlap to shield it from frost cracks. Pacific Northwest winters can fluctuate wildly, and sudden temperature swings stress young bark. Remove the wrap in early spring once buds begin to swell.
Maintain Through the First Three Years
Fertilize lightly in early spring with 10-10-10 granular fertilizer, spreading it evenly under the drip line. Pear trees are shallow-rooted, so focus on feeding the outer canopy. Thin fruit in the third year to 6-8 inches apart—this prevents overcrowding and improves fruit size.
Watch for signs of stress: yellowing leaves may indicate overwatering, while curled edges suggest underwatering. Prune in late winter to remove dead wood and shape the tree, but never cut more than 25% of the canopy in one season.
Tips & tricks for perfect pear tree landscaping
Here's what I've learned from years of planting pear trees in the Pacific Northwest—these tricks will help you avoid common pitfalls and give your tree the best start.
Location is Everything: In Step 1, when selecting your site, pay special attention to microclimates. While full sun (6-8 hours) is ideal, a south-facing slope gets more sunlight and warms up faster in spring—perfect for frost-sensitive varieties like 'Bartlett'. I've seen trees in north-facing spots struggle with late frosts, even in our mild winters. Also, avoid planting near large trees that will compete for water and nutrients.
Root Ball Prep Secret: When preparing the planting hole in Step 2, don't forget to score the root ball with a knife if you notice tight circling roots. I make 4-6 vertical cuts around the ball to encourage roots to spread outward rather than stay compacted. This helps the tree establish faster and prevents girdling as it grows. The 50% compost mix is crucial—it improves soil structure while providing nutrients without overwhelming young roots.
Watering Wisdom: That initial 10-15 gallons of water in Step 3 is non-negotiable, but don't stop there. After the first watering, check soil moisture every 7-10 days by sticking your finger 2 inches into the soil. If it's dry, water deeply until it drains out the bottom. The mulch layer helps retain moisture, but remember to keep it 6 inches away from the trunk to prevent rot. In our climate, consistent moisture is more important than frequent light watering.
Winter Protection Pro Tip: For Step 4's winter wrapping, I recommend using tree guard instead of burlap—it lasts longer and provides better insulation. Wrap it snugly but not too tight, leaving room for the trunk to swell slightly in winter. Remove it as soon as buds begin to swell in spring, usually around late February to early March in our region. This timing is critical—too early and you risk frost damage, too late and you can stress the emerging buds.
Pro Tips for Pear Tree Landscaping
- Here's what I've learned from years of planting pear trees in the Pacific Northwest—these tricks will help you avoid common pitfalls and give your tree the best start.
- Location is Everything: In Step 1, when selecting your site, pay special attention to microclimates.
- Root Ball Prep Secret: When preparing the planting hole in Step 2, don't forget to score the root ball with a knife if you notice tight circling roots.
Frequently asked questions
Got questions about transforming your Pacific Northwest landscape with frost-resistant pear trees? Here are some of the most common ones—plus straightforward answers to help you plan with confidence!
What’s the best time of year to plant a pear tree in the PNW?
The ideal window is late fall to early spring (November through March), when the tree is dormant. This gives roots time to establish before summer heat arrives. Avoid planting in extreme cold or during rainy seasons, which can stress young trees.
How do I protect my pear tree from late frosts in the PNW?
Use frost cloths or row covers during late spring blooms (April–May). For young trees, wrap the trunk with burlap to shield it from cold winds. Mature trees benefit from drip irrigation at night to raise soil temperatures slightly. Prune in late winter to avoid frost damage to fresh cuts.
Are there dwarf pear trees that work well in Pacific Northwest gardens?
Yes! Consider ‘Seckel’ or ‘Moonglow’—both are cold-hardy (USDA Zones 5–8) and stay compact (12–15 ft tall). They’re perfect for small yards, containers, or espalier designs. Just ensure they get 6+ hours of sun and well-draining soil to thrive.
How do I prevent pests like codling moths or fire blight in PNW pear trees?
Start with resistant varieties like ‘Kieffer’. Monitor for pests weekly and use neem oil or horticultural oil sprays in early spring. Prune infected branches 6+ inches below lesions to stop fire blight spread. Clean up fallen fruit promptly to deter moths.
How far apart should I space pear trees in my landscape?
Standard pear trees need 20–25 feet between trunks for proper airflow and sunlight. Dwarf varieties can be spaced 10–12 feet apart. If planting near a fence or wall, leave 12+ feet of clearance for root and branch growth. Always check the variety’s mature size in your planting guide!
Wrapping up and next steps
Transforming your Pacific Northwest landscape with a frost-resistant pear tree is a rewarding project that blends beauty, resilience, and practicality.
From selecting the perfect variety like the hardy Seckel or Bartlett to mastering planting techniques and seasonal care, you’re now equipped to create a thriving, picturesque addition to your outdoor space. 🌿
Ready to take the next step? Start by sketching your tree’s future spot—consider sunlight, space, and soil prep. Then, reach out to local nurseries for PNW-specific saplings or dive into pruning guides to keep your tree healthy year-round. Your future orchard awaits!