Pruning
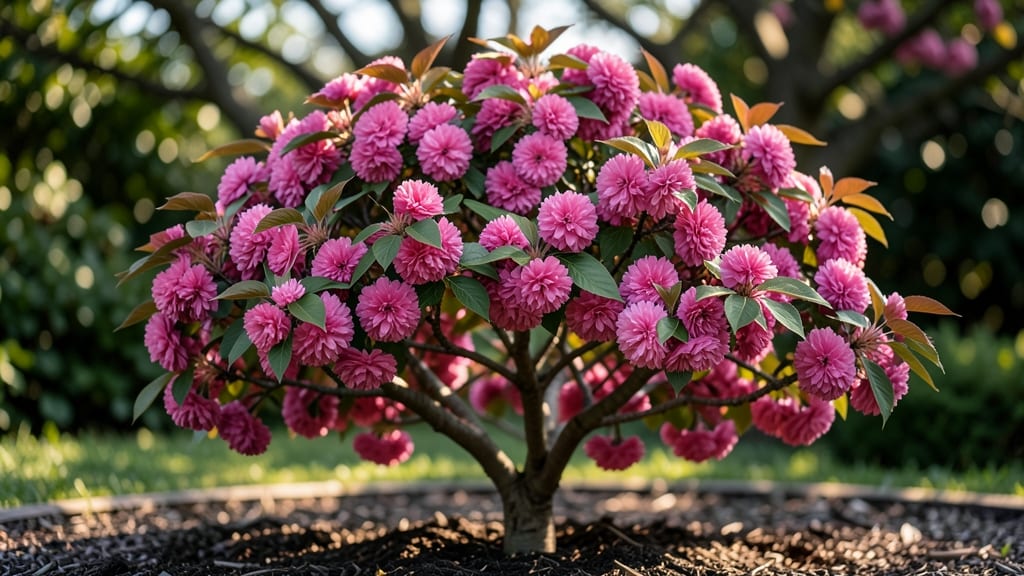
A patio cherry tree can transform your small outdoor space into a fruit-bearing paradise—without sacrificing precious square footage. 🌸 I’ve grown these compact varieties for years, and the key is selecting the right cultivar for your climate and container setup.
The right tree produces sweet, juicy cherries while staying neatly pruned to fit even the coziest patios.
Dwarf varieties like ‘Stella’ or ‘Compact Stella’ thrive in containers, needing just 5-6 gallons of soil and 6-8 hours of sunlight daily. These trees handle light frosts better than full-size cherries, making them perfect for zones 5-9.
A well-draining potting mix with compost ensures healthy roots, while regular pruning keeps the canopy manageable—think 6-8 feet tall at maturity.
You’ll enjoy harvests in late summer, with clusters of deep-red fruit that ripen over 2-3 weeks. The blooms in spring are equally stunning, adding fragrant pink flowers that attract pollinators. With proper care, these trees live for decades, rewarding you with low-maintenance beauty and bounty every year.
Whether you’re planting in a large pot, raised bed, or in-ground spot, the principles stay the same: choose the right variety, prioritize sunlight, and prune strategically. Let’s get your patio cherry tree off to the right start—your future self will thank you at harvest time.
📚 In This Guide
- What you need
- Instructions
- Tips and common mistakes
- Wrapping up and next steps
What you need
- ● Pruning shears: Bypass pruners (sharp, clean, and sterilized with rubbing alcohol or bleach). Choose 5-inch blades for small branches.
- ● Loppers: For thicker branches (up to 2-inch diameter). Look for bypass-style loppers with a 24-inch handle for leverage.
- ● Pruning saw: A folding pruning saw with a 10-inch blade for branches too thick for loppers (over 2 inches).
- ● Garden gloves: Heavy-duty, cut-resistant gloves (e.g., mechanics-style) to protect hands from thorns and sharp tools.
- ● Disinfectant: 70% isopropyl alcohol or a 10% bleach solution (1 part bleach to 9 parts water) to sterilize tools between cuts.
- ○ Sealing wax or pruning paint: Tree wound sealant (optional but recommended for cuts larger than ½ inch).
- ● Bucket or bag: A 5-gallon bucket or heavy-duty trash bag to collect pruned branches.
- ● Ladder (if needed): A stable, extendable ladder (e.g., 16-foot aluminum ladder) for taller trees. Always use with a spotter for safety!
- ● Hand pruners with a crimping wire cutter: Useful if your tree has metal ties or wires.
- ● Pole pruner: Extendable pruners (up to 10 feet) for high branches without a ladder.
- ● Work apron: With pockets to hold small tools and gloves.
- ● Safety goggles: To protect eyes from debris.
- ● Sharpie marker: For labeling branches if you’re doing structured pruning (e.g., marking cuts for next year).
- ● Tree growth regulator: Such as dormant oil or copper fungicide to protect against pests/diseases post-pruning.
Step-by-step instructions for growing a frost-resistant patio cherry tree
Here's how to cultivate a sturdy, fruit-bearing patio cherry that thrives in cooler climates.
🪴 Step 1: Select the Right Dwarf Variety and Container
Choose a dwarf self-pollinating cherry variety like 'Stella' or 'Comet'—they're bred for small spaces and produce fruit without needing a second tree. The 5-gallon container you've selected gives roots enough room to establish while keeping the tree manageable. Use a fabric grow bag for better drainage than rigid pots, which helps prevent root rot in winter.
Place the container on casters so you can move it to sunnier spots as seasons change. I always position mine near the south-facing wall during winter to capture reflected light, which helps maintain warmth when temperatures dip below 32°F. The 10-inch diameter ensures stability while allowing root expansion.
🌱 Step 2: Prepare the Soil and Plant Correctly
Fill the container with 3 gallons of well-draining potting mix blended with 1 gallon of compost. This ratio gives your cherry the nutrients it needs without compacting roots. Press the soil down gently but firmly—you want it snug enough to support the tree but loose enough for roots to penetrate.
Remove the young cherry from its nursery pot and loosen the roots if they're circling. Plant it at the same depth it was in the nursery container—burying too deep suffocates the trunk, while planting too shallow exposes roots to temperature swings. Water immediately after planting to settle the soil around the roots.
☀️ Step 3: Position for Maximum Sun and Protection
Patio cherries need 6-8 hours of direct sun daily, but they also benefit from afternoon shade in hot climates. I position mine to get morning sun and dappled shade in the afternoon, which prevents leaf scorch while maximizing photosynthesis. The south-facing orientation ensures winter sunlight exposure, crucial for fruit development.
During late spring and summer, move the container to a shaded patio if temperatures exceed 85°F for more than a few hours. Watch for leaf curling—this is your signal the tree is overheating. In fall, bring it closer to the house or under an eave to shield it from early frosts.
💧 Step 4: Water and Fertilize for Consistent Fruit Production
Water deeply 2-3 times per week until the top 2 inches of soil feel dry. Cherries hate soggy roots, so always check moisture before watering—wilting leaves mean you've waited too long. I use a moisture meter to avoid guesswork, especially in containers where soil dries out faster than in-ground plantings.
Fertilize twice yearly: once in early spring with a balanced 10-10-10 formula and again in mid-summer with a low-nitrogen, high-phosphorus blend to encourage flowering. Avoid high-nitrogen fertilizers—they promote leafy growth at the expense of fruit. Prune spent blossoms after harvest to redirect energy to next year's fruit.
⏰ Step 5: Protect from Frost and Winter Dormancy
When nighttime temperatures drop below 30°F, wrap the container in burlap and cover the top with frost cloth. This creates a 5-10°F warmer microclimate around the roots, preventing freeze damage. I also move the tree to a sheltered corner against the house wall, where it benefits from radiant heat from the structure.
Reduce watering in fall as growth slows—once every 10-14 days is plenty. Prune dead or crossing branches in late winter before buds swell, and apply a thin layer of mulch around the soil surface to insulate roots. With this care, your patio cherry will reward you with sweet, juicy fruit for years.
Tips & tricks for perfect frost-resistant patio cherry trees
A few key tricks will help your patio cherry thrive year-round and produce fruit reliably. These insights come from years of growing cherries in cooler climates—trust me, they make all the difference.
Container Mobility is Key: The 6-8 hours of daily sun requirement is critical, but don't let your tree get overheated in summer. I've found that positioning the tree to capture morning sun and afternoon shade creates the perfect balance. Use those casters to move it daily—when temperatures exceed 85°F, shift it to a shaded spot to prevent leaf curling. This simple adjustment can mean the difference between a healthy tree and one struggling with heat stress.
Soil Science Matters: The 3:1 ratio of well-draining potting mix to compost isn't just arbitrary—it's the sweet spot for cherry trees. I've learned that compacted soil suffocates roots while pure compost can burn tender root systems. Press the soil firmly but gently when planting; think "snug hug" rather than "tight squeeze." This creates the ideal environment for root expansion while supporting the tree's structure.
Winter Protection Secrets: When nighttime temps drop below 30°F, that 5-10°F warmer microclimate created by burlap and frost cloth is your tree's lifeline. I've seen firsthand how this simple layering prevents freeze damage that can kill the roots. Pro tip: Add a layer of mulch around the soil surface in late fall—this extra insulation helps maintain that crucial temperature buffer during the coldest nights.
Fertilizer Timing is Everything: The twice-yearly fertilization schedule isn't just about nutrients—it's about syncing with your tree's natural growth cycles. That early spring 10-10-10 application gives your cherry the energy boost it needs to break dormancy, while the mid-summer high-phosphorus feed encourages flowering for next year's fruit. I've noticed that skipping either timing results in either leafy growth with no fruit or poor flowering—both are signs the tree isn't getting what it needs when it needs it.
Pro Tips for Patio Cherry Tree
- A few key tricks will help your patio cherry thrive year-round and produce fruit reliably.
- Container Mobility is Key: The 6-8 hours of daily sun requirement is critical, but don't let your tree get overheated in summer.
- Soil Science Matters: The 3:1 ratio of well-draining potting mix to compost isn't just arbitrary—it's the sweet spot for cherry trees.
Frequently asked questions
Got questions about growing a patio cherry tree? You’re not alone! Here are some of the most common queries—plus straightforward answers to help you cultivate a thriving, frost-resistant fruit-bearing beauty.
When is the best time to plant a patio cherry tree?
Plant your patio cherry tree in early spring or fall when temperatures are mild (50–70°F). Avoid extreme heat or frost—roots need time to establish before winter. If planting in containers, ensure the pot has drainage holes and use well-draining soil to prevent root rot. Pro tip: Water deeply after planting to settle the soil!
How cold can a patio cherry tree tolerate?
Most patio cherry trees (like Prunus avium or dwarf varieties) handle temperatures down to −10°F to −15°F once established. Young trees or container-grown varieties may need winter protection, like burlap wraps or moving pots to a sheltered spot. Pro tip: Mulch heavily around the base to insulate roots!
Will a patio cherry tree produce fruit in the first year?
Nope! Patio cherry trees typically take 2–4 years to bear fruit, depending on variety and growing conditions. Focus on proper pruning, sunlight (6+ hours/day), and soil care first. Pro tip: Thin fruit in later years to improve size and quality—overloading can stress the tree!
Can I grow a patio cherry tree in a pot? What size container should I use?
Dwarf varieties (like ‘Stella’ or ‘Compact Stella’) thrive in 15–25 gallon containers. Ensure the pot has drainage and use a balanced fertilizer (like 10-10-10) every 4–6 weeks during growing season. Pro tip: Elevate pots slightly to prevent waterlogging!
What pests or diseases should I watch for with a patio cherry tree?
Common issues include:
- Cherry fruit flies: Trap with apple cider vinegar baits.
- Powdery mildew: Prune for airflow; spray with neem oil if needed.
- Aphids: Blast off with water or use insecticidal soap.
- Bacterial canker: Remove infected branches; sterilize pruners.
How often should I prune a patio cherry tree?
Prune once a year in late winter/early spring (before buds swell) to shape the tree, remove dead wood, and improve airflow. For container trees, trim lightly after fruiting to encourage bushiness. Pro tip: Use sterilized shears and make cuts at a 45° angle just above a bud!
Wrapping up and next steps
Transforming your patio into a fruitful haven with a frost-resistant cherry tree is a rewarding project that blends beauty and bounty! 🌸 Whether you're a seasoned gardener or just starting, this guide has equipped you with the essential tips, pruning techniques, and care strategies to nurture a thriving tree.
Remember, patience and consistency are key—your tree will thank you with delicious, homegrown cherries in no time.
Ready to take the next step? Start by marking your calendar for your first pruning session—spring or late winter is ideal! Gather your tools, roll up your sleeves, and enjoy the journey of growing your own patio cherry tree paradise. Happy gardening! 🌱