
Trees
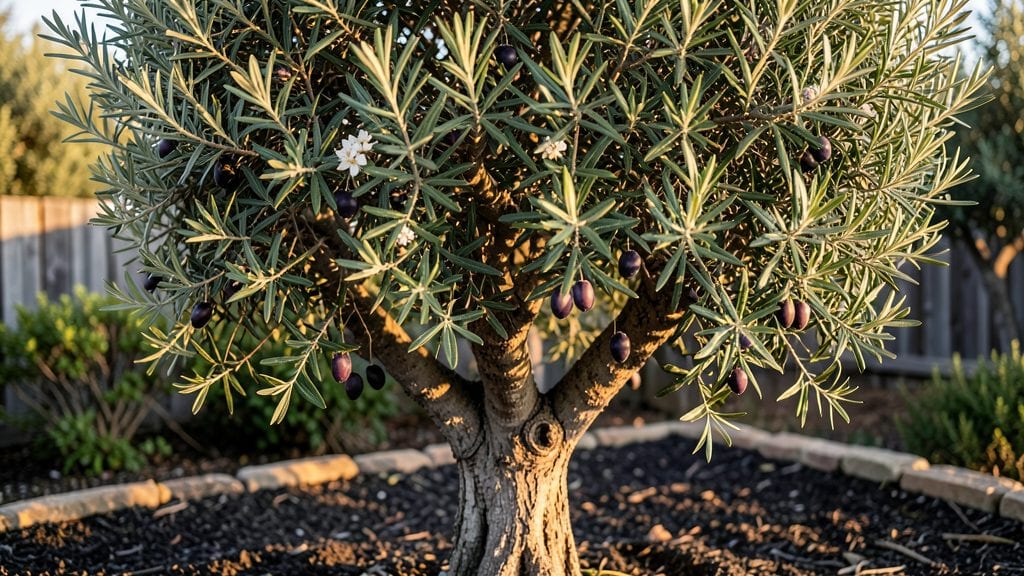
Growing Kalamata olive trees means bringing a taste of the Mediterranean to your backyard, with their silvery leaves and sweet, rich fruit. 🌿 I planted mine three years ago, and now my patio is shaded by a tree that produces more olives than I can pickle—but the process isn’t as tricky as it seems.
The key lies in mimicking their native climate, where hot, dry summers and mild winters create the perfect conditions for fruit set.
These trees thrive in full sun, needing at least 6-8 hours daily, and well-draining soil that mimics rocky Mediterranean hillsides. In containers, use a mix of potting soil and sand or gravel to prevent root rot, while in-ground plantings benefit from amended soil with compost.
Water deeply but infrequently—once established, they’re drought-tolerant, and overwatering is their biggest enemy.
Pruning in late winter encourages strong growth and better fruit production, while regular harvesting prevents the tree from becoming overburdened. With patience, your Kalamata will reward you with glossy green leaves, fragrant white flowers in spring, and those prized purple-black olives by fall.
The first harvest might take a few years, but the wait is worth it.
Whether you’re growing in a large pot or planting directly in the ground, these trees adapt well to warm climates—though they can handle brief cold snaps down to 20°F if protected.
The secret to success? Replicate their natural environment as closely as possible, and you’ll have a thriving olive tree that’s the centerpiece of your garden for decades.
📚 In This Guide
- What you need
- Instructions
- Tips and common mistakes
- Wrapping up and next steps
What you need
- ● Kalamata olive tree saplings: 1–3 (choose disease-resistant, grafted varieties for best results)
- ● Well-draining soil: 50 lbs of a mix of sandy loam and compost (pH 6.0–8.0)
- ● Container or planting site: For containers: 2–3 large pots (15+ gallons each) with drainage holes
- ● For in-ground: A sunny spot (6+ hours of light daily) with space for mature trees (15–20 ft wide)
- ● Fertilizer: Slow-release olive tree fertilizer (10-10-10 NPK ratio) or organic options like blood meal (1 lb per tree)
- ● Watering system: Drip irrigation or a 5-gallon watering can (for consistent moisture)
- ● Pruning tools: Bypass pruners (for small branches)
- ● Loppers (for thicker branches)
- ● Mulch: 2–3 inches of wood chips or straw (to retain moisture)
- ● Soil amendments: Perlite or pumice (to improve drainage)
- ● Pest control: Neem oil spray or copper fungicide (for olive fly prevention)
- ● Support stakes: 3–4 ft bamboo stakes (for young trees in windy areas)
- ● pH test kit: To monitor soil acidity/alkalinity
- ● Harvesting tools: Pole pruners or a ladder (for high branches)
Step-by-Step guide to growing Kalamata olive trees
Here's how to cultivate these prized Mediterranean trees—with secrets to maximize fruit production.
🌱 Step 1: Select the Right Variety and Planting Site
Kalamata olives thrive in USDA Zones 8-10, where winters stay above 20°F. Choose a location with full sun exposure—at least 8 hours daily—and well-draining soil. I always test drainage first by digging a 12-inch hole, filling it with water, and waiting to see if it drains within 30 minutes. Poor drainage is the #1 killer of olive trees.
If your soil is heavy clay, amend it with 3-4 inches of coarse sand or gravel before planting. Kalamata trees need room to grow—space 15-20 feet apart for proper airflow, which prevents fungal diseases. I plant mine near a south-facing wall to capture extra warmth in cooler climates.
🪴 Step 2: Plant Your Kalamata Olive Tree Correctly
Dig a hole twice as wide as the root ball but no deeper. Gently remove the tree from its container and loosen any circling roots with your fingers—this encourages outward growth. Place the tree in the hole so the top of the root ball sits level with the ground (never buried deeper).
Backfill with native soil mixed with 1 part compost to improve fertility. Water deeply right after planting to settle the soil and eliminate air pockets. I always add a 2-inch layer of mulch around the base (but keep it 3 inches away from the trunk) to retain moisture and regulate soil temperature. Use organic mulch like wood chips or straw.
☀️ Step 3: Water and Fertilize for Optimal Growth
Young Kalamata trees need deep watering once a week during their first year, but mature trees are drought-tolerant—water only when the top 4 inches of soil feel dry. Overwatering causes root rot, so always check moisture before watering. I water in the early morning to reduce evaporation and fungal risks.
Fertilize in early spring with a balanced, slow-release fertilizer (10-10-10 ratio). Apply ½ cup per tree and water it in. Avoid high-nitrogen fertilizers—they promote leafy growth at the expense of fruit production. Kalamata trees produce best when slightly stressed, so I skip winter fertilization entirely.
✂️ Step 4: Prune for Shape and Fruit Production
Prune your Kalamata tree in late winter or early spring before new growth begins. Remove dead, diseased, or crossing branches first. Then, thin out overcrowded branches to improve airflow—aim for an open vase shape that lets sunlight reach the center. I never cut more than 25% of the canopy in one season to avoid shocking the tree.
Encourage fruit production by pruning sucker growth (vigorous shoots at the base) and water sprouts (vertical shoots). Focus on fruit-bearing branches—these are thicker and have short, stubby side shoots. After pruning, apply a copper fungicide spray to prevent bacterial infections, especially in humid climates.
🍃 Step 5: Harvest and Care for Long-Term Fruit Production
Kalamata olives ripen in late fall, typically October-November, when they turn deep purple-black. Harvest by hand or with pruning shears, cutting branches just above the fruit cluster. I always leave some olives on the tree to ensure next year’s crop—the tree needs time to recharge.
Store harvested olives in a cool, dark place for 2-4 weeks to cure before processing. To keep your tree healthy, remove fallen fruit from the base in winter—rotting olives attract pests. In Zone 8 or cooler, protect young trees with burlap wraps during sudden cold snaps below 25°F. Mature trees handle frost better but still benefit from winter mulch.
Tips & tricks for perfect Kalamata olive tree cultivation
These insider tips will help you grow a thriving Kalamata olive tree that produces bountiful fruit year after year.
Location is Everything: The 8 hours of daily sun requirement is non-negotiable for Kalamata trees. If your yard doesn't get full sun, consider planting near a south-facing wall or fence that reflects additional warmth. I've seen trees in partial shade produce fewer olives and more leaves—it's all about that Mediterranean sunlight. The 30-minute drainage test in Step 1 is your best defense against root rot, so don't skip it even if your soil looks fine on the surface.
Root Ball Secrets: When planting, gently teasing apart those circling roots in Step 2 isn't just about outward growth—it prevents girdling as the tree matures. I've seen trees with untouched root balls struggle after just a few years. Also, that 2-inch layer of mulch acts like a thermal blanket, keeping roots cool in summer and warm in winter, which is especially important in Zone 8 where temps can dip near that critical 20°F threshold.
Watering Wisdom: The deep watering once a week for young trees might seem excessive, but it encourages deep root development. I use a long-handled shovel to check moisture at 4 inches down—if it's dry, water again. And that early morning watering isn't just about evaporation; it gives leaves time to dry before nightfall, reducing fungal risks. For mature trees, I've found sticking my finger in the soil is more reliable than guessing—if it feels dry at 4 inches, it's time to water.
Pruning Precision: That 25% canopy rule in Step 4 is your safety net. I mark the branches I want to remove with chalk before cutting to visualize the open vase shape. For fruit production, focus on those short, stubby side shoots—they're where next year's olives will form. And the copper fungicide spray? It's especially worth it if you live in humid areas where bacterial infections can wipe out entire crops.
Pro Tips for Olive Trees Kalamata
- These insider tips will help you grow a thriving Kalamata olive tree that produces bountiful fruit year after year.
- Location is Everything: The 8 hours of daily sun requirement is non-negotiable for Kalamata trees.
- Root Ball Secrets: When planting, gently teasing apart those circling roots in Step 2 isn't just about outward growth—it prevents girdling as the tree matures.
Frequently asked questions
Got questions about nurturing olive trees Kalamata? You’re not alone! Here are answers to the most common queries—from planting to harvest—so you can grow like a pro.
How long does it take for a Kalamata olive tree to bear fruit?
A young Olea europaea ‘Kalamata’ tree typically takes 3–5 years to produce its first fruit, though some may take up to 7 years. Patience is key—focus on well-drained soil, full sun (6+ hours daily), and consistent watering (especially in the first 2 years). Prune lightly in late winter to encourage healthy growth and fruiting branches.
Can Kalamata olive trees survive winter frost?
Kalamata olives are hardy to USDA Zones 8–11, meaning they can handle brief dips to 20°F (-7°C) but may suffer damage below 15°F (-9°C). Protect young trees with burlap wraps or mulch the root zone. In colder zones, grow them in containers and move them indoors or under cover during frost. Mature trees often bounce back with minimal pruning after cold snaps.
How often should I water a Kalamata olive tree?
Water deeply once a week during the first year to establish roots, then taper to every 2–3 weeks once established (adjust for extreme heat/drought). Overwatering is worse than underwatering—olives hate soggy soil! Aim for 1–2 inches of water per week, including rainfall. Drip irrigation or soaker hoses work best to deliver moisture directly to the roots.
Why aren’t my Kalamata olives turning black/purple?
Kalamata olives start green and ripen to deep purple/black in 6–8 months. If they stay green, check for:
- Insufficient sunlight (move to full sun).
- Over-fertilizing with nitrogen (switch to low-nitrogen, high-potassium fertilizer in late summer).
- Immature trees (wait another season).
Can I grow Kalamata olives in a container? Yes—but here’s how!
Use a 15–20 gallon pot with drainage holes and well-draining soil (mix potting soil with perlite/sand). Choose a dwarf variety (like ‘Arbequina’ or ‘Little Ollie’) for smaller spaces. Repot every 2–3 years and move containers indoors (or under a porch) when temps drop below 40°F (4°C). Prune annually to control size.
Wrapping up and next steps
Growing olive trees in Kalamata is a rewarding journey that connects you to the heart of the Mediterranean—where golden sunsets meet ancient traditions. With the right soil, climate, and care, your tree can thrive, offering years of luscious olives and stunning evergreen beauty.
Whether you're a seasoned gardener or a curious beginner, this guide has given you the tools to succeed!
Ready to plant your own olive tree? Start by selecting a healthy sapling, preparing your soil, and giving it the love it deserves. Watch it grow—and soon, you’ll be harvesting your first olives! 🌱✨