Pruning
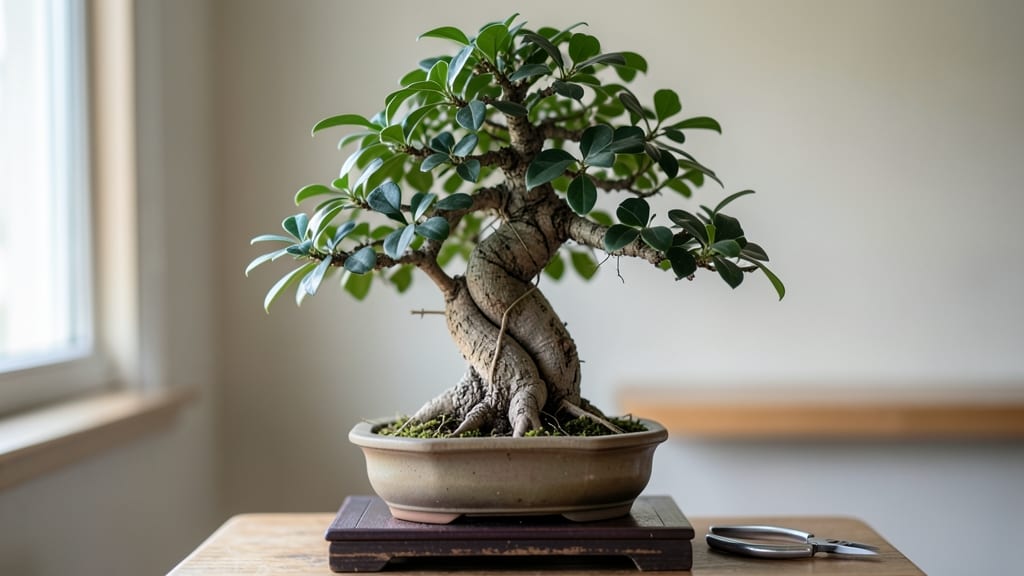
Creating a mini Japanese tree—like a dwarf bonsai—transforms even the smallest space into a living work of art. 🌿 I’ve nurtured these delicate trees for years, and the key lies in mimicking their natural mountain habitat with precise care.
The right soil mix, gentle pruning, and consistent light create that iconic, aged appearance without needing a yard.
You’ll need just a few essentials: a shallow container with drainage, a well-draining soil blend (like akadama and pumice), and sharp pruning shears for shaping. These trees thrive in bright, indirect light—think east or west-facing windowsills—and prefer to stay slightly dry between waterings.
The real magic happens in the details, like wiring branches to guide growth or using tweezers for delicate leaf adjustments.
With patience, your mini Japanese tree will develop that sought-after miniature, ancient look—twisted trunks, lush foliage, and a serene presence. The first year focuses on root establishment, while later seasons refine the shape.
Even a tiny apartment can become a sanctuary for this elegant plant, provided you follow a few simple yet critical steps.
Common challenges like yellowing leaves or pests have straightforward fixes—like adjusting humidity or introducing beneficial insects. Whether you’re starting with a cutting or a young tree, the process becomes intuitive once you understand the rhythm of its growth. Ready to cultivate your own living masterpiece?
📚 In This Guide
- What you need
- Instructions
- Tips and common mistakes
- Wrapping up and next steps
What you need
- ● Dwarf or bonsai tree species: Choose from Ficus retusa (Ginseng Ficus), Juniperus procumbens (Japanese Garden Juniper), or Carmona microphylla (Fukien Tea). Note: Ensure it’s pre-dwarfed or young (1–3 years old).
- ● Small bonsai pot: 4–6 inches in diameter (with drainage holes!). Opt for unglazed clay for best aeration.
- ● Well-draining soil: Mix 50% akadama, 30% pumice, and 20% inorganic compost (e.g., lava rock). Avoid garden soil—it’s too dense!
- ● Pruning tools: Concave bonsai shears (for clean cuts)
- ● Needle-nose pruners (for delicate branches)
- ● Root hook (for soil aeration and root trimming)
- ● Wire (aluminum or copper): 1–2mm thickness, for shaping branches.
- ● Spray bottle (for misting—bonsai love humidity!)
- ● pH testing kit (ideal soil pH: 5.5–6.5)
- ● Slow-release fertilizer (e.g., Osmocote or bonsai-specific granules)
- ● Tweezers (for adjusting small branches or debris)
- ● Mini greenhouse or humidity tray (for tropical species like Fukien Tea)
- ● Bonsai display stand (elevates your tree for aesthetic appeal)
- ● Organic mulch (e.g., bark chips) (retains moisture and adds texture)
- ● LED grow light (if natural light is <10 hours/day)
Step-by-Step instructions for cultivating mini Japanese bonsai trees
Here's how to coax those delicate, ancient-looking trees into thriving miniatures right on your windowsill.
🌱 Step 1: Select and Prepare Your Dwarf Tree Species
Choose a pre-bonsai cultivar like Ficus retusa 'Ginseng' or Carmona microphylla—both tolerate indoor conditions beautifully. Inspect the roots: healthy roots should be white and fibrous, not brown or mushy. If repotting, prune any circling roots with clean, sharp scissors to encourage outward growth. I like to soak the root ball for 10-15 minutes before planting to revive any dried sections.
Select a container with drainage holes—6-8 inches wide for your first bonsai. The pot should be slightly larger than the root ball but no more than 2 inches wider to prevent soil compaction. I use unglazed ceramic because it breathes and helps regulate moisture. Fill the pot's base with a 1-inch layer of coarse gravel for drainage, then add a thin layer of akadama or lava rock to create an air gap between soil and roots.
🪴 Step 2: Layer Soil for Proper Drainage and Aeration
Bonsai soil needs to drain fast but retain just enough moisture. Mix 40% inorganic grit (like pumice or lava rock), 30% organic matter (like fine bark or humus), and 30% akadama for ideal texture. I sift the mix through a 1/4-inch mesh screen to remove clumps—bonsai roots are delicate and need fine particles to penetrate easily.
Add soil in three layers: start with a 1/2-inch base layer of the grittiest mix, then the organic-rich middle layer, and finish with a 1/4-inch top layer of pure akadama. This gradient ensures water drains quickly but doesn't wash away nutrients. Press each layer lightly with your fingers—just firm enough to eliminate air pockets, but don't compact the soil.
☀️ Step 3: Position and Train for Optimal Growth
Place your bonsai in bright, indirect light—a south or east-facing window works best. Direct sun will scorch the delicate leaves, while too little light causes leggy growth. I rotate my tree a quarter turn weekly so it grows evenly toward the light source. You'll notice new growth leaning toward the window after about 2-3 weeks—that's your cue to adjust positioning.
Train the trunk early by gently wiring branches (if needed) with 1-2mm aluminum wire. Wrap the wire around the branch at a 45-degree angle, leaving room to grow. I check wires every 3-4 weeks: if they cut into the bark, remove them immediately. For dwarf species, prune new growth back to 2-3 leaves after the 5th leaf appears to maintain miniature proportions.
💧 Step 4: Master the Watering Technique
Bonsai trees hate soggy roots but despise drought more. Water when the top 1/2-inch of soil feels dry to touch—stick your finger in to check. I water from the bottom by placing the pot in a shallow tray of water for 10-15 minutes, then let it drain completely. This method ensures even moisture without disturbing the soil surface. After watering, I mist the foliage lightly to recreate humidity levels of a forest floor.
In winter, reduce watering by 30-50% as growth slows. Overwatering is the #1 killer of bonsai—yellowing leaves or mushy stems are warning signs. If you notice the soil staying wet for more than 2 days, your drainage mix needs more inorganic material. I keep a small spray bottle nearby to check moisture levels daily during hot months.
✂️ Step 5: Prune and Fertilize for Long-Term Health
Prune in early spring before new growth starts, cutting back to just above a leaf node. For dwarf species, I use concave cutters to make clean cuts that heal faster. Remove any dead or crossing branches—this improves airflow and prevents disease. After pruning, I apply a balanced 10-10-10 fertilizer diluted to half strength every 4-6 weeks during the growing season (spring and summer).
In fall and winter, switch to a low-nitrogen fertilizer (like 5-10-10) to encourage root development. I always rinse the soil after fertilizing to prevent salt buildup, which can burn delicate roots. Watch for new buds forming in spring—they'll tell you when to resume regular pruning. Patience is key: true bonsai mastery takes years, but these dwarf varieties show progress in just a few months.
Tips & tricks for perfect mini Japanese bonsai growth
These expert insights will help you nurture your miniature bonsai into a stunning, healthy centerpiece that thrives in small spaces.
Root Revival Technique: That 10-15 minute soak for the root ball in Step 1 is crucial for reviving any dried sections. I like to use room-temperature water and add a drop of mild dish soap to help break surface tension—this encourages water to penetrate faster. After soaking, gently squeeze out excess water with your hands; soggy roots are just as harmful as dry ones.
Soil Layering Secret: The three-layer soil approach in Step 2 creates the perfect balance of aeration and moisture retention. For the 1/2-inch base layer, I mix in extra inorganic grit (like perlite) to boost drainage—this prevents the dreaded root rot that plagues many beginners. The top 1/4-inch akadama layer acts like a moisture sponge, helping maintain consistent humidity around the roots.
Light Positioning Hack: When placing your bonsai in bright, indirect light (Step 3), pay attention to seasonal sun paths. In summer, morning sunlight is gentler than afternoon rays—rotate your tree quarter turns weekly to distribute light evenly. I've found that placing my bonsai on a small rotating turntable (available at garden centers) eliminates the need to manually rotate it every week.
Pruning Precision: For Step 5's pruning, I always use concave cutters and make cuts just above a leaf node at a 45-degree angle. This technique prevents water from pooling on the cut, which can cause rot. After pruning, I dip the cut ends in cinnamon powder—a natural antifungal agent that helps wounds heal faster. This simple trick has cut my recovery time by nearly half.
Pro Tips for Mini Japanese Tree
- These expert insights will help you nurture your miniature bonsai into a stunning, healthy centerpiece that thrives i...
- Root Revival Technique: That 10-15 minute soak for the root ball in Step 1 is crucial for reviving any dried sections...
- Soil Layering Secret: The three-layer soil approach in Step 2 creates the perfect balance of aeration and moisture re...
Frequently asked questions
Got questions about growing your own mini Japanese tree? You’re not alone!
Here are answers to the most common queries to help you nurture your bonsai dream—even in tight spaces.
How long does it take for a mini Japanese tree to mature?
A mini Japanese tree (like a Ficus microcarpa or Carmona) typically takes 3–5 years to reach its full bonsai potential with proper care. Dwarf varieties grow slower, so patience is key! Regular pruning and repotting every 2–3 years will speed up shaping. Pro tip: Start with a young tree (1–2 years old) for faster results!
Can I keep a mini Japanese tree indoors year-round?
Yes! Many mini Japanese trees thrive indoors, but they need bright, indirect light (like a south- or east-facing window). Avoid drafts and temperatures below 50°F (10°C). If leaves yellow or drop, it’s likely underwatering or overwatering. A humidity tray or occasional misting helps too!
What’s the best soil mix for a mini Japanese tree?
Use a well-draining bonsai mix (50% akadama, 30% pumice, 20% organic matter like peat or compost). Avoid garden soil—it compacts and causes root rot. Pro tip: Add a layer of perlite at the bottom of the pot for extra drainage. Repot every 2–3 years in spring!
How do I prune a mini Japanese tree without killing it?
Prune new growth in spring/summer using clean, sharp scissors. Cut just above a leaf node at a 45° angle to encourage branching. Never prune more than 1/3 of the foliage at once—this stresses the tree. For wiring (to shape branches), use aluminum or copper wire and remove it within 3–6 months to avoid scars.
What’s a good alternative if I don’t want to wait years for a bonsai?
Try a pre-bonsai tree (like a Juniper procumbens "Nana" or Sageretia theezans)—these are already dwarf varieties and mature faster. Another option? Air-layering a cutting from a healthy tree to grow a new mini version in 3–6 months!
Why are my mini Japanese tree’s leaves turning yellow?
Yellow leaves usually mean overwatering, poor drainage, or nutrient deficiency. Check the soil—it should dry out top to bottom between waterings. If roots smell rotten, repot with fresh mix. Pro tip: Fertilize lightly in spring/summer with a balanced bonsai fertilizer (diluted to half strength).
Wrapping up and next steps
Growing a mini Japanese tree is a rewarding journey that brings serenity and beauty into your space—no matter how small! With the right tools, patience, and care, you can nurture a stunning bonsai that reflects the elegance of traditional Japanese gardening.
Whether you’re a beginner or a seasoned plant lover, this project is perfect for adding a touch of zen to your home or office.
Ready to take the next step? Start by selecting your mini Japanese tree and gathering your supplies—then, watch your little masterpiece thrive! 🌿✨