Pruning
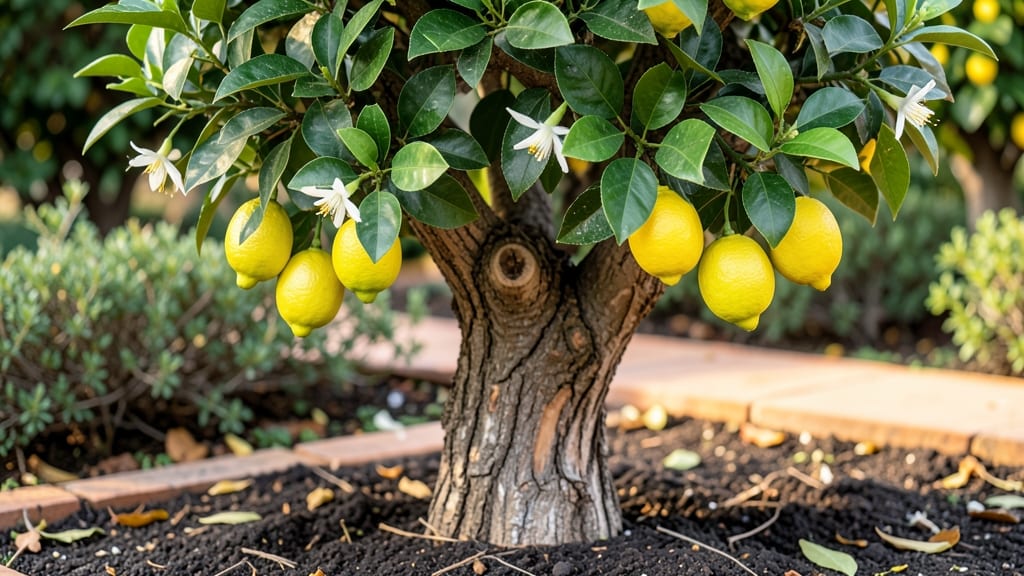
Your lemon tree’s bark tells a story—peeling, cracked, or discolored patches mean it’s struggling, not just aging. 🌿 I’ve seen sunburned bark turn from smooth to rough in a single summer, and scale insects leave sticky residue that looks like sap but ruins growth.
The good news? Most bark issues fix with simple pruning, protective measures, and a few targeted treatments.
Start by inspecting the bark for telltale signs: sunburn shows as white or brown patches on exposed sides, while pests leave sticky spots or tiny bumps. Pruning isn’t just about shaping—it’s about removing damaged branches to let light and air reach the trunk.
Use sterilized pruners to avoid spreading disease, and always cut just above a leaf node where new growth can sprout.
What you’ll end up with is a stronger tree that blooms more reliably and resists stress better. Healthy bark means fewer pests, better water absorption, and even sweeter lemons.
The key is acting early—once the damage spreads, recovery takes longer. I’ve revived trees with just a few adjustments, and you can too.
This works for both container and in-ground lemon trees, though container growers should monitor bark more closely—dry air and wind exposure speed up sunburn. Whether you’re dealing with frost cracks, fungal spots, or pest damage, the same principles apply. Let’s get that bark back to smooth and thriving.
📚 In This Guide
- What you need
- Instructions
- Tips and common mistakes
- Wrapping up and next steps
What you need
- ● Pruning shears: Bypass pruners (sharp, clean, and sterilized with rubbing alcohol or a 10% bleach solution). Spec: 6–8" blades for small branches (1/4"–3/4" thick).
- ● Loppers: For thicker branches (3/4"–1.5" diameter). Spec: 18–24" long with a comfortable grip.
- ● Pruning saw: For branches >1.5" thick. Spec: Curved-tooth saw (avoids tearing bark).
- ● Gloves: Heavy-duty, cut-resistant gloves (e.g., mechanics’ gloves or gardening gloves with Kevlar).
- ● Disinfectant: 70% isopropyl alcohol or a pruning sealant (e.g., Tanglefoot Tree Wound Pruning Seal).
- ● Bucket or bag: For collecting pruned branches (1–2 gallon capacity).
- ● Extension pole: For hard-to-reach branches (10–15 ft telescoping pole with pruner attachment).
- ● Ladder: Sturdy, non-slip ladder (4–6 ft tall) if tree is >6 ft high.
- ● Hand sanitizer: For post-pruning hygiene (especially if handling sap or thorns).
- ● Sharpie or label tags: To mark branches for future reference (e.g., “Remove in Spring”).
- ● Compost bin: For recycling pruned bark (if not diseased).
- ● Check the weather: Prune on a dry, cloudy day (avoid midday heat).
- ● Assess the tree’s health: Look for signs of disease (e.g., black spots, oozing sap)—sterilize tools if needed!
- ● Gather safety gear: Sunglasses, long sleeves, and closed-toe shoes (lemon tree thorns are sharp!).
Instructions for pruning your lemon tree for optimal health
Pruning isn't just about shaping your lemon tree—it's the secret to better blooms and fruit. Here's how to do it right.
✂️ Step 1: Time Your Pruning for Maximum Benefits
Prune your lemon tree in late winter or early spring, just as new growth begins but before buds swell. This timing ensures you remove dead wood while encouraging fresh, vigorous shoots. Avoid pruning during cold snaps or extreme heat—your tree needs energy to recover.
I like to schedule my pruning right after the last frost date in my zone, usually around February or March. If you're in a warmer climate, aim for late winter when the tree shows signs of waking up—tiny leaf buds or a slight green tint on branches. Never prune in fall; it stresses the tree before dormancy.
🌿 Step 2: Identify and Remove Dead or Diseased Branches
Start by examining the tree for branches that are brown, brittle, or completely without leaves. These are your first targets—they drain energy from healthy growth. Use clean, sharp pruning shears to make cuts just outside the branch collar (the swollen area where the branch meets the trunk).
Look for any branches with blackened spots, oozing sap, or fungal growth—these need immediate removal. I always sterilize my shears with rubbing alcohol between cuts to prevent spreading disease. If you're unsure whether a branch is dead, scratch the bark with your fingernail. Green underneath? It's still alive.
☀️ Step 3: Thin Out Crowded Branches for Better Airflow
Focus on removing branches that cross or rub against each other—these create wounds that invite pests and disease. Aim to open up the center of the tree so light and air can circulate freely. You'll see healthy growth respond within weeks with new, stronger branches forming.
I target branches growing inward at angles less than 45 degrees to the trunk. Cut these back to their origin point, but never leave stubs. Always make cuts at a 45-degree angle just above a leaf node or bud. This encourages outward growth and prevents water from pooling on the wound.
⏰ Step 4: Shape the Tree for Balance and Fruit Production
Lemon trees naturally grow in an open vase shape, so I prune to maintain that form while encouraging upward growth. Remove any "water sprouts"—those fast-growing, vertical shoots that appear along the trunk. These steal energy from fruit production.
For mature trees, I limit myself to removing no more than 25% of the tree's foliage in one session. Look for branches that bear the most fruit and give them priority—these are your tree's workhorses. After pruning, step back and visualize how sunlight will reach all parts of the tree. You want even light exposure for consistent fruit development.
💧 Step 5: Clean Up and Care for Your Pruned Tree
After pruning, rake up and dispose of all clippings—don't compost them unless you've confirmed they're disease-free. Sterilize your tools again with rubbing alcohol, then store them in a dry place. Water your tree deeply right after pruning to help it recover and reduce transplant shock.
In the weeks following pruning, keep an eye out for new growth at the pruning sites. This is a good sign your tree is responding well. If you notice yellowing leaves or wilting, it might be overpruned—give it time and consistent watering. For the first year after major pruning, your tree might produce fewer lemons, but the long-term health benefits are worth it.
Tips & tricks for pruning your lemon tree
Pruning your lemon tree might seem intimidating, but a few key tricks can transform it from a daunting task to a simple way to ensure your tree thrives. Here's what I've learned from years of shaping my own lemon trees.
Timing is Everything: The late winter to early spring window mentioned in Step 1 is your best bet, but don't just follow a calendar—watch your tree. Look for tiny leaf buds or a slight green tint on branches as your signal. This timing ensures you're not pruning too early (when the tree is still dormant) or too late (when buds are already swelling). In colder climates, wait until after the last frost date, but in warmer regions, you might start as early as January.
Tool Prep Matters: Before you make a single cut, sterilize your pruning shears with rubbing alcohol. I can't stress this enough—contaminated tools spread disease faster than you can say "citrus blight." Also, keep your shears sharp; dull blades crush branches instead of making clean cuts. A good pair of bypass pruners should last years if properly cared for. This step is especially important in Step 2 when dealing with diseased branches.
Visualize the Light: When shaping your tree in Step 4, step back frequently and imagine sunlight filtering through the branches. The goal is to create an open vase shape where light can reach all parts of the tree. I like to use a small mirror to check hard-to-see spots. This practice ensures even fruit development and prevents the center of your tree from becoming a dark, disease-prone tangle. Think of it as giving your tree a spa day—more light equals happier blooms and fruit.
Pruning Recovery Plan: After finishing Step 5, give your tree a post-pruning boost. I mix a balanced citrus fertilizer with the deep watering mentioned in the instructions. This helps the tree recover faster and encourages new growth. In the weeks following, keep an eye out for new shoots—these are your tree's way of saying "thanks for the trim!" If you notice yellowing leaves, it might be overpruned, so give it time and consistent care.
Pro Tips for Lemon Tree Bark
- Pruning your lemon tree might seem intimidating, but a few key tricks can transform it from a daunting task to a simple way to ensure your tree thrives.
- Timing is Everything: The late winter to early spring window mentioned in Step 1 is your best bet, but don't just follow a calendar—watch your tree.
- Tool Prep Matters: Before you make a single cut, sterilize your pruning shears with rubbing alcohol.
Frequently asked questions
Got questions about pruning your lemon tree bark for optimal growth? Here are some of the most common ones—and their answers!
When is the best time to prune lemon tree bark for maximum blooms?
The ideal time to prune is late winter or early spring, just before new growth begins. Avoid pruning during fall (as it can stimulate tender new growth before winter) or summer (which stresses the tree). For tropical climates, prune in dry seasons to minimize disease risk.
How much of the lemon tree bark should I remove during pruning?
Remove no more than 25-30% of the tree’s foliage in a single session to avoid shock. Focus on dead, diseased, or crossing branches first, then thin out crowded areas. Never remove more than a third of the canopy—this can weaken the tree and reduce fruit production.
Can I use lemon tree bark for anything else besides pruning?
Yes! While pruning is the primary use, dried lemon tree bark can be used for homemade fertilizer tea (steep in water for a few days) or as a natural pest repellent when hung near the tree. Just avoid over-harvesting—prioritize the tree’s health first!
What should I do if my lemon tree’s bark looks cracked or peeling after pruning?
Cracked or peeling bark is often normal, especially in mature trees. However, if it’s dark, oozing, or accompanied by wilting leaves, your tree may have fungal infection or sunburn. Apply a copper fungicide (for infections) or provide afternoon shade (for sunburn). Keep the area clean to prevent further issues.
Do I need special tools to prune lemon tree bark safely?
Basic tools work, but sterilized, sharp pruners (for small branches) and a pruning saw (for thicker limbs) are best. Disinfect tools with rubbing alcohol between cuts to prevent disease spread. Avoid dull tools—they tear bark, inviting pests and infections.
Wrapping up and next steps
Pruning your lemon tree bark isn’t just about shaping—it’s about unlocking its full potential! By mastering the right techniques, timing, and tools, you’ll encourage lush foliage, vibrant blooms, and a bountiful harvest. Remember: patience and consistency are key, so don’t rush the process.
Ready to give your lemon tree the care it deserves? Start small—pick one section to prune this weekend, then gradually tackle the rest. With every snip, you’re nurturing a thriving, fruit-bearing beauty! 🌿✨