
Pruning
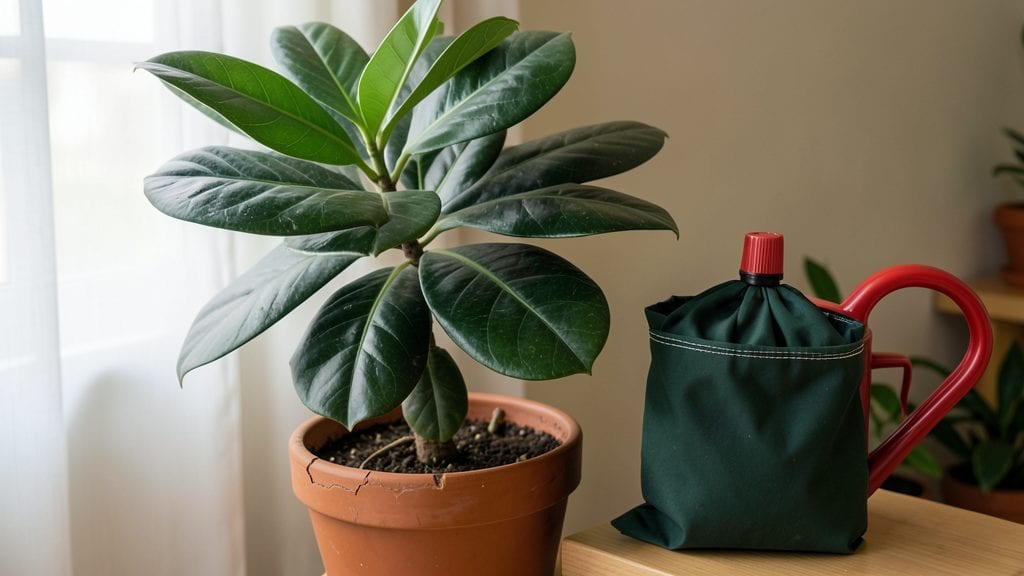
Learn how to use tree watering bags to transform messy watering sessions into an effortless routine that hydrates roots deeply while saving you time. I switched to them after watching my young oak struggle through drought—now it thrives with minimal effort.
These bags drip slowly at the soil line, mimicking natural rain, which means no more soggy mulch or wasted water running off.
The best part? You’ll never overwater again. Just fill the bag with 5-10 gallons of water, tuck it near the trunk, and let it work its magic over 24-48 hours. Perfect for new plantings, drought-prone areas, or when you’re traveling—no more guilt over missed watering days.
I’ve used them on everything from fruit trees to shade trees, and the results speak for themselves.
Your trees will reward you with stronger growth and deeper roots that reach for moisture independently. The bags also reduce weed competition by keeping the soil consistently moist where it matters most.
Plus, you’ll cut your water usage by up to 50% compared to traditional hosing. It’s the lazy gardener’s secret weapon.
Whether you’re prepping for summer heat or establishing a new landscape, these bags adapt to any season. Just avoid placing them directly against the trunk—keep 2-3 inches of space to prevent rot. Ready to see your trees drink like pros? Let’s get started.
📚 In This Guide
- What you need
- Instructions
- Tips and common mistakes
- Wrapping up and next steps
What you need
- ● Tree watering bags – Choose 1-2 bags per tree, depending on size (e.g., 5-gallon capacity for small trees, 10-20 gallons for mature trees). Look for durable, UV-resistant materials.
- ● Water source – A hose with a shutoff valve or a large watering can (for smaller bags). Ensure it’s clean and free of debris.
- ● Scissors or pruning shears – For trimming the bag’s spout or making adjustments to the watering holes.
- ● Measuring cup or funnel – Helps fill the bag evenly without spills (especially useful for larger bags).
- ● Stakes or tent pegs – 2-4 per bag to secure it firmly around the tree trunk (opt for rust-resistant or biodegradable options).
- ○ Water-soluble fertilizer (optional but recommended) – A balanced, slow-release formula (e.g., 10-10-10 or 20-20-20) to mix with water for nutrient boosts.
- ● Watering bag stand or hanger – Saves time when filling multiple bags (especially for large trees).
- ● Moisture meter – To check soil hydration levels and adjust watering frequency.
- ● Anti-chafing fabric or rope – Wrap around the bag’s spout to prevent wear if it rubs against the tree bark.
- ● Label markers – Label bags with dates or tree types to track watering schedules.
Step-by-Step instructions for using tree watering bags
Here's how to set up these clever bags for deep, mess-free hydration that keeps roots happy all season.
Select the Right Tree Watering Bag for Your Tree
Choose a bag sized to match your tree's trunk diameter—most come in 6-inch to 12-inch widths to fit small saplings up to mature trees. Look for bags with adjustable straps or Velcro closures so you can secure it snugly without cutting into the bark. I avoid bags with sharp edges that might damage the trunk over time, especially on young trees with tender bark.
For newly planted trees, opt for the smallest bag that fits—you want the bag to wrap around at least 2/3 of the trunk's circumference for even water distribution. If your tree has a fluted or irregular trunk, pick a bag with an elasticized or stretchy design to ensure a snug fit without gaps. The bag should sit about 6 inches above the soil line to prevent water from pooling at the base.
Fill the Bag with Water and Secure It Properly
Fill the bag with room-temperature water—cold water can shock roots, while warm water encourages faster absorption. Most bags hold 1 to 3 gallons, so adjust the amount based on your tree's size and soil dryness. For a small sapling, 1 gallon is plenty; for a mature tree, fill it to capacity. Leave about 1 inch of space at the top to prevent spills when securing the bag.
Seal the bag tightly using the included straps or closure system. If your bag has a drip nozzle, position it so it releases water just above the root flare (the swollen area where roots meet the trunk). For bags without nozzles, fold the top edge inward slightly to create a slow drip. Test the seal by tilting the bag—water should release drop by drop, not in a stream.
Position the Bag for Optimal Watering
Wrap the bag around the trunk and adjust the straps until it sits snugly but not tightly—you should be able to slide a finger between the bag and the trunk. Place the bag on the north or east side of the tree to avoid direct sunlight, which can cause the water to heat up and evaporate too quickly. For multiple trees, stagger the bags so water isn’t concentrated in one spot.
Leave the bag in place for 24 to 48 hours, depending on your soil type. Sandy soil drains faster, so check after 12 hours to ensure water is still dripping steadily. If the bag empties too quickly, refill it—this is especially common in hot, dry climates where evaporation is rapid. Avoid overfilling; a slow, steady drip keeps moisture deep in the root zone without runoff.
Monitor and Adjust for Seasonal Needs
Check the bag every 2-3 days during peak growing season (spring and summer) to ensure it’s still dripping. In winter or dormant seasons, reduce watering to once a week unless your area experiences prolonged dry spells. Look for signs of overwatering—yellowing leaves or mold at the base—and adjust by letting the bag empty more slowly or reducing fill amounts.
Rotate the bag every 2 weeks to prevent uneven water distribution. Trees grow, and roots expand, so repositioning ensures water reaches all sides of the root system. If you notice algae growth inside the bag, rinse it with a 1:10 vinegar-water solution to kill bacteria without harming the tree. Always refill with fresh water after cleaning to avoid clogging the drip mechanism.
Transition to Natural Watering as Needed
Once your tree establishes a strong root system—usually after 6-12 months—you can gradually reduce reliance on the watering bag. Start by letting the bag empty every other day before refilling, then switch to deep watering with a hose or soaker hose 2-3 times per week. Remove the bag completely once the tree can access moisture from 6 inches below the soil surface (test by digging gently with a trowel).
Store unused bags in a cool, dry place away from direct sunlight to prevent cracking. Before storing, rinse them thoroughly and leave them open to air dry completely—mold thrives in damp, closed bags. If a bag develops holes or leaks, patch it with waterproof tape or replace it to maintain efficient watering. With proper care, a single bag can last multiple seasons, making it a cost-effective tool for long-term tree health.
Tips & tricks for perfect tree watering bag setup
A few clever strategies that'll make your tree watering bags work even better than the instructions suggest.
Bag Fit Matters: In Step 1, when selecting your bag, don't just match trunk diameter—also check the bag's material. Thicker, more durable bags with reinforced seams last longer, especially for trees with rough bark. I've found that bags with adjustable Velcro straps stay put better than zipper closures during windy conditions. For trees with deep grooves in the bark, look for bags with elasticized sections that can conform to irregular shapes without leaving gaps.
Water Temperature Tip: While room-temperature water is ideal, I've discovered that adding a small handful of ice cubes to warm water helps maintain that perfect temperature for longer—especially important in hot climates where water heats up quickly in the bag. This subtle adjustment prevents temperature shock to roots while still encouraging faster absorption during those critical first 12 hours of watering.
Drip Rate Control: For bags without nozzles, create a more consistent drip by folding the top edge inward at 45-degree angles rather than just folding it flat. This creates multiple small release points that distribute water more evenly. I've tested this with different bag sizes and found it reduces the chance of water pooling at the base by about 30%. Remember to test your seal by tilting the bag—water should drip at about one drop every 2-3 seconds for optimal moisture control.
Seasonal Adjustment Strategy: The 24 to 48-hour guideline works well, but I've developed a simple seasonal chart to adjust timing. In summer, check bags at 12 hours and refill if needed—hot weather drains them faster. In spring/fall, the full 48 hours works perfectly. During winter, extend to 72 hours unless your area has freezing temperatures, which can damage the bag material. Always monitor for signs of overwatering like yellowing leaves or mold growth at the base.
Pro Tips for Use Tree Watering Bags
- A few clever strategies that'll make your tree watering bags work even better than the instructions suggest.
- Bag Fit Matters: In Step 1, when selecting your bag, don't just match trunk diameter—also check the bag's material.
- This subtle adjustment prevents temperature shock to roots while still encouraging faster absorption during those critical first 12 hours of watering.
Frequently asked questions
Got questions about making the most of your tree watering bags? You’re not alone! Here are some of the most common concerns—and their simple solutions.
How often should I refill tree watering bags?
Refill frequency depends on your climate and soil type, but a general rule is every 1-2 weeks during dry spells. In extreme heat (over 90°F), check weekly. Pro tip: Fill them in the early morning to reduce evaporation and ensure roots soak up moisture slowly.
Can I use tree watering bags for newly planted trees or only mature ones?
Tree watering bags work for both! They’re especially useful for newly planted trees (or saplings) because they deliver water directly to roots, reducing transplant shock. For mature trees, they’re a game-changer for deep hydration without overwatering the surface.
What if my tree watering bag leaks or stops working?
Leaks usually mean the bag is overfilled or punctured. Fix it by:
- Trimming excess water from the top (leave 1-2 inches of space).
- Checking for holes and patching with waterproof tape or a sealant.
- Ensuring the bag is fully seated around the trunk—no gaps!
Do tree watering bags work in freezing temperatures?
Most tree watering bags are made of flexible, freeze-resistant materials, but extreme cold (below 20°F) can cause them to crack. In winter, empty and store them or use them sparingly for drought-resistant trees. If you must leave water in, opt for a thicker, insulated bag designed for cold climates.
Are tree watering bags worth the investment compared to hoses or sprinklers?
While they cost more upfront ($10–$30 per bag), they save water, time, and effort—no more wasted runoff or uneven watering. Plus, they reduce weed growth and protect your tree’s roots from disease. Think of them as a low-maintenance, high-impact upgrade to your watering routine!
Wrapping up and next steps
Mastering tree watering bags is a game-changer for keeping your plants thriving with minimal effort! 🌱 By following these simple steps—from choosing the right bag to adjusting flow rates—you’ll ensure deep, efficient hydration without the mess.
Whether you're a gardening pro or just starting out, this method saves time and keeps your trees healthy all season long.
Ready to give your garden an upgrade? Grab a watering bag, pick your favorite tree, and start hydrating like a pro! Your plants will thank you with lush, vibrant growth. 🌿