Pruning
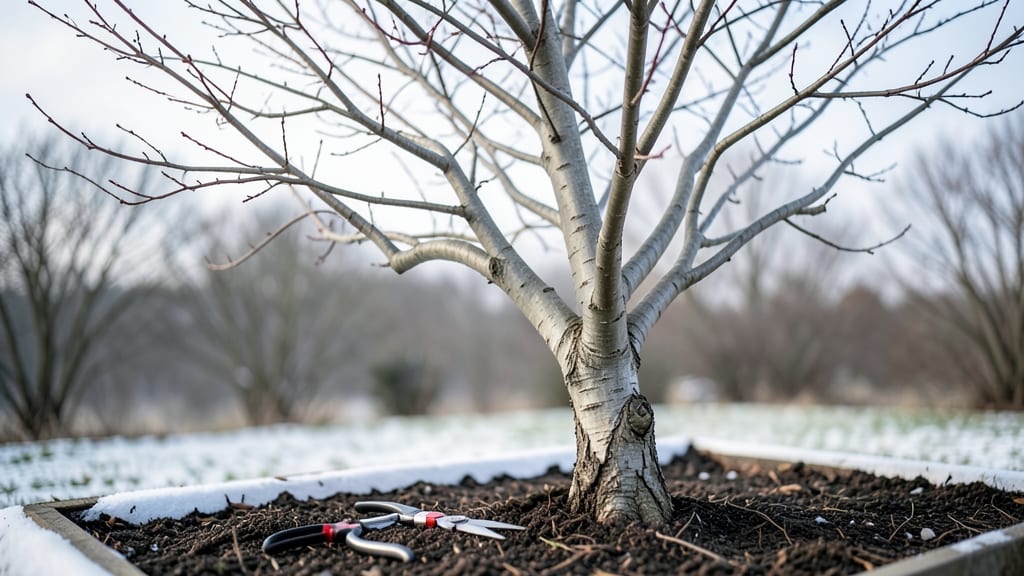
Trimming a Japanese maple in winter reveals its true structure like nothing else—those delicate branches finally show their skeleton without leaves to hide it. ✂️ The dormant season is the perfect time to shape your tree without stressing it, but timing matters: aim for late winter when frost has passed but buds haven't swollen yet.
Most gardeners skip winter pruning, but this is when your maple recovers fastest and looks its best by spring.
You'll need sharp bypass pruners, loppers for thicker branches, and a sturdy ladder—safety first, especially on icy ground. Gloves help with grip, and a bucket for clippings keeps your workspace clean. The key difference from summer truning?
Winter lets you see exactly where to cut without worrying about sap loss or pest attraction. Think of it as giving your tree a fresh start before the growing season begins.
What you'll end up with is a tree that looks intentional, not hacked. Those graceful layers you admire in spring begin with precise cuts now—removing deadwood, thinning crowded branches, and shaping for airflow.
The result? Fewer pests, stronger structure, and blooms that arrive earlier next year. It's the secret to keeping your Japanese maple looking like a masterpiece, not a neglected corner of the yard.
Works for both small patio specimens and mature trees in the landscape. The same principles apply whether you're cleaning up storm damage or just doing routine maintenance. Winter's the time to make those cuts you've been putting off—your tree will thank you with vibrant new growth come April.
📚 In This Guide
- What you need
- Instructions
- Tips and common mistakes
- Wrapping up and next steps
What you need
- ● Bypass pruning shears – Sharp, clean, and small enough to handle delicate branches (5- to 8-inch blades). Quantity: 1 pair.
- ● Loppers – For thicker branches (up to 2 inches in diameter). Quantity: 1 pair (long-handled for reach).
- ● Pruning saw – A bow or curved saw for branches larger than 2 inches. Quantity: 1.
- ○ Extension pole pruners – Optional but helpful for high branches (10- to 20-foot reach). Quantity: 1.
- ● Gloves – Heavy-duty, cut-resistant gloves to protect hands from thorns and sharp tools. Quantity: 1 pair.
- ● Safety glasses – To shield eyes from debris. Quantity: 1 pair.
- ● Disinfectant (70% isopropyl alcohol or bleach solution) – To sterilize tools between cuts and prevent disease spread.
- ○ Pruning sealant (optional) – For large cuts (over ½ inch) to reduce sap loss and infection risk.
- ● Tarp or drop cloth – To collect fallen branches and debris. Size: Large enough to cover the work area.
- ● Ladder (if needed) – A stable, non-slip ladder rated for your height and weight. Type: Extension or step ladder.
- ● Notebook & pen – To sketch a quick map of your tree’s structure before pruning.
- ● Check the weather forecast—trim on a dry, calm day to avoid slipping or spreading disease.
- ● Ensure your tree is dormant (typically late winter, after the coldest months).
- ● Wear long sleeves and pants to protect against scratches and sap.
- ● Have a buddy nearby if working with a tall or heavy tree.
Step-by-step instructions for trimming Japanese maple trees in winter
Winter's the perfect time to shape your Japanese maple—here's how to do it right for strong spring growth.
✂️ Step 1: Gather the Right Tools and Safety Gear
Start with sharp, clean tools to make clean cuts that heal faster. I use bypass pruning shears for small branches under ½ inch thick and a pruning saw for anything thicker. Always wear thick gloves—maple branches have sharp edges that can tear skin, and safety goggles to protect against flying debris.
Disinfect your tools with 70% rubbing alcohol before you begin. Japanese maples are prone to fungal infections, and dirty tools spread diseases like anthracnose or verticillium wilt from cut to cut. Keep a small spray bottle handy to wipe blades between cuts.
✂️ Step 2: Assess the Tree's Structure and Plan Your Cuts
Step back and examine your tree's natural shape—Japanese maples have graceful, layered branches that create their signature silhouette. Look for dead, crossing, or rubbing branches first. These are your priority because they damage healthy wood and invite pests. Mark these with a white chalk marker so you don't miss them.
Next, identify water sprouts—those fast-growing, upright shoots that pop up everywhere. These steal energy from your tree's main structure. Plan to remove at least 20% of these during winter pruning to encourage stronger framework growth. Avoid cutting more than 25% of the tree's total foliage in one season—this stresses the tree unnecessarily.
🌿 Step 3: Remove Dead, Damaged, and Problem Branches
Start at the outermost branches and work your way inward. Cut just outside the branch collar—that swollen area where the branch meets the trunk. This ensures the tree seals the wound properly. For branches thicker than 1 inch, make a 3-step cut: First, undercut the bottom, then top-cut slightly above, and finally remove the stub.
If you're removing a large branch, look for branch bark ridges or swells—these indicate where the branch naturally weakens. Cut at these points to avoid leaving awkward stubs. Never leave more than ¼ inch of a stub, or it'll rot and attract pests. You'll know you're doing it right when the cut looks clean and the branch collar remains intact.
✂️ Step 4: Thin and Shape for Airflow and Light Penetration
Thinning is where you create that open, airy canopy Japanese maples are famous for. Remove selective branches from the inside of the tree to let light reach the center. Aim to remove every 3rd or 4th branch in dense areas, focusing on the lower third of the tree first. This encourages upward growth and prevents a "mushroom" shape.
For shaping, use your pruning shears to trim back overly long branches to maintain the tree's natural form. Cut back to a bud or lateral branch that faces outward—this promotes bushier growth. Avoid cutting back to a stub or you'll get water sprouts. If you're unsure, cut back to a 45-degree angle just above an outward-facing bud.
🌱 Step 5: Clean Up and Protect the Tree
After pruning, remove all debris from the ground beneath the tree. This prevents fungal spores from infecting fresh cuts. I like to bag the clippings and dispose of them in yard waste—never leave them piled under the tree, as they can harbor pests and diseases over winter.
Give the tree a light watering if the ground isn't frozen, especially if you've done heavy pruning. This helps the tree recover faster. Apply a 2-3 inch layer of mulch around the base, keeping it 6 inches away from the trunk to prevent rot. This insulates the roots and retains moisture. You'll see new, vibrant growth in spring—proof your pruning paid off.
Tips & tricks for trimming Japanese maple trees in winter
A few key tricks will help you achieve healthy, vibrant growth while avoiding common mistakes that can harm your tree.
Tool Sharpness is Non-Negotiable: Dull tools tear branches instead of making clean cuts, which slows healing and invites disease. I test my pruning shears by cutting a piece of paper—if it doesn't cut cleanly, it's time to sharpen. For branches over ½ inch thick, a fresh blade on your pruning saw makes all the difference in creating smooth cuts that heal properly.
Winter Pruning Strategy: The dormant season is ideal because the tree's energy is focused on roots, not new growth. But don't wait until late winter—do your pruning in the first few weeks after the ground freezes but before buds start swelling. This timing gives your tree plenty of time to heal before spring growth begins.
Branch Collar Awareness: In Step 3, when you're making those critical cuts just outside the branch collar, take a moment to really study this swollen area. It's like the tree's natural bandage—it contains healing tissues that help seal the wound. If you cut into the collar, you'll create an open wound that's prone to infection. Think of it as the tree's first line of defense against disease.
Thinning Technique: When you're thinning in Step 4, focus on creating that open canopy by removing branches that cross or rub against others. I like to work from the inside out, starting with the lower third of the tree. This approach prevents that "mushroom" shape and lets light reach all parts of the canopy. Remember, you're aiming for about 20-25% total removal—don't overdo it!
Pro Tips for Trim A Japanese Maple Tree In Winter
- A few key tricks will help you achieve healthy, vibrant growth while avoiding common mistakes that can harm your tree.
- Tool Sharpness is Non-Negotiable: Dull tools tear branches instead of making clean cuts, which slows healing and invi...
- Winter Pruning Strategy: The dormant season is ideal because the tree's energy is focused on roots, not new growth. B...
Frequently asked questions
Got questions?
Trimming a Japanese maple in winter can feel tricky, but we’ve got answers to the most common concerns—from timing to tools and everything in between. Dive in!
Can I trim my Japanese maple in late winter?
Late winter (February to early March) is ideal for trimming Japanese maples. The tree is fully dormant, making it easier to see the structure and avoid stressing the plant. Just avoid trimming too close to spring bud break, as new growth needs energy to thrive.
What if I accidentally trim too much?
Don’t panic! Japanese maples are resilient, but avoid removing more than 25-30% of the canopy in one season. If you’ve over-trimmed, focus on pruning back to healthy, outward-facing branches in the next dormant season. Over time, the tree will recover with proper care.
Is winter the only time to trim a Japanese maple?
Winter is the best time, but light shaping can be done in late summer (after 60% of leaves drop) if needed. Avoid heavy pruning in spring or fall, as these seasons stress the tree and invite disease. Summer trims should be minimal and only for safety or immediate issues.
Do I need special tools for winter trimming?
Not necessarily! Sharp, clean pruners (bypass or anvil) and loppers are essential. For thicker branches, a pruning saw works. Sterilize tools with rubbing alcohol or bleach to prevent disease spread. Avoid dull tools—they tear bark and invite infections, especially in winter.
Will trimming in winter affect next year’s flowers or leaves?
Nope! Japanese maples bloom on new wood, so winter pruning won’t remove flower buds. Focus on removing dead, crossing, or weak branches to encourage vibrant foliage and blooms in spring. Just avoid over-pruning—balance is key for a lush, healthy tree.
Wrapping up and next steps
Trimming your Japanese maple in winter is a game-changer for its health and beauty—just remember to work during dormancy, use the right tools, and prioritize structure over perfection. 🌿 With patience and precision, you’ll encourage vibrant blooms, lush foliage, and a stronger canopy come spring.
Now that you’re armed with the know-how, grab those pruners and give your tree the care it deserves—your future green thumb (and happy maple!) will thank you.
Ready to take the next step? Monitor your tree’s progress in the coming months, and don’t hesitate to revisit your pruning skills as it grows. Happy gardening! 🌟