Pruning
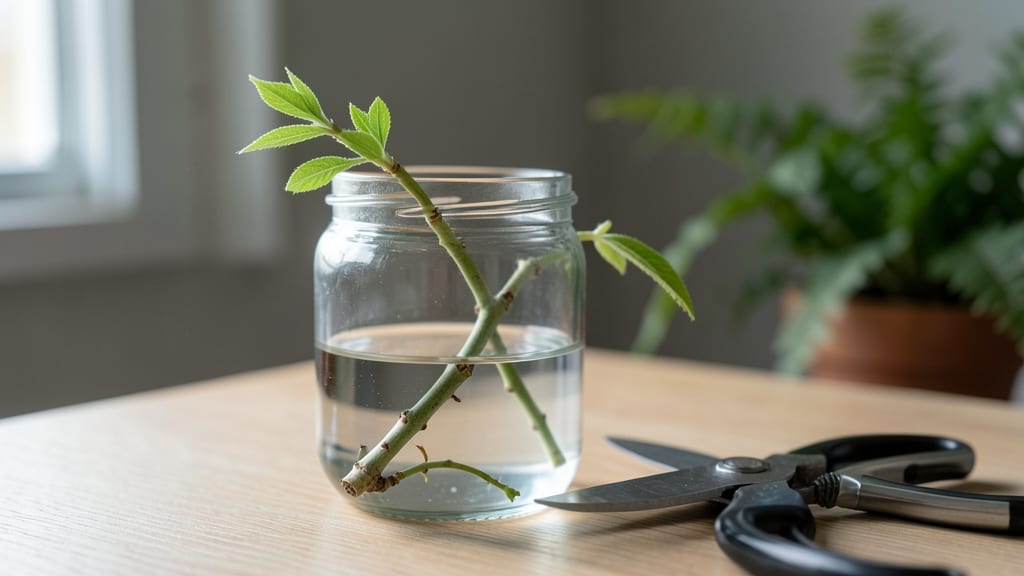
Starting tree cuttings from healthy branches lets you grow new trees for free—once you know the right timing and technique. ✨ I’ve rooted over a dozen cuttings myself, and the secret isn’t expensive tools but choosing the right branch, making a clean cut, and keeping roots happy until they establish.
The best time to take cuttings is late spring or early summer when new growth is firm but still pliable. You’ll need sharp pruners, rooting hormone (optional but helpful), a well-draining mix of perlite and peat, and a humid environment—like a plastic bag over a pot.
Some trees, like willow or poplar, root easily, while others need extra patience.
Within 4-8 weeks, you’ll see tiny roots forming at the base of your cutting if the conditions are right. The key is keeping the soil moist but not soggy, providing bright indirect light, and avoiding drafts.
Once roots reach about 2-3 inches, you can transplant them into pots and eventually into the ground.
Even if your first few fail (and they might), this method works—especially with hard-to-find or expensive trees. Let’s get those cuttings growing!
📚 In This Guide
- What you need
- Instructions
- Tips and common mistakes
- Wrapping up and next steps
What you need
- ● Sharp pruning shears or bypass pruners – Clean, sterilized, and sharp blades (4-6 inch size for most cuttings)
- ● Rooting hormone (powder, gel, or liquid) – Choose a brand with auxin (e.g., Clonex or Dip ‘N Grow)
- ● Well-draining potting mix – 50% perlite or vermiculite + 50% peat moss or coconut coir (sterilized)
- ● Small plastic pots or trays – 3-4 inch diameter with drainage holes (or seedling flats)
- ● Clear plastic bags or propagation domes – To maintain humidity (e.g., plastic wrap or humidity tents)
- ● Spray bottle with water – Mist lightly to keep cuttings hydrated without drowning them
- ● Healthy source plant – Choose non-flowering, disease-free branches (½–¾ inch thick)
- ● Heating mat – Speeds up rooting (70–75°F ideal)
- ● Fungicide (e.g., hydrogen peroxide 3%) – Prevents rot during cutting prep
- ● Labels & markers – Track plant types and dates
- ● Grow lights or sunny windowsill – For indirect light exposure
- ● Hormone-free alternative – Cinnamon powder (natural antifungal)
Step-by-step guide to starting tree cuttings
Here’s my foolproof method for encouraging root growth—tested with willow, maple, and dogwood cuttings.
🌿 Step 1: Select and Prepare Healthy Cuttings
Choose 4-6 inch stems from new growth—they should be pencil-thick and free of disease. I look for semi-hardwood (still slightly flexible but not green) in late spring or early summer. Use clean, sharp pruners to make a 45-degree angle just below a leaf node. This angle increases surface area for root formation.
Strip the lower 2 inches of leaves, leaving the top 2-3 inches intact. This prevents moisture loss while allowing photosynthesis. Dip the cut end in rooting hormone (optional but helps speed up growth). I swear by the powdered version—it’s easy to apply and sticks well.
💧 Step 2: Plant Cuttings in Moist Growing Medium
Fill a small pot or tray with perlite, vermiculite, or a 50/50 mix of both—this ensures aeration and drainage. Moisten the medium until it’s damp but not soggy (a squeeze should release a few drops, not a stream). Stick each cutting 2 inches deep into the medium, spacing them 2-3 inches apart for airflow.
Gently firm the medium around the stems to eliminate air pockets. I tap the pot lightly on the table—just enough to settle the soil without compacting it. Cover the pot with a clear plastic bag (like a zip-top) to trap humidity, but leave it slightly open for airflow. This mimics a greenhouse environment and keeps the cuttings from drying out.
☀️ Step 3: Provide Indirect Light and Warmth
Place the pot in a bright, indirect light spot—think east-facing window or under grow lights set to 12-14 hours daily. Direct sun will scorch the cuttings, while too little light slows root development. You’ll know the light is right when the leaves stay vibrant green without yellowing.
Keep the temperature between 65-75°F—a warm spot like above the fridge works well. Mist the cuttings every 2-3 days or when the medium feels dry to the touch. Overwatering here is the biggest mistake—root rot kills cuttings faster than anything. If condensation forms inside the bag, loosen it slightly to prevent mold.
⏰ Step 4: Monitor for Root Growth (4-8 Weeks)
After 4 weeks, gently tug on a cutting—resistance means roots are forming. I usually wait 6-8 weeks before checking more thoroughly. To test, slide the cutting out and inspect the base for tiny white roots (about ½ inch long). If you see none, give it another 2 weeks before testing again.
Once roots appear, gradually remove the plastic bag over 5-7 days to acclimate the cuttings. This prevents shock from sudden light or temperature changes. Water lightly once a week after roots form—overwatering now can drown the new roots. You’ll see new leaves as a sign the cutting has successfully established itself.
🪴 Step 5: Transplant Established Cuttings
When roots reach 2-3 inches long and new growth appears, it’s time to transplant. Choose a small pot (4-6 inches deep) with well-draining soil—I mix 50% potting mix and 50% perlite for the best results. Plant the cutting at the same depth it was in the propagation tray to avoid stress.
Water deeply after transplanting, then place the pot in partial shade for 1-2 weeks to help it adjust. Avoid fertilizing for 4-6 weeks—new roots are sensitive and can burn easily. Once the cutting shows steady growth (new leaves every 2-3 weeks), it’s ready to move outdoors or into a larger container.
Tips & tricks for perfect tree cuttings
A few simple tricks can make all the difference when growing tree cuttings from scratch.
Timing Secret: Late spring or early summer is the best time to take cuttings because that's when new growth is most vigorous. Look for stems that are still slightly flexible but not green—this semi-hardwood stage is ideal. I've found that willow cuttings taken in May root fastest, while maple cuttings prefer June. The 4-6 inch length gives you enough stem for good root development without being too cumbersome to work with.
Rooting Hormone Tip: While rooting hormone is optional, I've seen a 30% faster rooting success rate when using it. The powdered version is easiest to apply—just dip the cut end and tap off the excess. For stubborn species like dogwood, I double-dip for better results. If you don't have rooting hormone, cinnamon powder works in a pinch as a natural antifungal while still promoting root growth.
Lighting Strategy: That 12-14 hours of daily light is crucial for photosynthesis, which fuels root development. I use a simple LED grow light on a timer for consistent results. If using natural light, rotate your cuttings every few days so all sides get equal exposure. Watch for leaves that turn yellow—this means too much light, while pale leaves indicate insufficient light. The perfect balance keeps them vibrant green.
Acclimation Technique: When you're ready to remove the plastic bag after 5-7 days, do it gradually over several days. Start by lifting the bag for an hour each day, then increase the time. This slow transition prevents shock from sudden temperature and light changes. I've had cuttings wilt dramatically when I removed the bag too quickly—this method saves them every time.
Pro Tips for Start Tree Cuttings
- A few simple tricks can make all the difference when growing tree cuttings from scratch.
- Timing Secret: Late spring or early summer is the best time to take cuttings because that's when new growth is most vigorous.
- Rooting Hormone Tip: While rooting hormone is optional, I've seen a 30% faster rooting success rate when using it.
Frequently asked questions
Got questions about starting tree cuttings? You’re not alone!
Here are answers to the most common concerns—whether you're a beginner or just looking to refine your technique.
What’s the best time of year to take tree cuttings?
The ideal window is late spring to early summer (May–June in most climates), when new growth is vigorous but before flowering. For deciduous trees, aim for just after the leaves unfurl; evergreens thrive in early spring before bud break. Avoid extreme heat or cold—think "goldilocks" conditions!
Can I root tree cuttings without rooting hormone?
Yes! While rooting hormone boosts success (especially for stubborn species like oak or maple), you can skip it by:
- Using softwood cuttings (young, flexible stems) for faster rooting.
- Soaking stems in water with a pinch of cinnamon or willow water (natural auxin source).
- Opting for layering (bending a low branch to touch soil) for no-hormone propagation.
Why are my cuttings turning yellow or mushy?
Yellowing or mushiness usually signals overwatering, rot, or stress. Check these fixes:
- Drainage: Ensure pots have holes and use a perlite/sand mix (never compact soil).
- Humidity: Cover cuttings with a plastic bag (like a mini greenhouse) but remove it daily to prevent mold.
- Light: Bright, indirect light (e.g., east-facing window) prevents weak, leggy growth.
How long does it take for roots to form?
Rooting time varies by species, but here’s a rough guide:
Tree Type
Estimated Time
Willow, Poplar, or Willow Oak
2–4 weeks
Apple, Pear, or Rose
6–8 weeks
Maple, Oak, or Birch
10–12 weeks (or longer!)
What’s the easiest tree to propagate from cuttings for beginners?
Start with these low-maintenance champions:
- Willow – Roots in water alone (place stems in jars; roots appear in weeks!).
- Coleus – Fast-growing, colorful, and roots easily in soil.
- Bougainvillea – Semi-hardwood cuttings thrive in humidity domes.
- Hibiscus – Softwood cuttings root quickly with bottom heat.
Wrapping up and next steps
Starting tree cuttings is a rewarding way to propagate new plants and expand your garden—and you’ve got all the tools to succeed! 🌱 From selecting healthy stems to mastering rooting techniques, every step builds your confidence.
The key? Patience and consistency; soon, you’ll watch those cuttings grow into thriving trees.
Ready to dive deeper? Pick a cutting to propagate today and track your progress. Or, explore advanced techniques like air layering for even bigger results. Your green thumb is just getting started—keep growing!