
Propagation
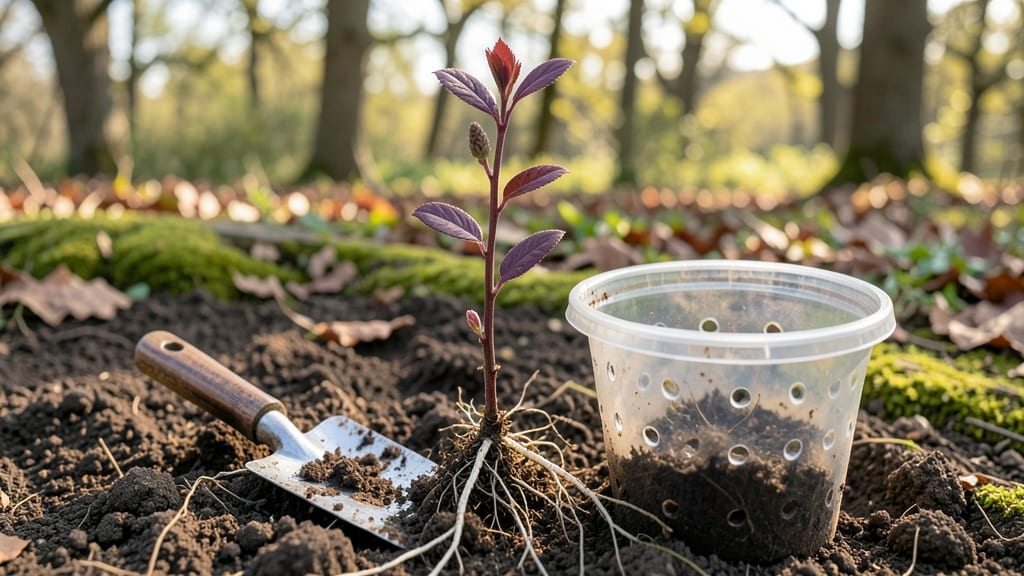
Starting a tree from a root sprout is like cloning your favorite tree for free—no nursery needed. 🌱 I’ve watched stubborn little shoots emerge from buried roots, and with the right approach, you can turn those into sturdy saplings.
The best part? You’re growing a genetic match to the parent tree, which means the fruit, flowers, or foliage will be exactly what you love.
You’ll need basic tools—a sharp shovel, pruning shears, and a bucket of water for the first few days. Look for healthy sprouts near the base of mature trees like apple, pear, or maple—they’re perfect candidates.
The process takes patience, but the payoff is a tree that thrives without the guesswork of seedlings. Even my black thumb can’t kill these.
Within a year, your sprout will grow into a small tree strong enough to transplant permanently. Imagine harvesting fruit from a tree you grew yourself or watching your yard fill with shade from a maple you nurtured from a tiny shoot.
The first leaves unfurling in spring? That’s the moment you’ll know it worked.
Works for backyard gardens, community plots, or even container-grown trees. Here’s how to do it without the trial and error—just results.
📚 In This Guide
- What you need
- Instructions
- Tips and common mistakes
- Wrapping up and next steps
What you need
- ● Root sprout: A healthy, vigorous shoot emerging from the roots of an existing tree (choose one with at least 2–3 leaves or buds).
- ● Sharp pruning shears or knife: Sterilized to avoid disease (rubbing alcohol works!).
- ○ Rooting hormone (optional but helpful): A powder or gel to encourage root growth (e.g., Rootone).
- ● Small pots or containers: 4–6 inches in diameter (use biodegradable pots if transplanting later).
- ● Well-draining potting mix: A blend of 50% peat moss or coconut coir and 50% perlite or sand (sterilized soil works too!).
- ● Clear plastic bag or humidity dome: To retain moisture (a ziplock bag with holes poked in it works!).
- ● Watering can or spray bottle: For gentle hydration (avoid soaking the sprout!).
- ○ Twine or plant ties (optional): To secure the sprout if it’s wobbly.
- ● Access to a mature tree with healthy root sprouts (avoid diseased or stressed trees!).
- ● A sunny or partially shaded spot for the sprout (6+ hours of light daily).
- ● Patience! Root sprouts can take 4–12 weeks to establish roots.
- ● 🌡️ Timing matters: Start in early spring or late summer for best results.
- ● ✨ Label your pots: Trees can look identical—use tags to track species!
- ● 🔄 Rotate pots: Every few days to ensure even light exposure.
Step-by-Step instructions for growing a tree from root sprouts
Here’s how to turn those stubborn root suckers into strong, independent trees.
🌱 Step 1: Identify and Select Healthy Root Sprouts
Look for root sprouts that are at least 6-12 inches tall with a sturdy stem and multiple leaves—these are your best candidates. I avoid spindly or yellowing shoots; they won’t survive transplanting. The sprouts should emerge from the base of the parent tree or along its root zone.
Use a sharp knife or pruners to cut the sprout cleanly at the base, just above the root. Make the cut at a 45-degree angle to increase surface area for healing. If the sprout is still attached to the parent tree, it won’t thrive on its own—it needs its own root system to develop.
🪴 Step 2: Prepare the Sprout for Transplanting
Gently remove any excess soil from the roots to expose the root ball. You’ll want to keep as much soil as possible intact—this minimizes shock. If the roots are tangled, untangle them carefully with your fingers, but don’t pull or damage them. The goal is to preserve the root system while preparing it for its new home.
Trim any broken or overly long roots with clean pruners. Focus on keeping the root ball compact and healthy. If the sprout is large, you can even wrap the root ball in a damp paper towel to keep it moist while you prepare the planting site. This step is all about giving your new tree the best possible start.
☀️ Step 3: Choose the Right Planting Location
Select a spot that mimics the parent tree’s growing conditions—same sunlight exposure, soil type, and moisture level. Most root sprouts thrive in full sun to partial shade, but check the parent tree’s habits to be sure. Dig a hole twice as wide as the root ball but only as deep as the root system itself.
Loosen the soil at the bottom of the hole with a garden fork to encourage root growth. Avoid amending the soil with compost or fertilizer at planting time—this can burn the delicate roots. Instead, focus on creating a well-drained, loose planting bed. The key here is to replicate the natural conditions the sprout is already adapted to.
💧 Step 4: Plant and Water the Sprout
Place the root sprout into the hole, ensuring the top of the root ball sits just below the soil surface. Fill the hole with soil, pressing gently to remove air pockets. Avoid compacting the soil too firmly—you want it loose enough for roots to spread easily. Water the sprout deeply right after planting to settle the soil and eliminate air gaps.
After watering, add a 2-inch layer of mulch around the base, keeping it a few inches away from the stem. Mulch helps retain moisture and regulate soil temperature, which is especially important for young trees. Water the sprout every 2-3 days until the soil feels moist 2 inches below the surface. Overwatering now can lead to root rot, so let the top inch dry out between waterings.
🌿 Step 5: Monitor and Care for the New Tree
Keep an eye on your new tree for the first few weeks, checking for signs of stress like wilting leaves or yellowing. If you notice any issues, adjust your watering or sunlight exposure accordingly. Root sprouts are resilient, but they still need consistent care to establish themselves.
After the first growing season, you can gradually reduce watering as the tree develops deeper roots. By the second year, your root sprout should be strong enough to handle seasonal changes on its own. This is where patience pays off—your tree will reward you with healthy growth and even potential fruit or flowers in the years to come.
Tips & tricks for perfect root sprout transplanting
Here's what nobody tells you about turning those stubborn root suckers into thriving trees.
Timing is Everything: The best time to transplant root sprouts is during the early spring or early fall when temperatures are mild and the tree isn't under stress. Avoid transplanting during extreme heat or cold—your sprout is already dealing with transplant shock, and harsh weather just makes it harder. I've learned this the hard way after losing several sprouts during scorching summer afternoons.
Root System Inspection: When you're preparing the root ball in Step 2, take a moment to examine the roots closely. Look for any signs of damage or disease—healthy roots should be white or light tan, not brown or mushy. If you notice any rot or damage, trim those sections carefully with sterilized pruners. Remember, a healthy root system is the foundation for your new tree's success.
Planting Depth Matters: In Step 4, when you're placing your sprout in the hole, make sure the top of the root ball sits just below the soil surface—this is crucial for proper establishment. I can't tell you how many times I've seen people plant too deep, which can suffocate the tree and lead to poor growth. The general rule is to plant at the same depth as it was growing originally, which is usually where the soil meets the stem.
Watering Wisdom: The 2-3 day watering schedule in Step 4 is a great starting point, but don't be afraid to adjust based on your local climate. In hotter regions, you might need to water every 2 days, while cooler areas might only need watering every 3-4 days. Always check the soil moisture by sticking your finger about 2 inches below the surface—this is the most reliable way to determine when your young tree needs water.
Pro Tips for Start A Tree From A Root Sprout
- Here's what nobody tells you about turning those stubborn root suckers into thriving trees.
- Timing is Everything: The best time to transplant root sprouts is during the early spring or early fall when temperatures are mild and the tree isn't under stress.
- Root System Inspection: When you're preparing the root ball in Step 2, take a moment to examine the roots closely.
Frequently asked questions
Got questions about growing a tree from a root sprout? You’re not alone! Here are some of the most common queries—and their answers—to help you get started with confidence.
What’s the best time of year to dig up root sprouts?
The ideal window is early spring (just as new growth begins) or late fall (before the first frost). Avoid summer heat or winter freezes, which stress young sprouts. If you miss these times, spring is your best bet—roots are active and recovery is easier!
Can I grow a tree from any root sprout, or do some types not work?
Not all sprouts are equal! Look for vigorous, healthy shoots (3–6 inches tall) with multiple leaves and a thick stem (at least pencil-sized). Avoid weak, leggy, or diseased sprouts—they’re less likely to thrive. Fruit trees, willows, and maples are great candidates, while some conifers (like pines) rarely sprout from roots.
How long does it take for a root sprout to grow into a mature tree?
Patience is key! A root sprout typically takes 2–5 years to establish as a small sapling (3–6 feet tall). Full maturity (ready for transplanting or fruiting) can take 5–10+ years, depending on the species. Fast growers like willows may reach 10 feet in 3–4 years, while slower varieties (like oaks) take decades.
What if my root sprout dies after transplanting?
Don’t panic—this happens! Common killers include root damage (trim carefully!), overwatering (let soil dry slightly between waterings), or transplant shock. To revive it: Prune wilted leaves, keep it in shade for 2 weeks, and water deeply but infrequently. If it’s still struggling after a month, try again with a healthier sprout.
Are there alternatives if root sprouts aren’t available?
Try these low-cost propagation methods instead:
- Layering: Bend a low branch to the ground, cover it with soil, and wait for roots to form (great for raspberries or dogwoods).
- Cuttings: Snip a 6-inch stem, dip in rooting hormone, and plant in moist perlite/sand.
- Grafting: Attach a scion (desirable branch) to a rootstock (existing tree) for instant maturity.
- Seed collection: Gather seeds from mature trees (though this takes longer for true species replication).
Wrapping up and next steps
Starting a tree from a root sprout is a rewarding way to propagate new life from an existing tree—and you’ve got all the tools to succeed! 🌱 With patience, the right techniques, and a little care, you can watch your sprout grow into a thriving tree.
Now that you know the steps, why not give it a try? Grab your tools, pick a healthy sprout, and let nature do the rest.
Ready to take the next step? Share your progress with fellow gardeners or explore advanced propagation tips to expand your green thumb skills!