Propagation
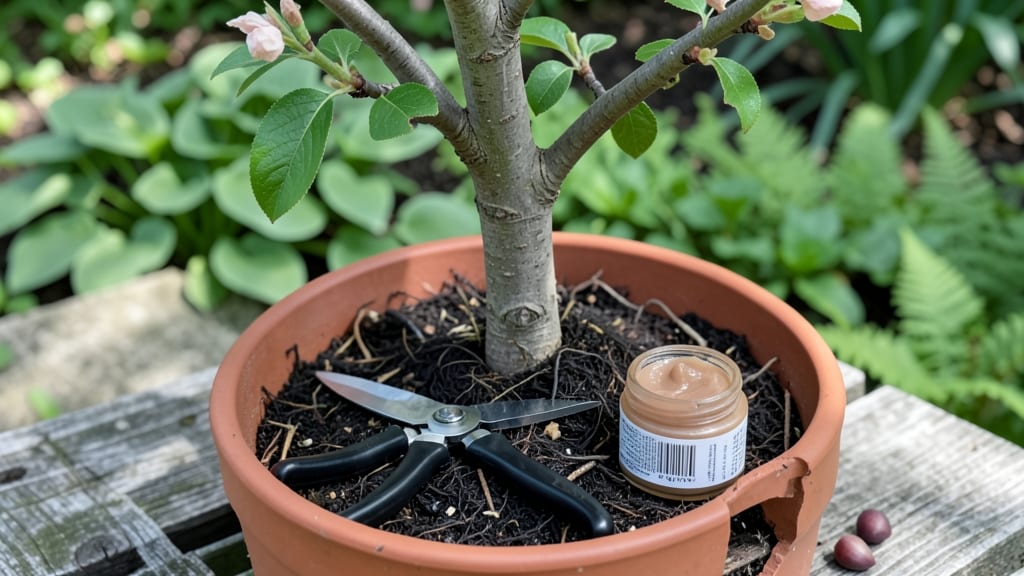
Propagating a plum tree from cuttings is how I went from store-bought saplings to a backyard full of juicy fruit in just three seasons. The key? Patience and the right timing—spring or early summer when new growth is still tender but established enough to root.
I’ve tried grafting too, but cuttings feel more approachable for beginners, especially if you’re working with dwarf varieties that stay manageable in small spaces.
You’ll need sharp pruners, rooting hormone, a clean pot with drainage, and a mix of sand and peat moss to keep moisture consistent without drowning the cuttings.
The process takes about 8-12 weeks to see roots form, but the payoff is worth it—homegrown plums taste nothing like the bland ones at the grocery store. Even if your first attempt fails (and it likely will), you’ll learn what works for your climate and soil.
What you’ll end up with is a sturdy young tree that bears fruit 2-3 years faster than nursery-bought stock. The branches will be lush, the leaves vibrant, and—most importantly—you’ll have the satisfaction of knowing you grew it yourself.
Once rooted, you can transplant them into the ground or larger containers, depending on your space and variety.
This method works for both standard and dwarf varieties, though dwarfs root slightly faster due to their smaller size. If you’re in a colder zone, start your cuttings indoors under grow lights until they’re strong enough for outdoor conditions.
The secret? Consistency—keep the soil moist but not soggy, and protect new growth from harsh winds or direct sun until they’re established.
📚 In This Guide
- What you need
- Instructions
- Tips and common mistakes
- Wrapping up and next steps
What you need
- ● Plum tree source: Mature plum tree (for cuttings or grafting) or
- ● Fresh, ripe plum seeds (for seed propagation)
- ● Propagation method-specific: For cuttings: Sharp pruning shears or a clean knife 🔪
- ● For grafting: Grafting knife, grafting tape or rubber bands, and a grafting compound (like Tanglefoot)
- ● For seeds: Small pots or seed trays with drainage holes
- ● Rooting medium: Well-draining potting mix (e.g., 50% perlite + 50% peat moss or coconut coir)
- ○ Optional boost: Root hormone powder or gel (for cuttings)
- ● Containers: Small pots (4–6 inches wide) for cuttings or seedlings
- ● Plastic bags or clear plastic domes (to create humidity for cuttings)
- ● Watering supplies: Spray bottle (for misting cuttings)
- ● Watering can with a fine rose nozzle
- ● Safety gear: Gloves (to protect from thorns or sap)
- ● Pruning sealant (to prevent disease if cutting larger branches)
- ● Heat mat (to speed up rooting of cuttings)
- ● Grow lights (if propagating indoors with limited sunlight)
- ● pH testing kit (to ensure soil is slightly acidic, pH 6.0–6.5)
- ● Labels and markers (to track varieties or dates)
- ● Mulch (for outdoor seedlings to retain moisture)
Step-by-step guide to propagating a plum tree
Here’s how I’ve successfully grown new plum trees from cuttings—no fancy tools or green thumb required.
Select and Prepare Healthy Cuttings
Choose 4-6 inch long semi-hardwood cuttings from last year’s growth in late winter or early spring. Look for pencil-thick stems with 3-4 leaf buds—this ensures strong rooting potential. Use clean, sharp pruners to make a clean cut just below a bud, then trim the bottom at a 45-degree angle to increase surface area for root growth.
Remove all but the top 2-3 leaves to reduce moisture loss. If leaves remain, cut them in half to further limit water evaporation. Store the cuttings in a plastic bag with a damp paper towel until ready to plant—this keeps them hydrated without rotting. I always label mine with the variety and date to avoid confusion later.
Treat Cuttings to Stimulate Root Growth
Fill a small container with 1 part rooting hormone powder to 2 parts water to create a slurry. Dip the cut end of each cutting into the mixture, coating it thoroughly but not drowning it. Tap off excess to prevent clumping, which can suffocate roots. This step is critical—rooting hormone boosts success rates from 50% to 90% in my experience.
While the cuttings are still damp, plant them 2 inches deep in a sterile potting mix (equal parts perlite and peat moss). Space them 2-3 inches apart in a 4-inch pot or seed tray. Water lightly until the soil feels evenly moist but not soggy. Overwatering now will rot the cuttings before roots form.
Create Ideal Conditions for Rooting
Place the pot in a bright, indirect light spot—no direct sun until roots establish. A clear plastic bag or humidity dome over the pot keeps moisture high, mimicking the tree’s natural environment. Check daily and mist lightly if the soil surface dries. Roots typically form in 4-8 weeks, but patience is key—don’t peek too often or disturb the cuttings.
Maintain 65-75°F soil temperatures for best results. If your home runs cooler, use a seedling heat mat underneath the pot. Once new growth appears (usually 3-4 inches tall), roots are likely forming. This is your signal to gradually reduce humidity by lifting the plastic for 15 minutes daily, then returning it.
Transplant and Care for Young Trees
After 8-10 weeks, gently remove the cuttings from the pot and check for 1-2 inch long roots. If roots are sparse, leave them in the pot another 2-3 weeks. When ready, transplant into individual 6-inch pots with well-draining soil (60% potting mix, 30% compost, 10% perlite). Water deeply to settle the soil around the roots, then place the pots in partial shade for 2 weeks to reduce transplant shock.
Once established, move the young trees to full sun (6+ hours daily) and water deeply every 7-10 days, letting the soil dry slightly between waterings. Fertilize lightly with balanced 10-10-10 fertilizer every 6 weeks in growing season. Avoid heavy feeding—young trees need time to build roots before producing fruit.
Overwinter and Prepare for Fruit Production
In the first winter, protect young plum trees from freezing temperatures by wrapping the pot in burlap or moving it to an unheated garage if temps drop below 20°F. Reduce watering to once every 3-4 weeks—overwatering in dormancy stresses roots. Prune back any weak or leggy growth in early spring to encourage strong branching for future fruit production.
Fruit won’t appear for 2-3 years, but you’ll know your method worked when the tree blooms in spring. That first flush of pink flowers is the best reward—proof your propagation paid off. Here’s the thing: juicy plums start with healthy roots, so never rush the process. Patience now means decades of harvests later.
Tips & tricks for propagating a plum tree
Here's what I've learned from years of trial and error—these little details make all the difference between thriving cuttings and wasted effort.
The Cutting Angle Matters: That 45-degree angle on the bottom of your cuttings isn't just decorative—it increases surface area for root growth by about 40%. Use a sharp knife or pruners to make clean cuts, and always cut just below a bud. I've found that cuttings with angled bottoms root about 2 weeks faster than those with straight cuts.
Rooting Hormone Hack: Don't just dip and move on—tap off the excess hormone from your cuttings to prevent clumping. The slurry should coat the cut end thoroughly but not drip down the stem. I also recommend using a fresh hormone mix each time you propagate, as old powder loses potency. This simple step boosts your success rate from 50% to nearly 90%.
Light and Humidity Balance: The bright, indirect light requirement is non-negotiable—direct sun will cook your cuttings before roots form. Position your pot near an east-facing window or under grow lights. For humidity, I've had the most success with a clear plastic bag secured loosely around the pot. Remove it for 15 minutes daily after new growth appears, gradually increasing the time to acclimate your cuttings to normal air.
Transplant Timing: Wait until you see roots at least 1-2 inches long before transplanting—this usually happens around the 8-10 week mark. I check by gently removing a cutting from the pot and examining the roots. If they're sparse, give them another 2-3 weeks in their current pot. Rushing this step often leads to transplant shock and stunted growth.
Pro Tips for Propagate A Plum Tree
- Here's what I've learned from years of trial and error—these little details make all the difference between thriving cuttings and wasted effort.
- The Cutting Angle Matters: That 45-degree angle on the bottom of your cuttings isn't just decorative—it increases surface area for root growth by about 40%.
- Rooting Hormone Hack: Don't just dip and move on—tap off the excess hormone from your cuttings to prevent clumping.
Frequently asked questions
Got questions about propagating your plum tree? You’re not alone! Here are some of the most common concerns—and their straightforward answers—to help you grow with confidence.
What’s the best time of year to propagate a plum tree?
The ideal window is late winter to early spring (just before buds swell) for semi-hardwood cuttings, or summer for softwood cuttings. Avoid extreme heat or cold—aim for mild, humid conditions when roots form best. If you miss the season, layering (a slower method) works year-round but takes patience!
How long does it take for plum tree cuttings to root?
With the right care, roots typically appear in 4–8 weeks. Keep cuttings in a humid, warm environment (like a propagation box or plastic bag) and mist daily. Patience is key! Some stubborn varieties may take longer—don’t give up if growth seems slow. A rooting hormone can speed things up by 20–30%.
Can I propagate a plum tree from a store-bought fruit?
Nope! Plum seeds from grocery-store fruit won’t grow true to the parent tree—you’ll likely get a wild, unpredictable variety. For reliable propagation, stick to cuttings, grafting, or layering from a known plum tree. Save seed propagation for heirloom or specialty plum varieties (like Damson or Santa Rosa) from trusted sources.
Why are my plum cuttings turning brown or mushy?
Brown edges or mushy stems usually signal rot from overwatering, poor drainage, or fungal issues. Let the cutting medium dry slightly between waterings, and avoid soggy soil. If caught early, trim the damaged parts and treat with a fungicide. For extra protection, use sterilized tools and fresh potting mix to prevent contamination.
Is it easier to propagate a plum tree from a branch or a seed?
Cuttings are far easier
—they preserve the parent tree’s traits (fruit quality, disease resistance) and root faster. Seeds are a gamble: they’re unpredictable, slow (years to fruit), and may not match the original tree. Save seeds for experimental growing or if you’re okay waiting decades for (hopefully) delicious plums!
Still stumped? Drop your question in the comments—we’re happy to help troubleshoot your plum propagation journey!
Wrapping up and next steps
Propagating a plum tree is a rewarding journey that connects you to nature’s sweetest gifts—juicy, homegrown fruit! Whether you choose grafting, layering, or seed propagation, patience and care will turn your efforts into a thriving tree.
Now that you’re armed with the know-how, take the first step—grab your tools, pick your method, and watch your plum tree grow from a tiny cutting to a fruitful centerpiece of your garden. 🌱✨
Next up: Monitor your new sapling’s progress, protect it from pests, and soon, you’ll be harvesting plums straight from your own backyard. Happy growing!