Propagation
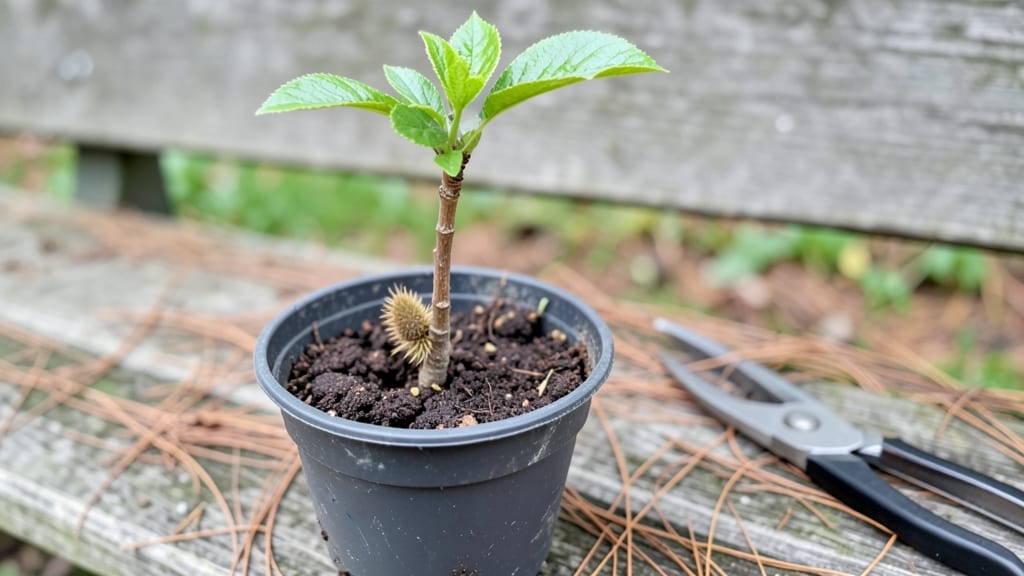
Planting chestnut tree seeds is the slowest, most rewarding way to grow a tree that’ll feed wildlife and future generations. 🌱 The key to breaking through that tough shell?
A cold stratification trick that mimics nature’s timing. I’ve watched my own seeds crack open after months of patience—it’s like watching a tiny forest emerge from a single nut.
You’ll need fresh chestnuts (not store-bought), a plastic bag, damp peat moss or sand, and a freezer. The process takes about 3-4 months of cold treatment before planting, but it’s worth it for a tree that can live for centuries.
Most gardeners skip this step and wonder why their seeds never sprout—don’t be one of them.
Once stratified, you’ll plant the seeds in well-draining soil, 2-3 inches deep, in a sunny spot where they can grow undisturbed for years.
The first sprouts might take 3-6 months to appear, but once they do, you’re on your way to a 60-foot giant—if you’re patient enough to wait.
This method works best in zones 5-8, where chestnuts thrive naturally. For faster results, you can plant multiple seeds in a nursery pot before transplanting, but be ready for slow growth—chestnuts are built for endurance, not speed. The payoff? A tree that’ll outlive you and your grandchildren.
📚 In This Guide
- What you need
- Instructions
- Tips and common mistakes
- Wrapping up and next steps
What you need
- ● Fresh chestnut seeds: 3–5 viable nuts (harvested in fall, ideally from a healthy tree). Pro tip: 💡 Look for plump, unblemished nuts with a papery husk still attached.
- ● Stratification supplies: 1–2 large plastic bags (gallon-sized) or a moisture-retentive container
- ● Peat moss or coconut coir (2–3 cups, dampened but not soggy)
- ○ Optional: Perlite or vermiculite (½ cup) for aeration
- ● Planting container: A 6-inch deep pot with drainage holes (or a seed tray)
- ● Well-draining potting mix: 1–2 bags of high-quality seed-starting mix (sterilized)
- ● Watering can or spray bottle: For gentle hydration
- ● Labels & marker: To track seed varieties and planting dates
- ● Garden gloves: Protect your hands from prickly husks!
- ● Cold stratification: A refrigerator (set to 35–40°F) or outdoor cold frame (for natural winter exposure).
- ● Sunlight: A south-facing window or grow lights (for post-stratification growth).
- ● Patience: Chestnut seeds can take months to germinate—plan ahead!
- ● Humidity dome or plastic wrap (to retain moisture during early growth)
- ● Soil thermometer (to monitor stratification temps)
- ● Compost or worm castings (for nutrient-boosted potting mix)
- ● Tree support stake (for transplanting saplings later)
Step-by-Step instructions for planting chestnut tree seeds
Here's my battle-tested method for breaking dormancy and ensuring strong, healthy chestnut seedlings.
🌱 Step 1: Harvest and Prepare Fresh Chestnut Seeds
Collect chestnuts from healthy, mature trees in late fall after they've naturally fallen. Look for plump, unblemished nuts with intact caps—these hold the best germination potential. Remove any seeds with cracks, insect holes, or soft spots, as they won't survive stratification.
Store the selected seeds in a single layer on a paper towel in a sealed container. Keep them in a cool, dark place at 35-40°F for 3-4 months. This mimics winter conditions and is critical for breaking dormancy. I've found that refrigerating them in a plastic bag with a tiny air hole works perfectly—just check monthly for mold or moisture buildup.
💧 Step 2: Stratify Seeds Using the Cold-Moisture Method
After the cold storage period, remove the seeds and soak them in lukewarm water for 24 hours. This softens the hard seed coat and jumpstarts germination. Drain well and place them between two damp paper towels in a sealed plastic bag. Store the bag in your refrigerator for another 4-6 weeks.
Check the seeds weekly—if they begin to sprout, move them immediately to a warm spot. The goal is to see 1/4-inch white roots before planting. I like to wrap the bag in a clear plastic wrap with a tiny opening to monitor progress without disturbing them. This step is where most gardeners fail—patience here ensures reliable germination.
☀️ Step 3: Plant Stratified Seeds in a Controlled Environment
Fill small 3-inch pots with a sterile seed-starting mix and plant each seed 1 inch deep, leaving the sprout facing downward. Use a pencil to make a hole just wide enough for the seed—pressing too hard can damage the delicate root. Cover the pot with clear plastic wrap to retain moisture and warmth, then place it in a warm, bright spot.
Keep the soil consistently moist but never soggy—water when the top 1/2 inch feels dry. Germination typically occurs within 2-4 weeks, but some seeds may take up to 8 weeks. Once the first true leaves appear (not the initial seed leaves), remove the plastic wrap gradually over 3-5 days to acclimate the seedlings to normal humidity.
🌿 Step 4: Transplant Seedlings to Outdoor Nursery Beds
When seedlings reach 6-8 inches tall with a sturdy stem, transplant them to an outdoor nursery bed in early spring. Choose a site with partial shade and well-draining soil—chestnuts hate waterlogged roots. Space seedlings 3 feet apart to allow room for root development.
Water deeply after transplanting to settle the soil around the roots, then mulch with 2 inches of wood chips to retain moisture and suppress weeds. Young chestnut trees need consistent care—water weekly during dry spells and protect them from strong winds. You'll see significant growth in their second year if they establish well.
⏰ Step 5: Maintain Trees Through Their First Five Years
For the first three years, focus on protecting young trees from deer and rodents, which love tender chestnut shoots. Install a 5-foot tall wire cage around each tree or use commercial tree guards. Fertilize lightly in early spring with a balanced 10-10-10 formula to encourage steady growth without burning delicate roots.
By year five, your chestnut trees should reach 10-15 feet tall and begin producing their first nuts. Prune in late winter to remove dead wood and shape the canopy, but avoid heavy pruning—chestnuts respond poorly to aggressive cutting. The real reward comes in 10-15 years, when mature trees produce abundant crops of sweet, edible nuts.
Tips & tricks for planting chestnut tree seeds
Here's what I learned the hard way after struggling with inconsistent germination rates over years of planting chestnut trees.
Cold Storage is Non-Negotiable: In Step 1, that 3-4 month cold storage period at 35-40°F is absolutely critical—don't skip it! I tried planting fresh seeds without stratification and had less than 10% germination. This cold treatment mimics winter conditions and breaks the seed's natural dormancy. Use your refrigerator's crisper drawer for consistent temperatures, and remember to check monthly for any mold or moisture buildup that could ruin your seeds.
Stratification Timing Matters: During Step 2, the 24-hour soak in lukewarm water is your first chance to jumpstart germination. After this soak, the 4-6 weeks of refrigerator stratification is where the magic happens. I've found that wrapping the bag in clear plastic wrap with a tiny opening lets me monitor root development without disturbing the seeds—this is where most gardeners fail by being impatient. The goal is to see those 1/4-inch white roots before planting, not rush the process.
Planting Depth and Orientation: When you reach Step 3, planting each seed 1 inch deep with the sprout facing downward is crucial. I learned this through trial and error—planting too shallow can expose the seed to temperature fluctuations, while planting too deep can prevent proper sprouting. Using a pencil to make a precise hole prevents over-compacting the soil around delicate roots. The plastic wrap covering helps maintain humidity during the critical germination period.
Transplanting Strategy: In Step 4, when your seedlings reach 6-8 inches tall, timing is everything. Early spring transplanting gives young trees the growing season to establish strong roots before winter. I recommend hardening off seedlings by gradually removing the plastic wrap over 3-5 days before transplanting to prevent shock. Also, choose a site with partial shade—young chestnut trees can't handle full sun exposure yet.
Pro Tips for Plant A Chestnut Tree From Seed
- Here's what I learned the hard way after struggling with inconsistent germination rates over years of planting chestnut trees.
- Cold Storage is Non-Negotiable: In Step 1, that 3-4 month cold storage period at 35-40°F is absolutely critical—don't skip it!
- Stratification Timing Matters: During Step 2, the 24-hour soak in lukewarm water is your first chance to jumpstart germination.
Frequently asked questions
Got questions about growing chestnuts from seed? You’re not alone! Here are answers to the most common queries—plus a few pro tips to set you up for success.
How long does it take for chestnut seeds to sprout after stratification?
After stratification (typically 3–4 months in cold, moist conditions), germination can take 2–6 weeks once planted. Some seeds sprout faster if pre-chilled, while others may linger—patience is key! Keep soil consistently moist (but not soggy) and maintain warmth (60–70°F) to encourage growth.
Can I plant chestnut seeds directly in the ground without stratification?
Nope! Chestnut seeds require stratification to break dormancy. Planting them fresh in the ground will likely result in zero germination. Mimic winter’s chill by refrigerating seeds in moist peat or sand for 3–4 months first. For a shortcut, try a hot-and-cold water soak (soak 24 hrs in warm water, then 24 hrs in ice water) before planting.
How do I know if my chestnut seed is viable before planting?
Test viability with the float test: Fill a bowl with water and drop seeds in. Viable seeds sink (they’re heavy with stored energy), while hollow or rotted ones float. For extra confidence, cut open a few seeds—look for a plump, firm interior (not shriveled or moldy). Discard any seeds with cracks, holes, or foul smells.
Why aren’t my chestnut seedlings growing? Troubleshooting tips.
Slow growth?
Check soil moisture—chestnut seeds need consistent dampness (like a wrung-out sponge). Overwatering can cause rot, while dry soil stalls sprouts.
No sprouts at all?
Recheck stratification—some seeds need longer cold exposure (up to 6 months). Try scarifying the seed coat lightly with sandpaper to help water penetrate.
Yellow leaves or wilting?
Your seedling might be overcrowded or in poor light. Thin seedlings to 6 inches apart and move to a bright, indirect spot (or under grow lights).
What’s the best alternative if my chestnut seeds fail to germinate?
No worries—chestnut trees are also available as saplings from nurseries! Look for disease-resistant varieties like ‘Davis’ or ‘Paradise’ chestnuts, which mature faster (10–15 years vs. 20+ for seed-grown trees). Just ensure the sapling’s root system is intact and plant in well-draining soil with full sun for best results.
Wrapping up and next steps
Growing a chestnut tree from seed is a rewarding journey that blends patience with nature’s magic! 🌱 By mastering stratification and providing the right care, you’ll unlock the potential for a thriving, long-lived tree.
Whether you’re a seasoned gardener or a curious beginner, every step—from seed selection to transplanting—builds your green thumb confidence.
Your next adventure? Monitor your seedlings as they grow! Track their progress, protect them from pests, and soon, you’ll be harvesting sweet chestnuts straight from your own backyard. Happy planting! 🌳