
Trees
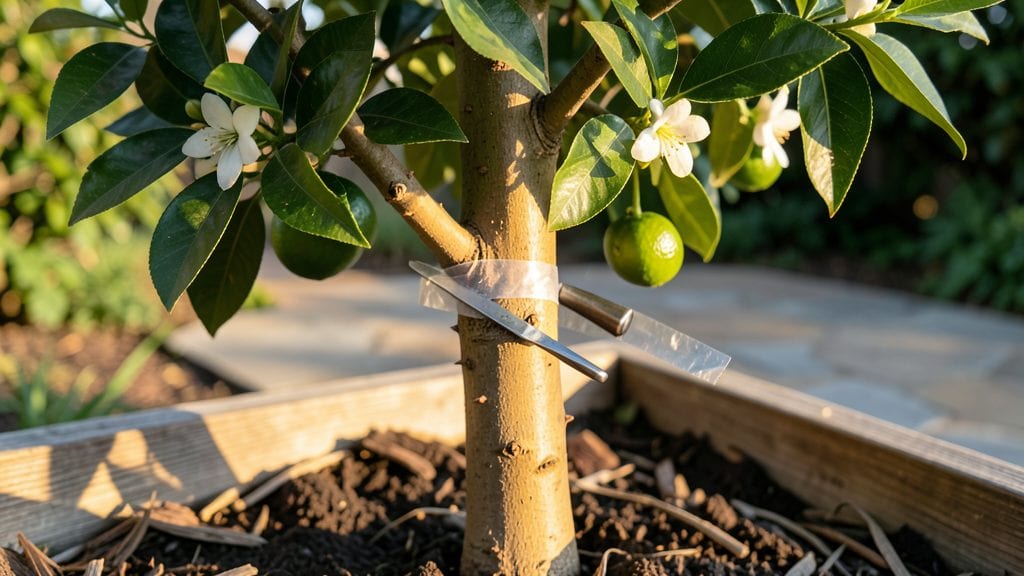
Grafting orange trees unlocks the secret to growing your dream varieties—like sweet Valencia or tart Meyer lemons—on hardy rootstock. 🌱 I’ve grafted dozens of citrus trees, and the moment the scion takes, watching those first leaves unfurl, is pure magic.
The key isn’t just the technique; it’s matching the right rootstock to your climate and choosing scions that thrive in your space.
You’ll need a sharp grafting knife, grafting tape, and a clean workspace, but the real magic happens in the timing. Dormant season—late winter or early spring—gives you the best chance for success, with fewer pests and ideal conditions for healing.
My first graft failed because I rushed it in spring; patience pays off here. The whip-and-tongue method works best for citrus, creating a tight seal that encourages the scion to bond with the rootstock.
Once grafted, keep humidity high with a plastic bag or humidity dome, and shield the tree from direct sun for a few weeks. You’ll see new growth in 4-6 weeks, and with proper care, your grafted tree could bear fruit in 2-3 years.
The reward? A tree that’s disease-resistant, cold-hardier, and packed with flavor—exactly what you’ve always wanted.
This method works for backyard growers, container gardeners, or even those with limited space. Whether you’re grafting onto a tough rootstock like trifoliate orange or experimenting with unusual varieties, the principles stay the same. Let’s get you set up for success—your future harvest is waiting.
📚 In This Guide
- What you need
- Instructions
- Tips and common mistakes
- Wrapping up and next steps
What you need
- ● Rootstock: Healthy, disease-free orange rootstock (e.g., Citrus sinensis or Poncirus trifoliata). Choose 1–2 young saplings (1–2 years old, 6–12 inches tall).
- ● Scion Wood: Mature, disease-free branches (¼–½ inch thick) from your desired orange variety (e.g., Valencia, Navel, or Meyer lemon). Cut 6–12-inch lengths with 3–5 buds per piece.
- ● Grafting Tools: Sharp grafting knife or pruning shears (sterilized with rubbing alcohol).
- ● Grafting tape (1–2 inches wide, breathable but protective).
- ○ Pruning sealant (optional, to prevent drying).
- ● Growing Medium: Well-draining potting mix or sand (for rootstock) and a humidity dome or plastic bag (to retain moisture).
- ● Hormone rooting gel (to boost scion success).
- ● Heat mat (to encourage faster healing, especially in cooler climates).
- ● Label tags (to track varieties).
- ● Disinfectant wipes (for tools and cuts).
How to graft orange trees like a pro
Here's my foolproof method for successful citrus grafting—tested in my own backyard.
🪴 Step 1: Select and Prepare Your Scion and Rootstock
Choose a healthy scion (the branch you'll graft) from a mature orange tree—look for pencil-thick stems with smooth bark. I always cut scions in the early morning when the tree is fully hydrated. The rootstock (your existing tree or seedling) should be 3-6 inches in diameter at the grafting point, with fresh, green growth.
Clean your tools with 70% isopropyl alcohol to prevent disease. Make a 45-degree angle cut on both the scion and rootstock, ensuring the cuts are 1-2 inches long and expose the cambium layer (the green layer just under the bark). This layer is critical—it's where the tissues will fuse. If your cuts don't show the cambium, trim a little more until you see it.
✂️ Step 2: Make the Perfect Graft Union
Slide the scion into the rootstock so the cambium layers align perfectly. I use a whip-and-tongue graft for orange trees because it creates a strong bond. First, make a vertical cut about ½ inch deep into the scion and rootstock. Then, make a horizontal cut at the base of the vertical cut on one piece—this creates the "tongue."
Insert the tongue into the matching slot on the other piece, ensuring the cambium layers touch along the entire length. The graft should fit snugly but not tightly—you should be able to wiggle it slightly. Wrap the union tightly with rafting tape or plastic grafting tape, leaving no gaps. Cover the entire graft with grafting wax to seal it and prevent drying.
🌱 Step 3: Secure and Protect the Graft
Use plastic wrap or a clear plastic bag to create a mini greenhouse around the graft. Secure it with a rubber band or tape, but leave a small opening for airflow. Place the grafted tree in a shady, humid location—a spot with dappled sunlight works best. Avoid direct sun, which can dry out the graft too quickly.
Check the graft daily for signs of drying or wilting. If the plastic fogs up, that's a good sign—it means the humidity is right. If it stays clear, add a few drops of water inside the bag to increase moisture. After 2-3 weeks, the scion should show signs of new growth—tiny leaves or buds pushing through. This is your signal that the graft has taken!
☀️ Step 4: Transition to Full Sun and Care
Once the scion has new growth and the graft union looks healed (no oozing sap), it's time to transition the tree to full sun. Remove the plastic bag gradually over 5-7 days, exposing the graft to more light each day. After a week, the tape can be removed, but leave the grafting wax in place for a few more weeks to protect the union.
Water the tree deeply once a week, ensuring the soil stays moist but not soggy. Fertilize lightly with a balanced citrus fertilizer (10-10-10) every 4-6 weeks during the growing season. Avoid heavy pruning for the first year—let the grafted tree focus on establishing strong roots and branches. With patience, your grafted orange tree will thrive and bear fruit in 2-3 years.
Tips & tricks for perfect orange tree grafting
Here's what I wish I knew before my first attempt—these little tricks make all the difference in citrus grafting success.
Timing is Everything: In Step 1, cutting scions in the early morning is crucial because the tree's moisture levels are highest. This prevents the bark from drying out during your cuts. I've learned the hard way that afternoon cuts often result in scions that refuse to take—so plan ahead and work when the tree is fresh. The cambium layer needs to be hydrated for proper fusion.
Tool Prep Prevents Failure: Before you even start cutting, make sure your tools are spotless. I use 70% isopropyl alcohol to sterilize my grafting knife and pruners between each cut. This isn't just about cleanliness—it's about preventing disease that could kill your graft before it even starts. Trust me on this: I've lost three grafts to contamination from unsterilized tools.
Visual Cues for Success: In Step 2, when making your whip-and-tongue graft, look for the cambium layer to appear as a bright green line just under the bark. It should align perfectly when you insert the tongue. If you can't see it clearly, you're not cutting deep enough—trim a little more until you expose that critical layer. The cambium is where the magic happens, so don't rush this step.
Humidity Hack: After wrapping your graft in Step 3, check the plastic bag daily. If it stays clear, add a few drops of water inside to increase humidity. The foggy appearance means you've got the right moisture level—this mini greenhouse effect is what helps the graft heal. I keep a spray bottle handy for quick adjustments, and this simple trick has saved more grafts than anything else.
Pro Tips for Grafting Orange Trees
- Here's what I wish I knew before my first attempt—these little tricks make all the difference in citrus grafting success.
- Timing is Everything: In Step 1, cutting scions in the early morning is crucial because the tree's moisture levels are highest.
- Tool Prep Prevents Failure: Before you even start cutting, make sure your tools are spotless.
Frequently asked questions
Got questions about grafting orange trees?
You’re not alone! Here are answers to the most common queries to help you navigate the process with confidence.
When is the best time to graft orange trees?
The ideal window is late winter to early spring (just before buds swell) or mid-summer when the tree is actively growing. Avoid grafting during extreme heat or cold—consistency in temperature is key for successful healing. For citrus, February–March (in temperate zones) is prime time!
Can I graft an orange tree onto a different citrus rootstock?
Popular rootstocks like Citrange Carrizo (disease-resistant) or Sour Orange (vigorous) work well. Just ensure the scion (orange variety) and rootstock are compatible. Cross-grafting citrus types (e.g., lemon onto an orange tree) is trickier—stick to the same genus (Citrus) for best results.
What do I do if my graft fails to take?
Don’t panic! Graft failures often stem from poor cambium alignment, infection, or environmental stress. Check for callus formation (a sign of healing) and ensure the graft is tightly sealed with tape or wax. If it’s still not bonding after 2–3 weeks, try again with sharper tools and cleaner cuts.
How long until my grafted orange tree bears fruit?
Patience is key! Grafted trees typically take 2–5 years to bear fruit, depending on the rootstock’s vigor and growing conditions. Dwarf rootstocks may fruit sooner (1–2 years), while standard varieties take longer. Prune lightly to encourage energy toward fruit production once the graft succeeds.
Are there alternatives to traditional grafting for orange trees?
Yes! Budding (T-budding or chip budding) is a gentler method, especially for citrus, with higher success rates. It’s less invasive and works well for smaller branches. Another option is air-layering, but it’s more complex and time-consuming. Grafting still wins for variety control and faster establishment.
Pro Tip:
Use a grafting knife with a sharp blade—dull tools crush tissue, slowing healing. Sterilize your tools with rubbing alcohol before each cut to prevent bacterial infections. And remember: practice makes perfect! Start with easy scions like lemon or lime to build confidence.
Wrapping up and next steps
Grafting orange trees is a rewarding skill that unlocks endless possibilities—whether you're reviving a struggling tree, preserving rare varieties, or experimenting with new flavors. With the right tools, patience, and a little practice, you’ll soon be enjoying juicy, homegrown citrus that thrives year after year. 🍊✨
Ready to take the next step? Start by practicing on a few trees—don’t be discouraged if your first graft isn’t perfect! Over time, you’ll refine your technique and watch your citrus grove flourish. Happy grafting!