Pruning
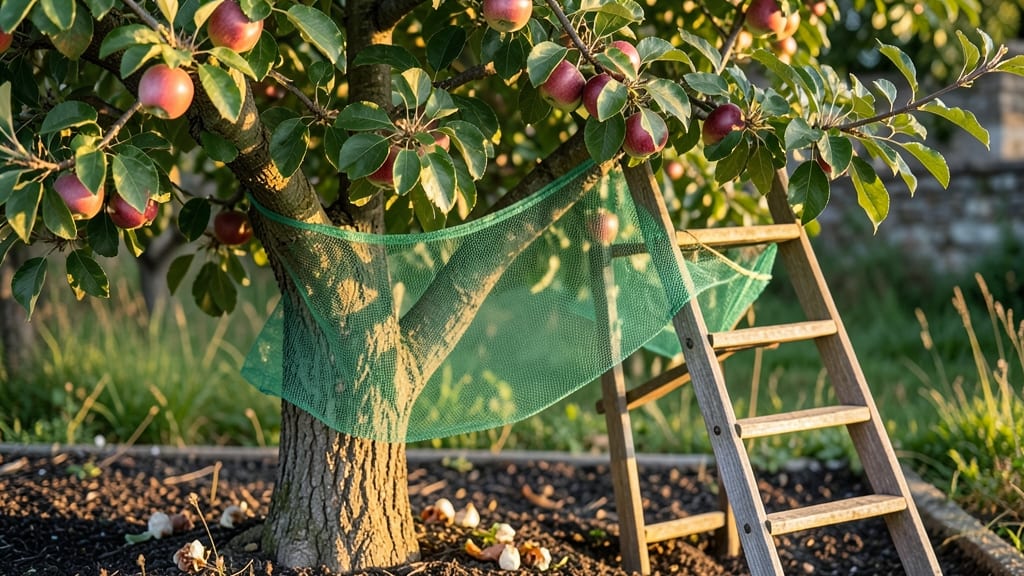
When your fruit tree branches sag under the weight of ripe apples, pears, or peaches, fruit tree net catchers become your secret weapon to save the harvest from rot, pests, and wind damage. 🌳 I learned this the hard way when half my apple crop fell prey to raccoons—and the other half got trampled by a summer storm.
These netting systems aren’t just about preserving fruit; they’re about transforming chaos into a clean, organized harvest that stays fresh until you’re ready to pick.
The right net—whether fine mesh for birds or heavier bird netting for larger fruit—goes up before harvest season begins, typically in late spring or early summer. You’ll need sturdy stakes or hooks to secure it tightly around the tree, leaving just enough room for branches to grow.
The goal is to create a snug cocoon that keeps critters out while letting sunlight and rain through. For wind-prone areas, opt for a slightly looser fit with extra support stakes to prevent flapping that could damage branches.
With the net in place, you’ll notice fewer dropped fruits, less bruising from wind, and a dramatic drop in pest-related losses. The fruit stays cleaner, too, which means longer storage life and better flavor at picking time.
Plus, you’ll spend less time chasing squirrels off the tree and more time enjoying the bounty. The key is checking the net every few weeks to adjust for growth and repair any tears from storms or curious critters.
Works for apples, pears, cherries, and even delicate stone fruits. Whether you’ve got one tree or a whole orchard, this simple setup pays off in fewer headaches and more harvests. Ready to turn your fruit tree into a fortress? Let’s get started.
📚 In This Guide
- What you need
- Instructions
- Tips and common mistakes
- Wrapping up and next steps
What you need
- ● Fruit Tree Net: Mesh size: 1/2" to 3/4" (adjust based on fruit size—smaller for berries, larger for apples/peaches)
- ● Material: UV-stabilized polyethylene or nylon (durable and weather-resistant)
- ● Quantity: 1 net per tree (or larger if covering multiple branches)
- ● Support Stakes or Poles: Length: 6–10 feet (depending on tree height)
- ● Material: Bamboo, fiberglass, or metal (4–6 stakes per net)
- ● Zip Ties or Twist Ties: Size: Heavy-duty (1/4"–3/8") (for securing nets to branches)
- ● Quantity: 20–50 ties (depends on net size)
- ● Measuring Tape: 10–25 feet (for precise net sizing)
- ● Scissors or Utility Knife: For trimming net edges
- ● Windproof Clips: Metal or plastic (for extra-secure net fastening)
- ● Ground Anchors: Stakes or sandbags (to weigh down nets in windy areas)
- ● Reflective Tape: For visibility (if nets are near walkways)
- ● Spare Net: 1–2 extra (in case of tears or larger harvests)
How to install fruit tree net catchers for maximum protection
Here’s my foolproof method to shield your fruit trees from wind, pests, and wildlife—keeping every harvest intact.
🪴 Step 1: Measure and Select the Right Net Size
Start by measuring the height and spread of your tree. For a 4-foot-tall tree, a 5-foot-tall net with a 6-foot diameter works perfectly. I always add 12 inches extra to the height and 6 inches to the width to ensure full coverage—especially if branches sway in wind.
Check the net’s mesh size too. A ½-inch square keeps out birds and squirrels, while a 1-inch square allows more airflow but still blocks larger pests. If your tree is 6+ feet tall, use two nets stacked or overlap them by 1 foot to prevent gaps where critters can sneak in.
🌿 Step 2: Assemble the Net Frame and Position It
Most nets come with a collapsible hoop frame, but if yours doesn’t, use 4-foot PVC pipes or sturdy wooden dowels to create a square or octagonal frame—this prevents the net from sagging under fruit weight. Place the frame 6 inches above the tree’s highest branches to avoid crushing limbs when you lower the net.
Position the frame centered over the tree, then gently lower the net over the branches. If your tree is young or flexible, secure the net at the base with soft twine tied loosely around the trunk—tight enough to stay in place, but not so tight it girdles the bark. For mature trees, use stakes and clips to anchor the net edges to the ground.
✂️ Step 3: Secure the Net Without Damaging the Tree
Use zip ties or soft Velcro straps to fasten the net to the frame—avoid wire or anything that could cut into the branches. I like to attach the net every 2 feet along the frame to prevent sagging, especially when fruit gets heavy. For extra wind resistance, wrap the top of the frame with burlap or landscape fabric to diffuse gusts instead of letting them tear the net.
Check for gaps where branches poke through. If you see light shining through, adjust the net or trim any low-hanging branches that might tear it. A well-fitted net should look like a tight tent—no flapping, no sagging, and no loose corners where pests can slip in.
💧 Step 4: Maintain and Adjust Through the Season
After heavy rain or wind, inspect the net for water pooling or loose ties. Drain any standing water immediately—soggy nets rot faster and attract mold. If fruit starts pressing against the net, prop up the sides with small stakes to create more space inside.
Mid-season, give the net a gentle shake to dislodge debris or trapped pests. If birds or squirrels manage to nest inside, remove them humanely (a broom or vacuum can work) and re-secure the net. By harvest time, you’ll have a pristine, pest-free bounty—no broken branches, no missing fruit, just perfect ripeness.
⏰ Step 5: Store or Reuse the Net Next Season
At the end of the season, clean the net with a hose and let it dry completely in the sun to prevent mildew. If it’s still in good shape, store it flat in a dry place—I use a large plastic bin with a lid to keep it safe from rodents. For next year, reuse the frame and net, but check for frayed edges or stretched mesh—replace if needed.
Here’s the thing—this system works for apples, peaches, cherries, or even citrus as long as you adjust the size. The key is snug fits, regular checks, and quick fixes. Once you see your first full harvest under that net, you’ll never go back to hoping for the best.
Tips & tricks for fruit tree net catchers
A few simple adjustments can make all the difference between a flimsy net that fails and a sturdy barrier that saves your harvest every time.
Frame Stability is Everything: In Step 2, when assembling your frame, make sure the PVC pipes or dowels are securely connected—loose joints will cause sagging, especially when fruit gets heavy. I like to add a few extra zip ties along the joints for reinforcement. For extra stability, consider using a 5-gallon bucket as a weight at the base of each corner if you're dealing with windy conditions.
Mesh Size Matters: The ½-inch square mesh mentioned in Step 1 is perfect for keeping out birds and squirrels, but if you're dealing with larger pests like raccoons, you might want to go even smaller. I've found that a ¼-inch mesh works wonders for those persistent critters. Just remember, smaller mesh means less airflow, so check your fruit more frequently for signs of rot.
Seasonal Adjustments: In Step 4, when maintaining your net, pay special attention to how the fruit grows throughout the season. What starts as a snug fit in spring might become too tight by summer. If you notice fruit pressing against the net, don't just prop it up—consider adding a few more stakes or even adjusting the net's height slightly to give your fruit more room to grow.
Storage Wisdom: For Step 5, when storing your net, I've found that adding a few wooden dowels across the top of the frame when folded helps maintain its shape. This prevents the net from getting crushed in storage, making it much easier to set up next season. Also, consider treating the frame with a light coat of outdoor sealant before storing to protect against moisture and extend its lifespan.
Pro Tips for Fruit Tree Net Catcher
- A few simple adjustments can make all the difference between a flimsy net that fails and a sturdy barrier that saves your harvest every time.
- Frame Stability is Everything: In Step 2, when assembling your frame, make sure the PVC pipes or dowels are securely connected—loose joints will cause sagging, especially when fruit gets heavy.
- Mesh Size Matters: The ½-inch square mesh mentioned in Step 1 is perfect for keeping out birds and squirrels, but if you're dealing with larger pests like raccoons, you might want to go even smaller.
Frequently asked questions
Got questions about fruit tree net catchers? You’re not alone! Here are some of the most common concerns—plus expert answers to help you protect your harvest like a pro.
When is the best time to install a fruit tree net catcher?
Install your net catcher before fruit sets in early spring—usually when buds swell but haven’t bloomed yet. This ensures pests like birds and squirrels can’t access your tree as flowers turn to fruit. For late-blooming trees (e.g., peaches), wait until after peak blossoming. Pro tip: Secure the net tightly to avoid gaps where critters can sneak in!
How do I choose the right size for my tree?
Measure your tree’s height and spread, then add 2–3 feet to the diameter for full coverage. Most nets come in 6x8 ft or 8x10 ft sizes, but custom options exist for larger trees. Overlap sections by 6–12 inches to block pests completely. Warning: Too-small nets leave gaps—measure twice!
Will a net catcher work in strong winds or heavy rain?
Look for windproof or UV-resistant nets labeled for outdoor use. Secure the net with sturdy stakes or weights (like sandbags) and tighten tension regularly. For extreme weather, reinforce with additional ties or a second layer. Premium nets (e.g., polyethylene mesh) handle storms better than cheaper alternatives.
Can I reuse a fruit tree net catcher year after year?
High-quality nets last 3–5 years if stored dry and protected from UV rays. Clean them with mild soap and water after harvest to remove sap or debris. Avoid folding for long-term storage—hang them loosely to prevent tears. Fun fact: Some gardeners use the same net for multiple trees in rotation!
What’s a good alternative if I don’t want to use a net?
Try these low-tech solutions:
- Bird spikes (for small trees or branches)
- Reflective tape or old CDs (scares birds with movement)
- Harvest early (pick fruit before pests target it)
- Plant repellent herbs (e.g., mint or rosemary near the tree)
However, nets are the most reliable for heavy infestations or large harvests.
My net keeps blowing loose—how do I fix it?
Check these fixes:
- Re-stake the net with U-shaped ground anchors (better than stakes for wind)
- Add weights (e.g., cinder blocks or heavy rocks) at the base
- Tighten ties—use zip ties or bungee cords (not twine, which weakens)
- Trim tree branches to reduce wind catch
Still struggling? A second net layer or professional setup might be worth it!
Wrapping up and next steps
Investing in a fruit tree net catcher is a game-changer for any gardener or homesteader aiming for bountiful, damage-free harvests. These simple yet effective tools shield your hard work from wind, pests, and wildlife, ensuring your fruit stays fresh and intact until you’re ready to pick. 🍎✨
Now that you’re equipped with the knowledge, why not take the next step? Measure your trees, gather your supplies, and build or purchase your net catchers today. Your future harvests—and your peace of mind—will thank you!