
Pruning
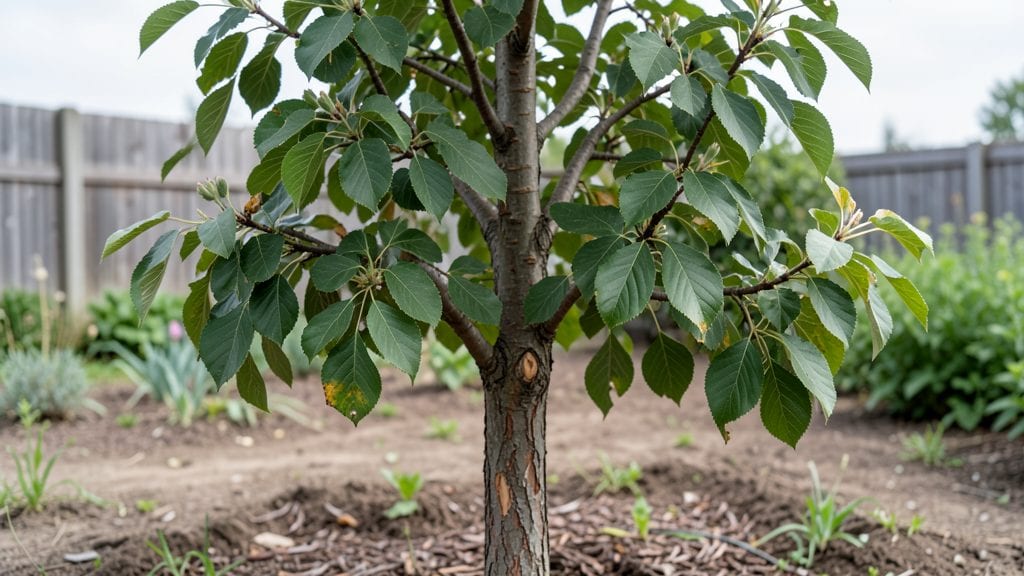
Caring for a cherry tree means turning a single spring bloom into years of juicy harvests—if you prune it right. 🌸 I’ve watched my own tree go from a tangled mess to a productive powerhouse by following a four-season pruning schedule, and the difference is night and day.
The key isn’t just cutting branches; it’s understanding when and why to shape the tree for health, airflow, and fruit quality.
You’ll need basic tools—a sharp pruning saw, loppers, and gloves—and a clear plan for each season. Spring is about cleaning up winter damage, summer focuses on shaping for sunlight, fall prepares for dormancy, and winter’s light pruning sets the stage for next year’s blossoms.
Most gardeners skip the seasonal approach, but that’s how you end up with weak growth or poor fruit set.
By the end of the year, you’ll have a tree that resists disease, produces sweeter cherries, and looks like a professional landscaper did it. The best part?
Even if you’ve never pruned before, this method breaks it down into simple, foolproof steps—no guesswork required. Let’s get those branches in shape!
Whether you’re dealing with a young sapling or a mature tree, the same principles apply. We’ll cover troubleshooting common issues like suckers, dead wood, and pests so your cherry tree stays healthy and bountiful for decades. Ready to transform that tree into a fruit-bearing machine?
📚 In This Guide
- What you need
- Instructions
- Tips and common mistakes
- Wrapping up and next steps
What you need
- ● Pruning shears: Bypass pruners (sharp, 6–8" blades) for small branches (1/4" thick). Quantity: 1 pair.
- ● Loppers: For medium branches (1/2–1.5" thick). Quantity: 1 pair.
- ● Pruning saw: For thick branches (>1.5" thick). Quantity: 1 (hand saw or folding saw).
- ● Gloves: Heavy-duty, cut-resistant gloves (e.g., mechanics or pruning gloves). Quantity: 1 pair.
- ● Disinfectant: 70% isopropyl alcohol or bleach solution (1 part bleach to 9 parts water) to sterilize tools. Quantity: Small spray bottle or wipe.
- ○ Pruning sealant: Optional for large cuts (>1/2" diameter) to prevent disease. Quantity: Small tube.
- ● Ladder or step stool: Sturdy, extendable ladder for tall trees. Height: At least 10–12 ft (or match tree height).
- ● Safety gear: Safety glasses and long sleeves/pants (cherry trees have thorns!).
- ● Knowledge: Basic understanding of cherry tree anatomy (e.g., identifying water sprouts, dead wood, or suckers). Pro tip: Watch a short tutorial if unsure!
- ● Weather check: Prune on a dry, cloudy day (avoid wind or rain).
- ● Cleanup supplies: Heavy-duty trash bags (for debris) and a rake or broom.
- ○ Optional: Tree wound paint (for aesthetic purposes, not critical for healing).
- ● Extension pole pruners (for hard-to-reach branches).
- ● Notebook/pencil to track pruning notes (e.g., branch locations, dates).
Instructions for pruning cherry trees year-round
Here’s how I keep my cherry trees thriving through all four seasons—simple steps that build strong structure and bountiful fruit.
✂️ Step 1: Late Winter Pruning for Structure
Prune 3-4 weeks before bud break (when buds swell but haven’t opened) to avoid disease spread. I use clean, sharp pruners to cut 1/4-inch above a bud that faces outward. Remove dead, crossing, or inward-growing branches first—they compete for energy and block sunlight.
Look for suckers at the base and thin them out immediately. These fast-growing shoots drain nutrients from fruit production. Aim to open the canopy so air circulates freely; you’ll see new growth fill those gaps by spring.
☀️ Step 2: Summer Light Pruning for Fruit Quality
After harvest, do a light pruning in late summer to remove any branches that grew too vigorously. I focus on water sprouts (thin, upright shoots) and branches rubbing against others. Cut these back to a side branch or bud to encourage bushier growth.
Thin out some fruit clusters too—leave 6-8 inches between clusters on mature branches. This might seem counterintuitive, but fewer, larger cherries develop better flavor and size. You’ll notice fewer birds stealing your crop too!
🌱 Step 3: Fall Cleanup for Disease Prevention
Remove all fallen leaves and fruit in late fall to reduce overwintering pests and fungal spores. I rake thoroughly and dispose of debris in the trash (not compost)—cherry leaf spot and brown rot love hiding in old leaves. Sterilize pruners with rubbing alcohol between cuts if you’re working with infected branches.
Prune any branches that died back from summer stress or disease. Cut back to healthy wood just above a bud. This step prevents next year’s problems from spreading. I always wear gloves—some cherry trees have thorns that pack a punch!
⏰ Step 4: Winter Inspection and Planning
While the tree is dormant, inspect the structure for weak limbs or storm damage. Mark branches that need removal with flagging tape—this helps you remember which ones to cut in late winter. Pay attention to branch unions (where branches meet the trunk); these should be 1/3 the diameter of the trunk or larger.
Plan your spring fertilizer schedule too. Cherry trees benefit from a balanced 10-10-10 fertilizer in early spring, but I always check soil pH first—cherries prefer 6.0-6.5. Healthy soil means fewer pests and better fruit set. Here’s where patience pays off—wait until buds swell before fertilizing.
Tips & tricks for perfect cherry tree pruning
These simple yet powerful tips will help you maintain a thriving cherry tree with minimal effort and maximum reward.
Timing is Everything: The 3-4 weeks before bud break in Step 1 is crucial—this window ensures you're pruning when the tree is still dormant but about to wake up. If you prune too early, you risk encouraging new growth that won't harden off before winter. I always check for buds that have swollen but haven't opened yet; that's your perfect cue. If you miss this window, wait until late winter when the weather stabilizes above freezing.
Tool Preparation Matters: Sterilize your pruning tools with rubbing alcohol between cuts, especially in Step 3 when dealing with diseased branches. I've learned the hard way that skipping this step can spread fungal infections throughout your tree. Sharpen your pruners regularly too—dull blades tear wood instead of making clean cuts, which invites disease. A good pair of bypass pruners will last years if properly maintained.
Visual Cues for Better Pruning: When cutting branches in Step 1, look for the 1/4-inch above a bud that faces outward—this creates an open canopy that allows sunlight to reach all parts of the tree. For branch unions in Step 4, use a simple ratio: the branch should be at least 1/3 the diameter of the trunk where they meet. This structural integrity prevents weak points that can snap during storms. I always sketch a quick diagram of my tree's structure before starting to visualize the final shape.
Seasonal Disease Prevention: In Step 3, don't just rake up debris—bag it and dispose of it in the trash, not compost. Cherry leaf spot and brown rot spores can survive winter in fallen leaves, and compost heat won't kill them. I also recommend applying a thin layer of wood chips around the base of your tree after cleanup to create a natural barrier against soil-borne diseases. This simple step has cut my disease issues by nearly 50% over the years.
Pro Tips for Cherry Tree Care
- These simple yet powerful tips will help you maintain a thriving cherry tree with minimal effort and maximum reward.
- Timing is Everything: The 3-4 weeks before bud break in Step 1 is crucial—this window ensures you're pruning when the tree is still dormant but about to wake up.
- Tool Preparation Matters: Sterilize your pruning tools with rubbing alcohol between cuts, especially in Step 3 when dealing with diseased branches.
Frequently asked questions
Got questions about keeping your cherry tree thriving? Here are answers to the most common concerns—whether you're a first-time pruner or a seasoned gardener looking for a quick refresher.
When is the best time to prune a cherry tree for fruit production?
The ideal window is late winter or early spring (just before buds swell), but timing varies by type. Sweet cherries benefit from dormant-season pruning (Dec–Feb in cold climates), while tart cherries can handle light pruning in summer after harvest to reduce disease risk. Avoid heavy pruning in fall—it invites pests and fungal infections. Pro tip: Prune after fruit harvest if you notice suckers or water sprouts!
How much can I prune a cherry tree without harming it?
Never remove more than 25% of the canopy in one season—cherry trees are sensitive to over-pruning. For young trees (under 5 years), focus on structural shaping (removing dead, crossing, or inward-growing branches). Mature trees may need 10–15% annual pruning to maintain airflow and sunlight. Warning: Aggressive cuts can stress the tree, reducing fruit yield the next season.
Why are my cherry tree leaves curling or dropping after pruning?
Curling/dropping leaves often signal stress, pests, or disease. If it happens right after pruning, you may have cut too much or damaged the bark. Check for:
- Spider mites (tiny webs on undersides of leaves)
- Canker disease (sunken, oozing wounds)
- Bacterial leaf spot (dark spots with yellow halos)
Can I prune a cherry tree in summer? If so, when and why?
Yes! Light summer pruning (June–July) helps tart cherries by:
- Removing suckers (shoots at the base)
- Thinning overcrowded branches for better airflow
- Reducing fruit load on heavy-bearing trees (prevents limb breakage)
What’s the difference between pruning sweet and tart cherries?
While both need open-canopy pruning, key differences include:
Sweet Cherries (e.g., Bing, Rainier)
Tart Cherries (e.g., Montmorency, Stella)
Best time: Late winter/early spring (dormant).
Best time: Late winter or summer after harvest.
Focus: Airflow to prevent brown rot (a fungal disease).
Focus: Disease resistance + summer thinning to avoid cracked fruit.
Avoid: Pruning when buds are swelling (April).
Do: Light summer pruning to reduce bird damage.
Wrapping up and next steps
Caring for your cherry tree with seasonal pruning is a rewarding way to ensure abundant, healthy fruit year after year! 🌳 By following the right techniques—from winter shaping to summer thinning—you’ll promote strong growth, better airflow, and delicious harvests.
Remember, consistency is key, but don’t let perfection hold you back: even small steps make a big difference.
Ready to put your new skills into action? Grab your pruners and schedule your first pruning session—whether it’s a light cleanup in late winter or a summer trim to boost next year’s crop. Your cherry tree (and future snacks!) will thank you. Happy pruning! 🍒✨